Перейти к основному содержанию

Выберете то, что вам нужно

Это демонтаж а неруководство по ремонту. Чтобы отремонтировать Datatronics Discovery 2400CM, воспользуйтесь нашим сервисным руководством.

  1. Datatronics Discovery 2400CM Teardown, remove front cover: шаг 1, изображение 1 из 3 Datatronics Discovery 2400CM Teardown, remove front cover: шаг 1, изображение 2 из 3 Datatronics Discovery 2400CM Teardown, remove front cover: шаг 1, изображение 3 из 3
    • The front is attached to the body with 2 latches.

    • Using the spudger, open a latch on one side.

    • Open the latch on the other side next to detach the front.

  2. Datatronics Discovery 2400CM Teardown, remove back cover: шаг 2, изображение 1 из 2 Datatronics Discovery 2400CM Teardown, remove back cover: шаг 2, изображение 2 из 2
    • The back cover is attached to the body the same way as the front.

    • Open both latches to detach to back cover.

  3. Datatronics Discovery 2400CM Teardown, remove board from housing: шаг 3, изображение 1 из 3 Datatronics Discovery 2400CM Teardown, remove board from housing: шаг 3, изображение 2 из 3 Datatronics Discovery 2400CM Teardown, remove board from housing: шаг 3, изображение 3 из 3
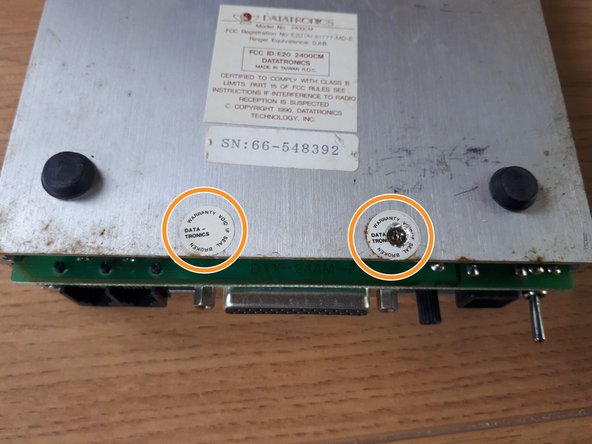
    • The board is attached to the body with 2 screws. The screws are hidden under "warranty voidance" stickers.

    • Remove the stickers so you can unscrew the screws.

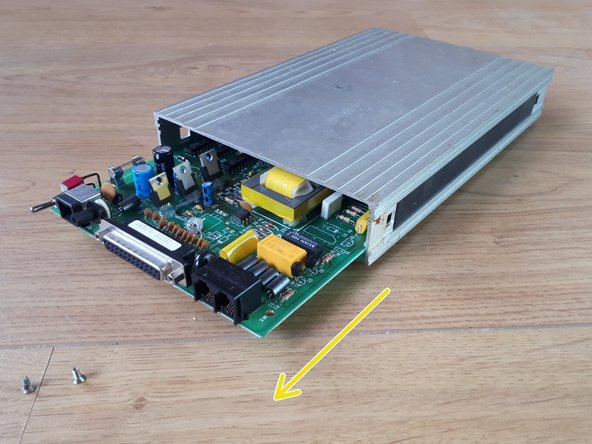
    • Slide the board from the body.

  4. Datatronics Discovery 2400CM Teardown, overview: шаг 4, изображение 1 из 3 Datatronics Discovery 2400CM Teardown, overview: шаг 4, изображение 2 из 3 Datatronics Discovery 2400CM Teardown, overview: шаг 4, изображение 3 из 3
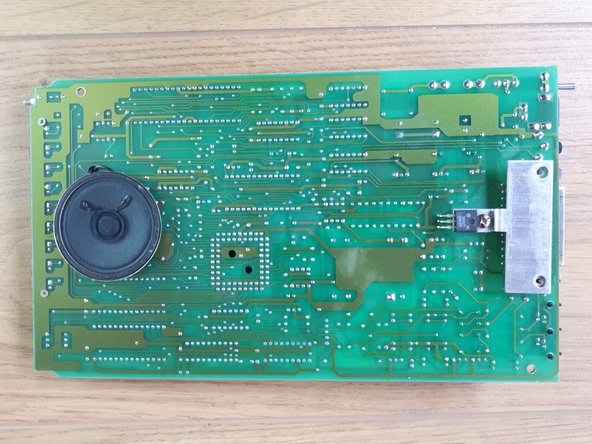
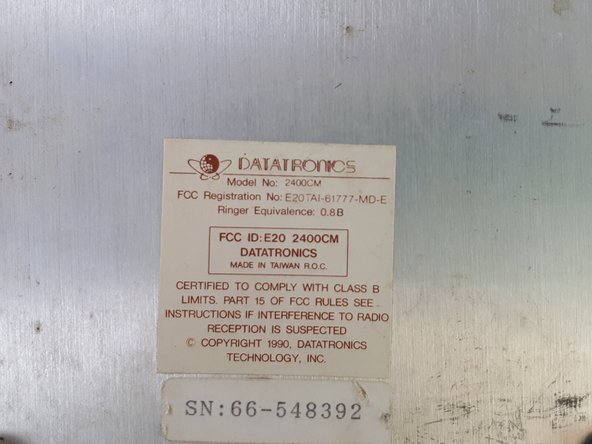
    • Overview of the front and back of the board, as well as a detailed view of the label.

knipwim

Участник с: 09/01/18

8 517 Репутация

Автор 30 руководств

0 Комментариев

Добавить комментарий

Просмотр статистики:

За последние 24часов: 0

За последние 7 дней: 2

За последние 30 дней: 8

За всё время: 900