Перейти к основному содержанию

Выберете то, что вам нужно

Это демонтаж а неруководство по ремонту. Чтобы отремонтировать DrayTek Vigor 2820, воспользуйтесь нашим сервисным руководством.

  1. DrayTek Vigor 2820 Teardown, remove the front plate: шаг 1, изображение 1 из 2 DrayTek Vigor 2820 Teardown, remove the front plate: шаг 1, изображение 2 из 2
    • The front plate is attached to the bottom with 3 clips.

    • Using a flathead screwdriver, pry open the first clip.

    • Use a flat object to hold the first clip open.

    • Use the flathead to open the remaining clips.

  2. DrayTek Vigor 2820 Teardown, disassemble case: шаг 2, изображение 1 из 2 DrayTek Vigor 2820 Teardown, disassemble case: шаг 2, изображение 2 из 2
    Инструмент, используемый на этом этапе:
    Flathead 3/32" or 2.5 mm Screwdriver
    $5.49
    Купить
    • With the 2.5mm flathead, remove the rubber feet.

    • Unscrew the 4 screws holding the top and bottom parts of the case together.

  3. DrayTek Vigor 2820 Teardown, remove the ADSL module: шаг 3, изображение 1 из 3 DrayTek Vigor 2820 Teardown, remove the ADSL module: шаг 3, изображение 2 из 3 DrayTek Vigor 2820 Teardown, remove the ADSL module: шаг 3, изображение 3 из 3
    • Unscrew the screws attaching the ADSL module to the mainboard.
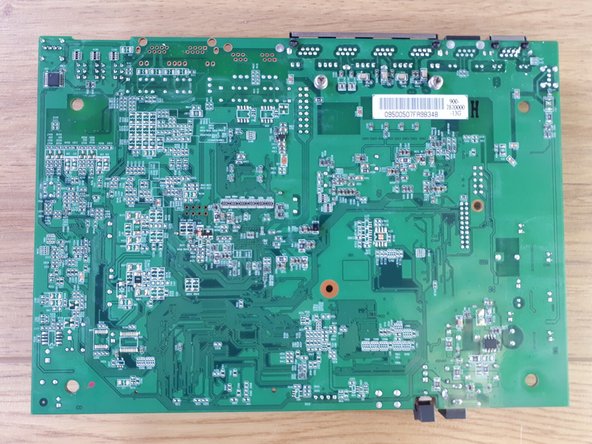
    • The mainboard:

    • Nanya Technology NT5DS16M16CS-5T 256Mb DDR SDRAM

    • Infineon Technologies PSB 6972 HL V1.2 Ethernet Switch Controller

    • Delta Electronics LFE8731

    • Delta Electronics LFE9208A

knipwim

Участник с: 09/01/18

8 517 Репутация

Автор 30 руководств

0 Комментариев

Добавить комментарий

Просмотр статистики:

За последние 24часов: 0

За последние 7 дней: 7

За последние 30 дней: 18

За всё время: 1,275