Перейти к основному содержанию

Выберете то, что вам нужно

Это демонтаж а неруководство по ремонту. Чтобы отремонтировать Echo Dot 4. Generation, воспользуйтесь нашим сервисным руководством.

  1. Echo Dot 4th Generation Teardown, Open the bottom: шаг 1, изображение 1 из 3 Echo Dot 4th Generation Teardown, Open the bottom: шаг 1, изображение 2 из 3 Echo Dot 4th Generation Teardown, Open the bottom: шаг 1, изображение 3 из 3
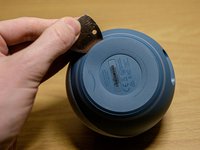
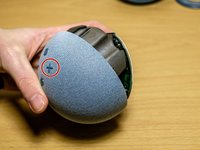
    • Get under the bottom layer with something thin and pull it off. You might need to use quite a force as it's glued pretty well.
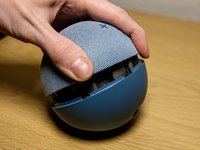
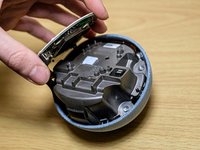
  2. Echo Dot 4th Generation Teardown, Loosen screws: шаг 2, изображение 1 из 2 Echo Dot 4th Generation Teardown, Loosen screws: шаг 2, изображение 2 из 2
    • Take the screws out with torx 6. A T5 might work as well.

  3. Echo Dot 4th Generation Teardown, Open it: шаг 3, изображение 1 из 3 Echo Dot 4th Generation Teardown, Open it: шаг 3, изображение 2 из 3 Echo Dot 4th Generation Teardown, Open it: шаг 3, изображение 3 из 3
    • Open the device.

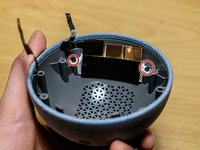
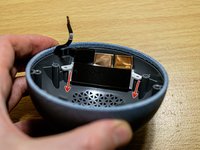
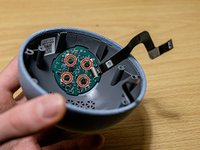
    • The top part is housing the speaker with all boards and components.

  4. Echo Dot 4th Generation Teardown, Take out the mainboard screws: шаг 4, изображение 1 из 1
    • Take out the mainboard screws with a torx 5.

  5. Echo Dot 4th Generation Teardown, Lift the mainboard.: шаг 5, изображение 1 из 3 Echo Dot 4th Generation Teardown, Lift the mainboard.: шаг 5, изображение 2 из 3 Echo Dot 4th Generation Teardown, Lift the mainboard.: шаг 5, изображение 3 из 3
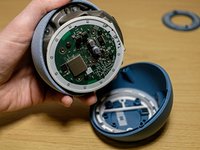
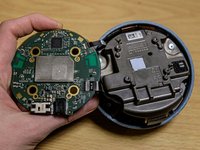
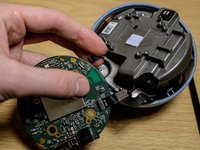
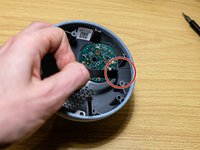
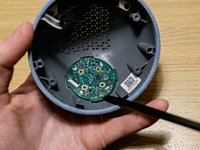
    • Be careful by lifting the mainboard. The LED panel and the control board are still connected.

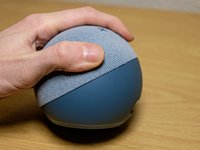
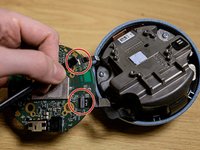
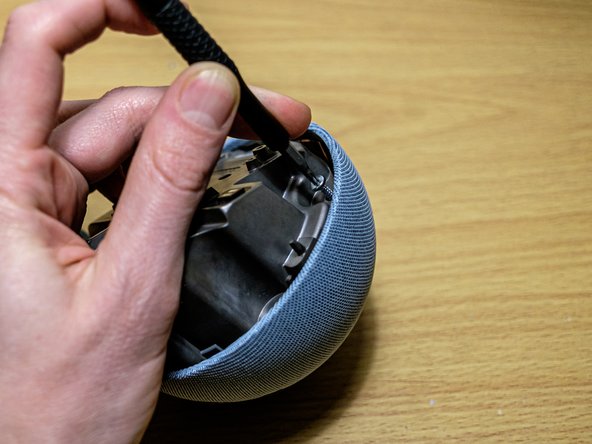
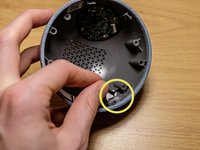
    • Open it from the side on the volume up button.

  6. Echo Dot 4th Generation Teardown, Unplug the connectors: шаг 6, изображение 1 из 3 Echo Dot 4th Generation Teardown, Unplug the connectors: шаг 6, изображение 2 из 3 Echo Dot 4th Generation Teardown, Unplug the connectors: шаг 6, изображение 3 из 3
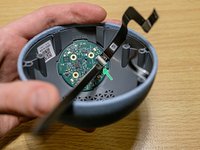
    • Take a spudger and lift the connector off. Careful! It opens from the oppesite site the the cable is going in.

  7. Echo Dot 4th Generation Teardown, Place the mainboard aside: шаг 7, изображение 1 из 1
    • Best place is in the bottom part where it originaly sits.

  8. Echo Dot 4th Generation Teardown, Take out the speaker: шаг 8, изображение 1 из 3 Echo Dot 4th Generation Teardown, Take out the speaker: шаг 8, изображение 2 из 3 Echo Dot 4th Generation Teardown, Take out the speaker: шаг 8, изображение 3 из 3
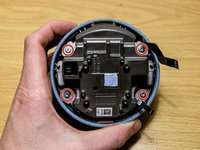
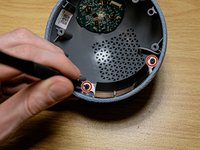
    • Open the four torx 8 screws.

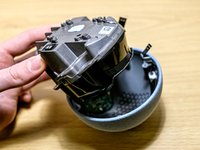
    • Lift the speaker outside the speaker grill.

  9. Echo Dot 4th Generation Teardown, LED Panel: шаг 9, изображение 1 из 3 Echo Dot 4th Generation Teardown, LED Panel: шаг 9, изображение 2 из 3 Echo Dot 4th Generation Teardown, LED Panel: шаг 9, изображение 3 из 3
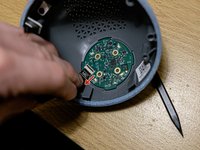
    • Carefully pull the partially glued connector cable off.

    • Use a torx 6 or 5 to take out the two screws.

  10. Echo Dot 4th Generation Teardown, Take LED panel out: шаг 10, изображение 1 из 2 Echo Dot 4th Generation Teardown, Take LED panel out: шаг 10, изображение 2 из 2
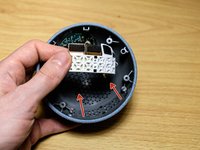
    • Pull it in the direction of the arrows to take the panel out.

  11. Echo Dot 4th Generation Teardown, Take out screws of control board: шаг 11, изображение 1 из 2 Echo Dot 4th Generation Teardown, Take out screws of control board: шаг 11, изображение 2 из 2
    • Loosen the four screws.

  12. Echo Dot 4th Generation Teardown, Loosen glued cable: шаг 12, изображение 1 из 2 Echo Dot 4th Generation Teardown, Loosen glued cable: шаг 12, изображение 2 из 2
    • Pull of the glued connector cable.

  13. Echo Dot 4th Generation Teardown, Take off the cable: шаг 13, изображение 1 из 3 Echo Dot 4th Generation Teardown, Take off the cable: шаг 13, изображение 2 из 3 Echo Dot 4th Generation Teardown, Take off the cable: шаг 13, изображение 3 из 3
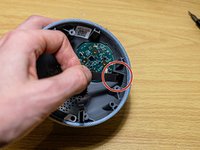
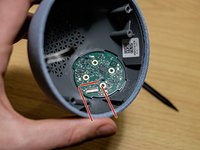
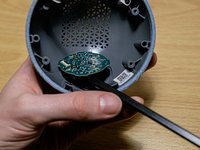
    • Lift the lock, which is again on the opposite side of the cable.

    • Beware pulling the cable out. Don't pull it up, pull it as low as you can. See the arrow.

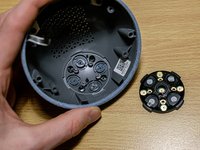
    • Remember how the board is placed because there isn't much of a difference.

  14. Echo Dot 4th Generation Teardown, Lift the controller board: шаг 14, изображение 1 из 3 Echo Dot 4th Generation Teardown, Lift the controller board: шаг 14, изображение 2 из 3 Echo Dot 4th Generation Teardown, Lift the controller board: шаг 14, изображение 3 из 3
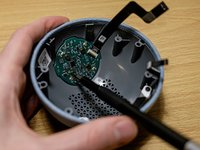
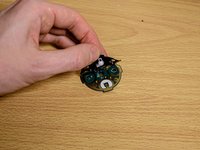
    • As the controller board sits quite tight better use the flat side of a spudger to lift it off.

    • Use the leverage effect.

  15. Echo Dot 4th Generation Teardown, Closer look: шаг 15, изображение 1 из 3 Echo Dot 4th Generation Teardown, Closer look: шаг 15, изображение 2 из 3 Echo Dot 4th Generation Teardown, Closer look: шаг 15, изображение 3 из 3
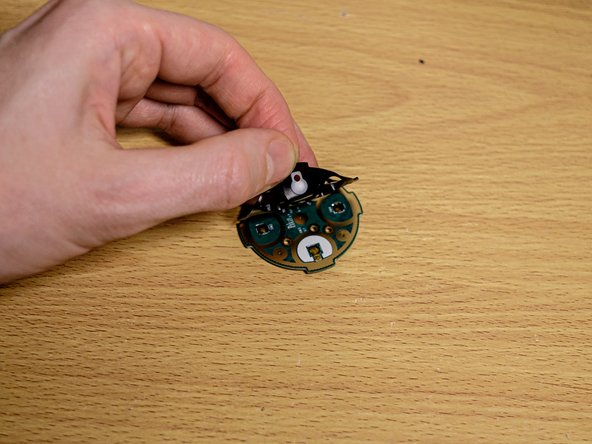
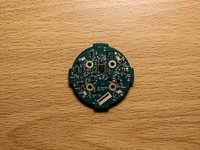
    • Thats the controller board.
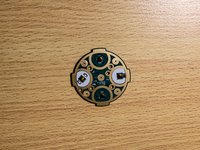
    • On the other sid are the buttons. Remove the rubber cap.

  16. Echo Dot 4th Generation Teardown, Screws of the device: шаг 16, изображение 1 из 1
    • The device uses three types of screws.

Simeon

Участник с: 02/03/22

512 Репутация

Автор 2 руководств

0 Комментариев

Добавить комментарий

Просмотр статистики:

За последние 24часов: 4

За последние 7 дней: 39

За последние 30 дней: 147

За всё время: 5,626