Введение
This is a partial teardown of the Eton Elite Mini AM/FM/Shortwave radio. I still wanted to use it, so I didn't go down to the board/internal components.
Выберете то, что вам нужно
-
-
To remove the 2 AAA batteries. Press your thumb on the grooves of the battery cover (on the lower back of the radio) and move your thumb downward.
-
You'll see a black battery ribbon once the battery cover has been removed. Gently tug on the battery ribbon to remove the batteries from the compartment.
-
-
-
-
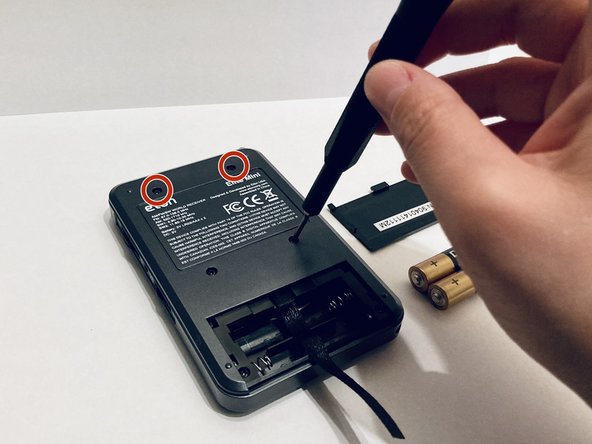
Place the radio face-down so the back panel is visible. Then unscrew the four screws located on the top and middle of the back panel.
-
The two top screws are smaller then the two middle screws. If you think you might want to put this back together again it's important to remember where to put each size screw so as to not mess up any internal components.
-
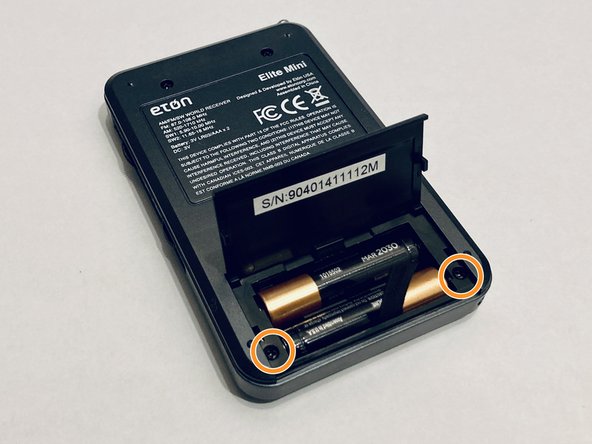
There are two screws inside the battery compartment that also need to be unscrewed. The #000PH will work for this step too. These screws are just as long as the middle screws from the back plate.
-
-
-
Take your spudger and put it between the back plate and the actual radio compartment. Slowly guide it along the edges to remove.
-
-
-
Once you've successfully pried the back plate off, you will have access to all of the internal components of the radio.
-
2 Комментариев
This isn't really a disassembly video. It's only partially disassembled. I can't imagine why you'd want to take it only this far. You have no access to either of the pc boards to troubleshoot or repair the radio.
@larrywolke13251 , it's not meant to be a video. Just a step-by-step guide of tearing it down without totally ruining it. But, it's a fair point. It's not a complete disassembly. If you end up taking it apart completely, feel free to add to the guide or create a new one. I updated this guide to be more accurate.


