Перейти к основному содержанию

Эта разборка продолжается – Периодически обновляйте, чтобы увидеть последние изменения!

Выберете то, что вам нужно

  1. Fujifilm Camera Teardown, Fujifilm Camera Teardown: шаг 1, изображение 1 из 3 Fujifilm Camera Teardown, Fujifilm Camera Teardown: шаг 1, изображение 2 из 3 Fujifilm Camera Teardown, Fujifilm Camera Teardown: шаг 1, изображение 3 из 3
    • tools needed

    • Phillips 00 screwdriver

    • "Y" screwdriver

    • tweezers

    • small needle nose pliers

    • small plastic pry tool

    • plastic spudger

    • the iFixit Pro Tech tool kit contains all necessary tools for this job

  2. Fujifilm Camera Teardown, open it up: шаг 2, изображение 1 из 1
    • remove the 2 Phillips 00 screws from the bottom

    • remove the 1 Phillips 00 screws from the side

    • remove the 2 "Y" screws from the other side

  3. Fujifilm Camera Teardown, remove back: шаг 3, изображение 1 из 1
    • use your plastic pry tool to remove the back of the camera

    • make sure the battery door is open as it will hold the back in place

    • remove back carefully camera has a ribbon cable running to the digitizer screen

    • disconnect digitizer cable

  4. Fujifilm Camera Teardown, remove view finder: шаг 4, изображение 1 из 3 Fujifilm Camera Teardown, remove view finder: шаг 4, изображение 2 из 3 Fujifilm Camera Teardown, remove view finder: шаг 4, изображение 3 из 3
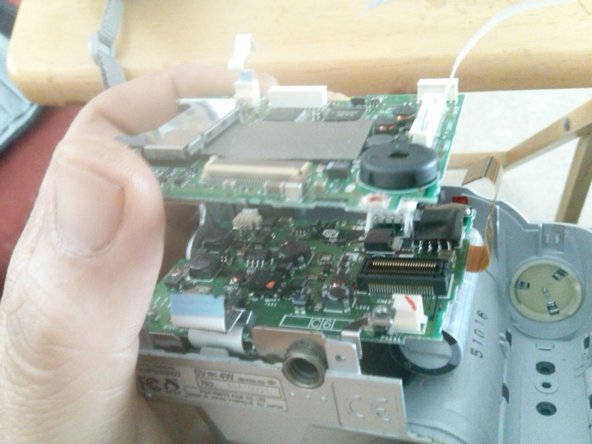
    • you should have already disconnected the copper ribbon cable and the molex connector with the pink and white wires.

    • wiggle the view finder gently until it comes lose

  5. Fujifilm Camera Teardown, remove battery compartment: шаг 5, изображение 1 из 1
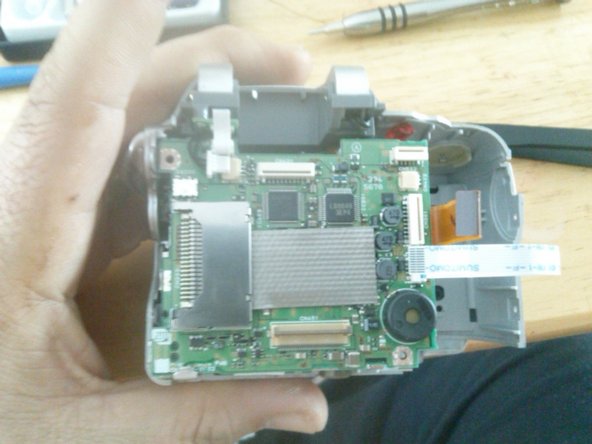
    • there is a small white ribbon cable attached to the battery compartment and the cameras logic board verify that it's disconnected

    • there is a molex connector with a black wire and a red wire coming from the battery compartment going to the cameras logic board. disconnect this wire from the logic board.

    • using your plastic pry tool carefully free battery compartment from the camera housing

  6. Fujifilm Camera Teardown, LCD removal: шаг 6, изображение 1 из 3 Fujifilm Camera Teardown, LCD removal: шаг 6, изображение 2 из 3 Fujifilm Camera Teardown, LCD removal: шаг 6, изображение 3 из 3
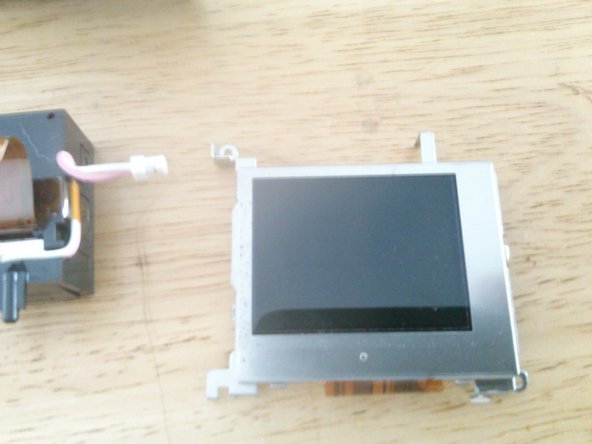
    • remove the 2 Phillips screws securing the LCD one is in the upper left corner and the other is on the lower right corner

    • gently lift the top of the LCD panel towards you

    • use caution not to damage the copper ribbon cable behind the display

    • use a plastic pry tool to release the latch that secure the cable to the logic board

    • gently pull the ribbon cable from the logic board

  7. Fujifilm Camera Teardown, Removal of logic board 1: шаг 7, изображение 1 из 3 Fujifilm Camera Teardown, Removal of logic board 1: шаг 7, изображение 2 из 3 Fujifilm Camera Teardown, Removal of logic board 1: шаг 7, изображение 3 из 3
    • STILL WORKING ON THIS GUIDE PLEASE CHECK BACK

Timothy Fogg

Участник с: 12/08/14

21 Репутация

1 руководство автора

0 Комментариев

Добавить комментарий

Просмотр статистики:

За последние 24часов: 0

За последние 7 дней: 0

За последние 30 дней: 2

За всё время: 1,193