Перейти к основному содержанию

Выберете то, что вам нужно

Это демонтаж а неруководство по ремонту. Чтобы отремонтировать HTC Rezound, воспользуйтесь нашим сервисным руководством.

  1. HTC Rezound Teardown, HTC Rezound Teardown: шаг 1, изображение 1 из 3 HTC Rezound Teardown, HTC Rezound Teardown: шаг 1, изображение 2 из 3 HTC Rezound Teardown, HTC Rezound Teardown: шаг 1, изображение 3 из 3
    • Remove rear cover using little notch located at bottom of phone

  2. HTC Rezound Teardown: шаг 2, изображение 1 из 1
    • Remove 1620 mAh battery

    • Remove SD card

    • Phone comes with 16 GB SD card

  3. HTC Rezound Teardown: шаг 3, изображение 1 из 2 HTC Rezound Teardown: шаг 3, изображение 2 из 2
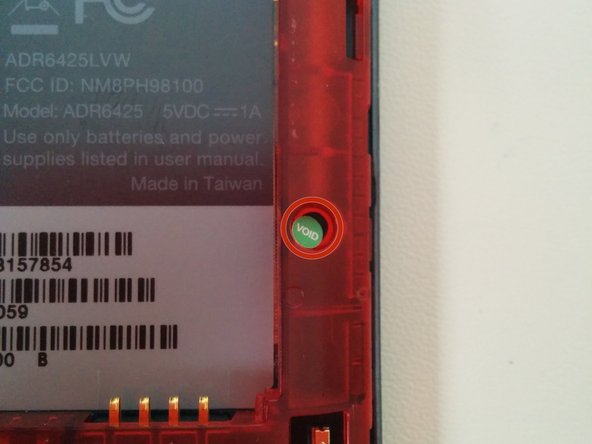
    • Remove (6) Torx T7 screws

    • You may have to remove VOID sticker from one of the screws

  4. HTC Rezound Teardown: шаг 4, изображение 1 из 3 HTC Rezound Teardown: шаг 4, изображение 2 из 3 HTC Rezound Teardown: шаг 4, изображение 3 из 3
    • Use opener tool to carefully pry cover off

    • Volume and power buttons are located in cover so be careful not to lose them

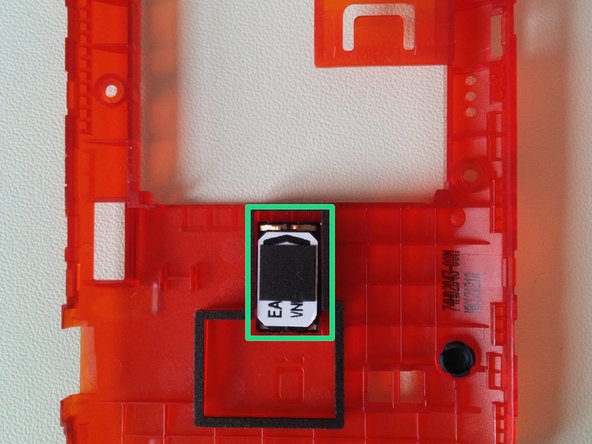
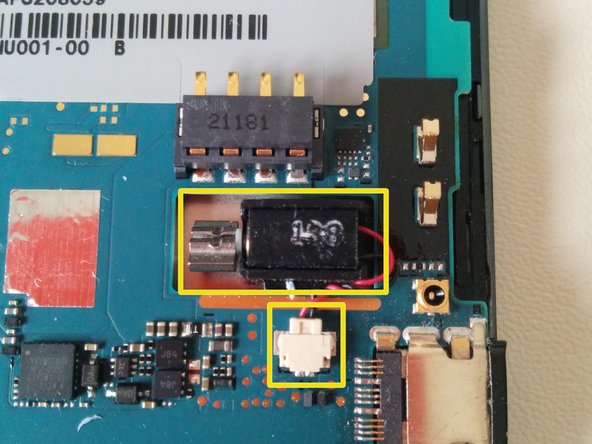
    • Speaker is located inside back cover
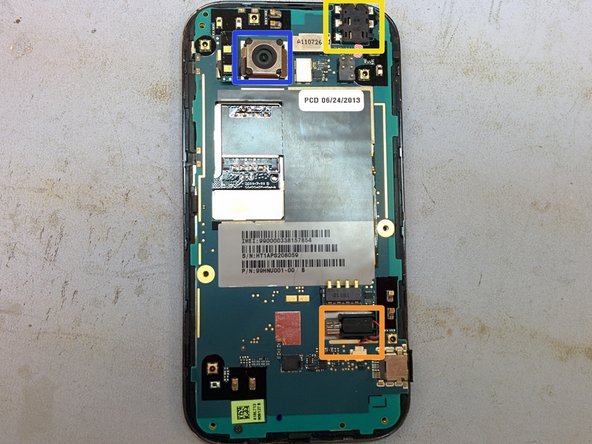
    • Main Camera

    • Headphone jack

    • Vibration motor

  5. HTC Rezound Teardown: шаг 5, изображение 1 из 3 HTC Rezound Teardown: шаг 5, изображение 2 из 3 HTC Rezound Teardown: шаг 5, изображение 3 из 3
    • Carefully unplug board

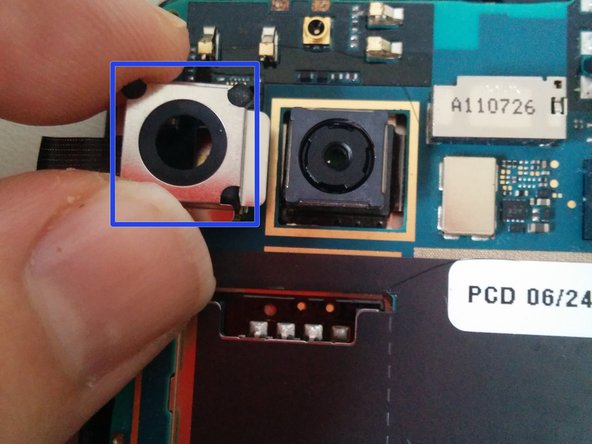
    • Carefully remove camera cover, slowly peeling off tape to reuse

    • Remove and unplug vibration motor

  6. HTC Rezound Teardown: шаг 6, изображение 1 из 3 HTC Rezound Teardown: шаг 6, изображение 2 из 3 HTC Rezound Teardown: шаг 6, изображение 3 из 3
    • Remove (2) Phillips heads screws (one is shown, the other is on the left lower side)

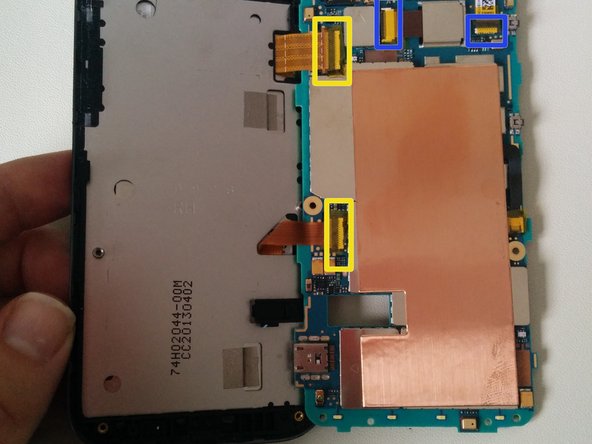
    • Disconnect two cables from logic board to screen. Be very careful not to break our bend too badly.

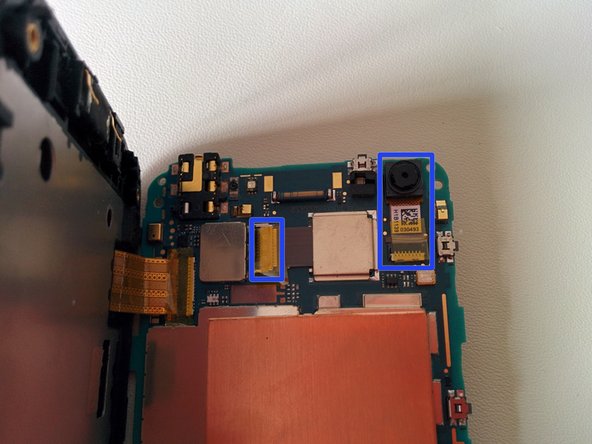
    • Main camera connection & front camera

  7. HTC Rezound Teardown: шаг 7, изображение 1 из 2 HTC Rezound Teardown: шаг 7, изображение 2 из 2
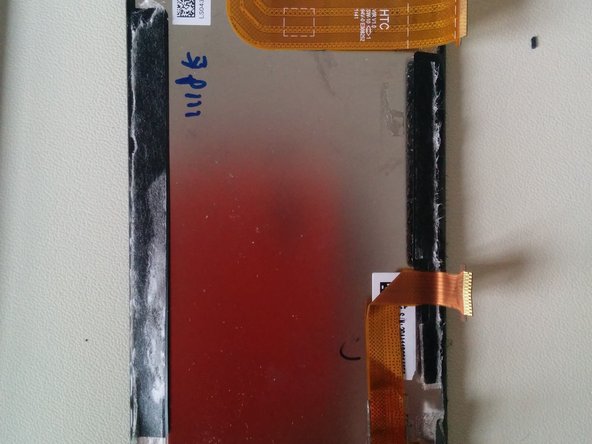
    • Using pick or pry tool, slowly remove screen from frame. Tape and adhesive is holding it on so work slowly and use heat gun if needed.

  8. HTC Rezound Teardown: шаг 8, изображение 1 из 1
    • For the most part, this teardown is pretty straightforward with the headphone jack fused to main board. The display looks to be fused to the screen so replacement of either means replacement of both.

Codyhatch24

Участник с: 12/26/13

201 Репутация

1 руководство автора

Команда

Android Alliance Участник Android Alliance

Community

87 членов

Автор 699 руководств

2 Комментариев

If there's anything I can add to help make this more clear cut and easy to follow let me know as this is my first attempt at a guide.

Codyhatch24 - Ответить

My rezound glass is cracked . It still operates fine but I would like to replace the glass. I ordered a glass from Amazon but it has a connection tail that I don't understand how to install?

Lee Ferguson -

Добавить комментарий

Просмотр статистики:

За последние 24часов: 0

За последние 7 дней: 1

За последние 30 дней: 2

За всё время: 3,980