Перейти к основному содержанию

Эта разборка продолжается – Периодически обновляйте, чтобы увидеть последние изменения!

Выберете то, что вам нужно

  1. Nintendo DS Lite Teardown, Part  Seperartion: шаг 1, изображение 1 из 1
    • Your first step would be to unscrew all all screws on the back and take the case off. You take the case off by placing a spudger on the line edges , and then place it inward, forcing it to separate the two parts.

  2. Nintendo DS Lite Teardown, WI-FI board: шаг 2, изображение 1 из 1
    • You first remove the gabbles by gently pulling them and do the same for the WI-FI board

  3. Nintendo DS Lite Teardown, Screen Removal: шаг 3, изображение 1 из 1
    • You take the mother board off by flipping the upside-down and the screen should pop right off.

  4. Nintendo DS Lite Teardown: шаг 4, изображение 1 из 1
    • Unscrew and gently slide wires through frame

  5. Nintendo DS Lite Teardown, Final Look: шаг 5, изображение 1 из 1
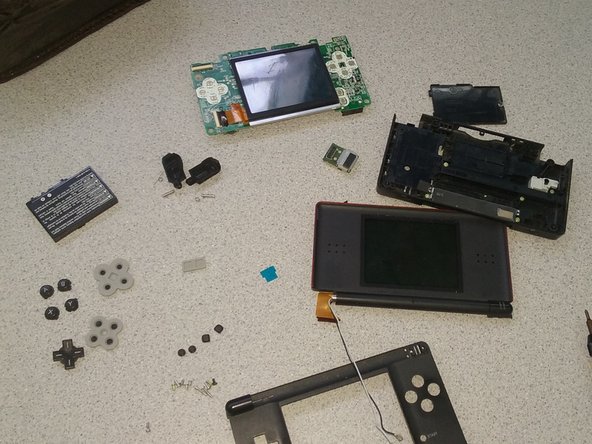
    • The DS should look like this and to put the DS back together simply follow steps back wards.

Isabella Sandoval

Участник с: 11/06/16

182 Репутация

1 руководство автора

Один комментарий

Don’t like this guide. Only a few steps. Tear downs usually have 50+. Add more and in detail.

Bob - Ответить

Добавить комментарий

Просмотр статистики:

За последние 24часов: 0

За последние 7 дней: 0

За последние 30 дней: 4

За всё время: 1,930