Введение
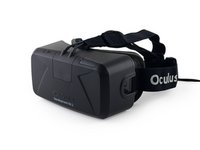
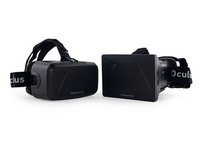
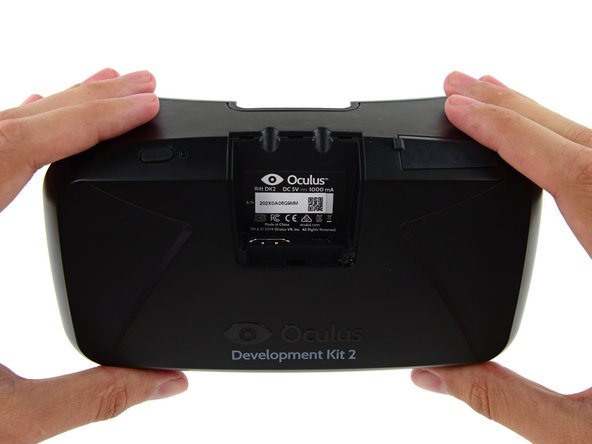
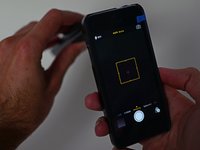
Oculus VR took the world by surprise last year with the Oculus Rift. This year, they seek to push their own self-created envelope with the Oculus Rift Development Kit 2. We may not have flying cars, hoverboards or (commercial) teleporters, but we do have the latest virtual reality tech. Join us as we ogle the wizardry in the Oculus Rift DK2, teardown style.
Don't fight the future—watch it unfold one teardown at a time on our Facebook, Instagram, or Twitter.
Выберете то, что вам нужно
Видеообзор
-
-
The folks at Oculus VR have had a busy year. Their hard work culminates in an amazing bit of technology, the Oculus Rift Development Kit 2. Features include:
-
Accelerometer, gyroscope, and magnetometer with an update rate of 1000 Hz
-
Positional tracking via external camera with near-infrared CMOS sensor
-
Low-persistence 5.7" Super AMOLED display with a resolution of 960 x 1080 per eye
-
Built-In latency tester
-
100° field of view (a much discussed change from DK1)
-
-
-
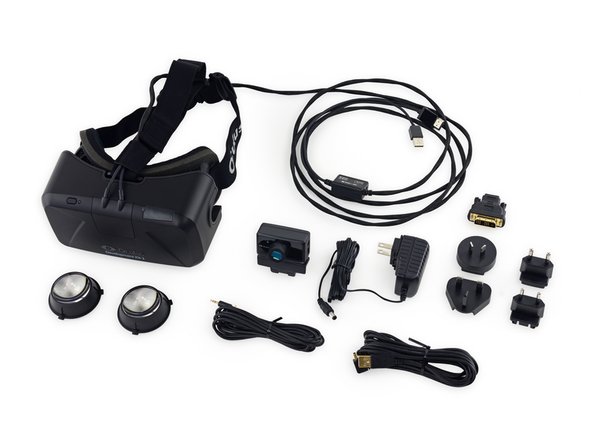
The Oculus Rift Development Kit 2 wouldn't be a complete piece of developer hardware without its assortment of cables, adapters, and accessories.
-
Cable management is a must when you've got a cluster of cables like this. The DK2 features a cable hub that combines USB 2.0, HDMI, DC power (optional), and a Sync cable for the positional tracker.
-
-
-
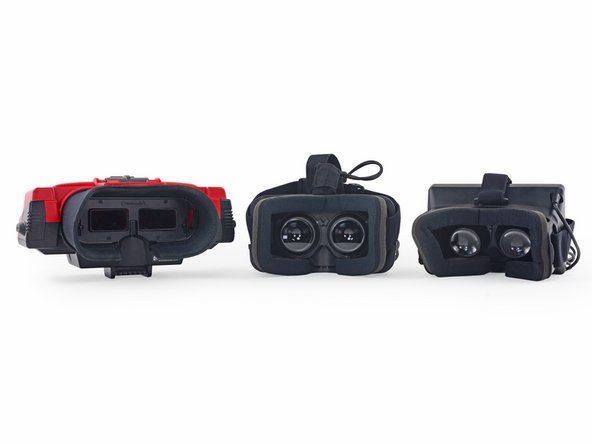
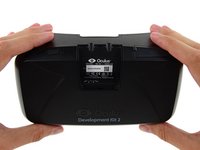
We have an ocular face off! Development kits 1 and 2 have a staring contest, giving us time for a quick comparison.
-
The first thing we notice is that DK2 shows some noticeable streamlining in size and shape.
-
Without warning, the forefather of VR headsets crashes the party—the Virtual Boy.
-
It's a fight to the virtual death! The contenders weigh in at:
-
896 g for the Virtual Boy, making it the heavyweight champ (although, to be fair, this was never supposed to hang off of your face)
-
453 g for the newcomer to the ring, the DK2
-
395 g for last year's lightweight fighter, the original Rift
-
-
-
The DK2 includes a brand-spanking-new positional tracking unit. Essentially, it's a custom-made external IR camera, specially designed to work with the new Development Kit.
-
The Oculus Rift DK2 retains its 360° orientation tracking, with no camera needed—just like the first version of the Oculus Rift. But to get the added benefit of positional tracking, you'll need to be in the external IR camera's field of view.
-
-
-
We love our IR camera. Any opportunity to capture that exciting invisible glow, and we're all over it. So when we heard that the DK2 was going to incorporate the IR LED array of the Crystal Cove prototype, but with the LEDs on the inside, we knew it was our camera's time to (catch the) shine once again.
-
-
-
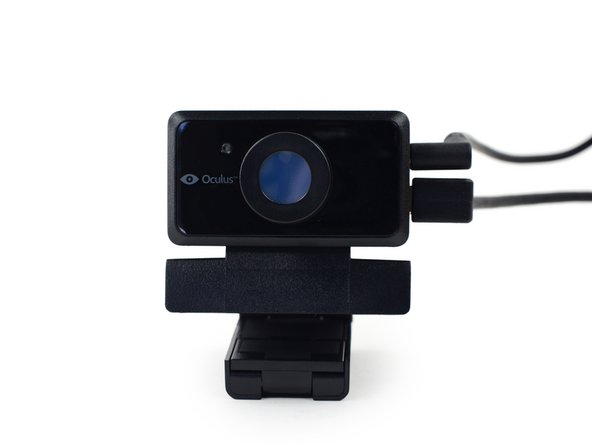
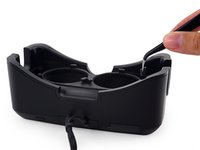
Tucked away under a rubber cover in the front, we find the USB accessory port and an additional sync cable port.
-
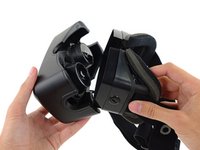
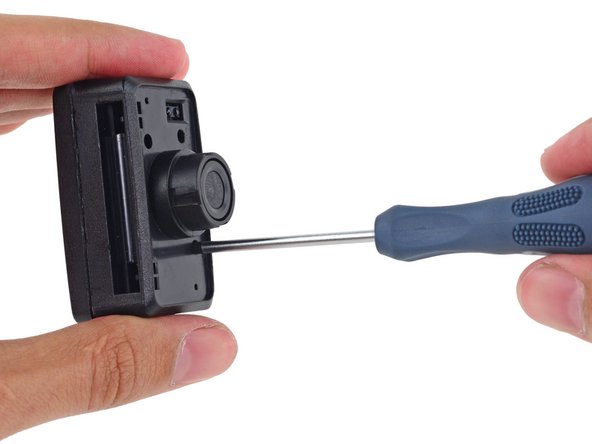
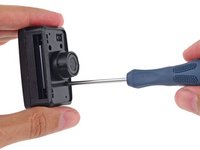
Time to de-face the Oculus: we remove several Phillips #0 screws securing the device itself to its adjustable headband.
-
Within the faceplate, we find two new and improved lenses. The lenses have increased in size to accommodate a wider IPD (interpupillary distance) range.
-
-
-
After 150 years of development in VR, we have finally found a way to make the Oculus even more realistic... It's like everything's right in front of you, in full 3D!
-
-
-
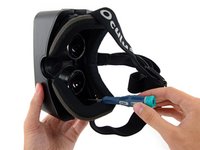
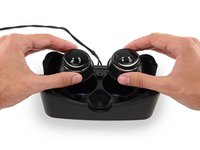
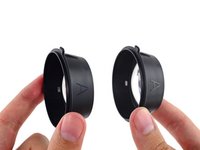
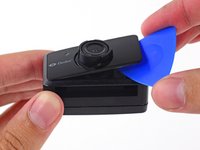
Thankfully, removing the interchangeable lenses remains a straightforward affair: twist and lift.
-
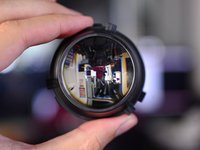
With the lenses removed, there is no end to the light-bending experiments we can perform.
-
-
-
-
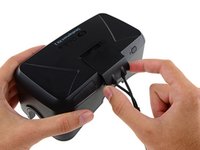
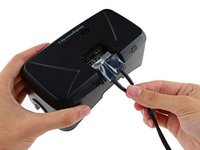
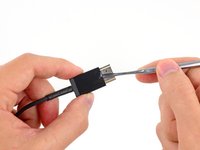
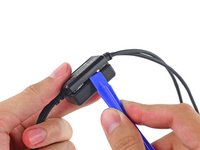
This svelte cable cover slides out with nary a complaint, making the Mini USB and HDMI cables surprisingly easy to disconnect.
-
In terms of a model number, these FCC labels yield nothing but "Rift DK2."
-
Simplicity: we can haz it.
-
-
-
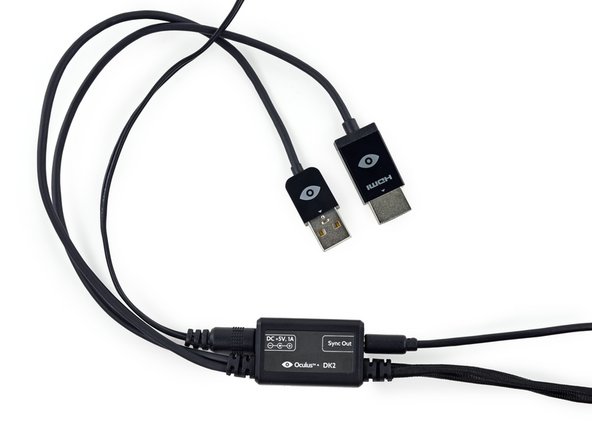
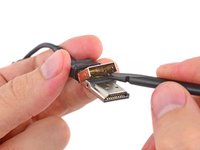
Keeping up with the Oculus news recently, we figured there might be something lurking within the HDMI cable, just like with Apple's Thunderbolt cable from awhile back.
-
With a couple flicks of our metal spudger, we find we were right—a hidden IC presents itself!
-
We find the Spectra7 VR7100 processor buried under what seems to be a thick encasing of glue.
-
According to their product brief, the little doohickey "reduces size and weight of HDMI copper interconnects..." and "supports video formats up to 4K 60p" — hot stuff!
-
Well now we know why the cables got so much thinner when compared to the DK1.
-
-
-
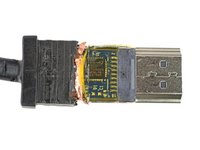
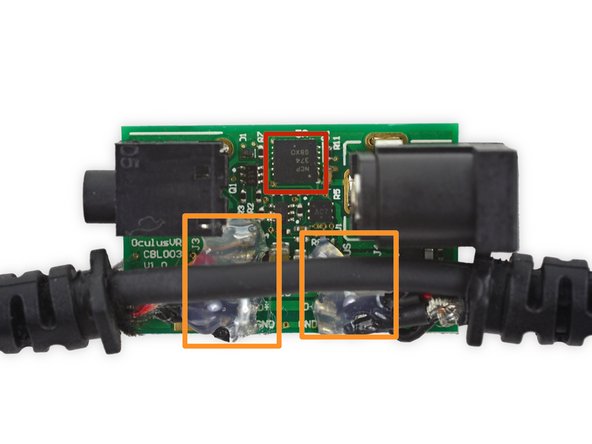
Let's pop open the slick new cable hub and find out what's inside:
-
ON Semiconductor NCP 374 overvoltage protection device with load switch function
-
You can sleep soundly knowing that those cables aren't going anywhere, because Oculus didn't skimp on the globs of hot glue on the inside of the cable hub.
-
-
-
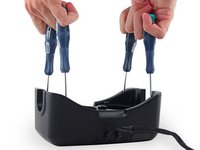
We quickly dispatch some serious rubber plugs and go Wolverine all over the screws they protect.
-
With the screws dispatched, we slide the eyewear enclosure out of the front casing.
-
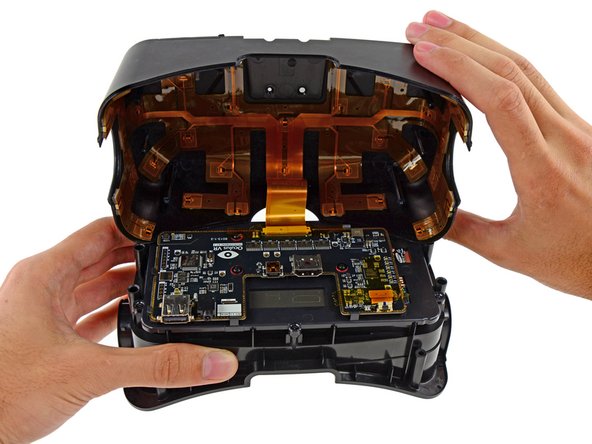
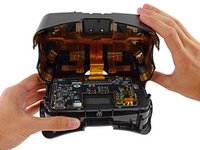
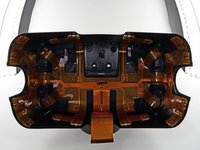
Hold onto your hamburgers, because here comes the first look at the inside of the Oculus Rift Development Kit 2.
-
-
-
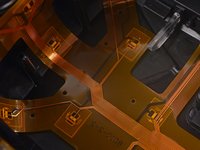
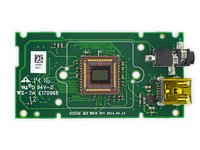
Opening the treasure chest a bit further, we get a glimpse of a whole entire motherboard, not the tiny boards of yore.
-
But what's all this orange cabling? Looks like we found the many sources of those many, many IR LEDs.
-
There are
eleventy nineforty of them, artfully connected via a ribbon cable designed by space elves.
-
-
-
Here at iFixit, we are unabashed lovers of screws—they epitomize everything that's good about repair. Which is probably why Oculus VR sneaked this maddeningly uncooperative non-screw in here, just to mess with us.
-
Actually, this could just be a minor manufacturing snafu. Apart from the lack of threads, this little guy is identical to two other (perfectly ordinary) Phillips screws nearby.
-
-
-
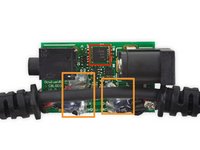
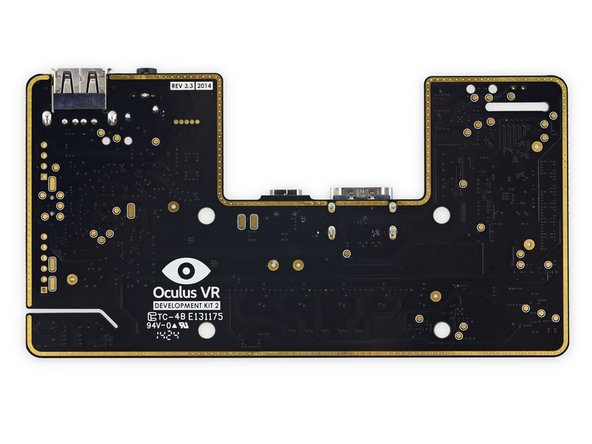
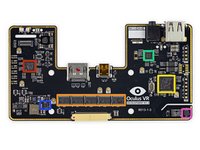
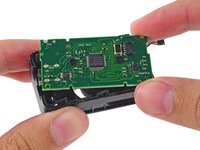
We manage to liberate the motherboard from the DK2's eyewear enclosure with ease.
-
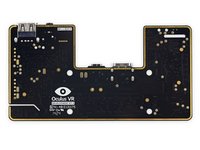
This motherboard is a major change from the previous incarnation of the Oculus Rift. All of the device's guts are now packed onto a single board, eliminating the need for an external control box.
-
-
-
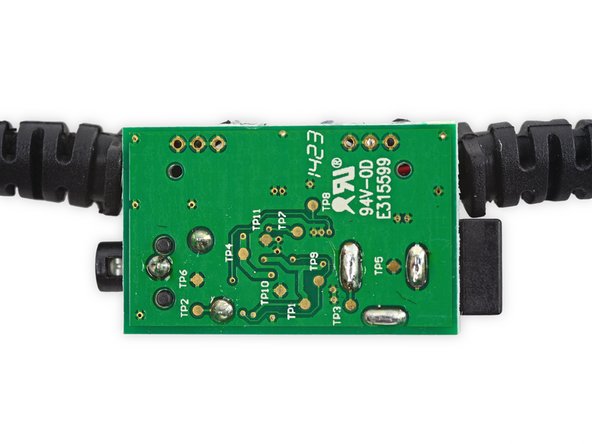
These are the ICs that make virtual reality a possibility:
-
Toshiba TC358779XBG HDMI Interface Bridge
-
STMicroelectronics STP16CPC26 Low Voltage 16-Bit Constant Current LED Sink Driver
-
STMicroelectronics STM32L100RB Ultra-low-power 32-bit Value Line ARM Cortex-M3 MCU with 128 Kbytes Flash, 32 MHz CPU, LCD, USB
-
Cypress Semiconductor CY7C65632 Very Low Power USB 2.0 Hub Controller
-
STMicroelectronics ST1S31 3A Step-down DC-DC
-
Invensense MPU-6500 Six-Axis (Gyro + Accelerometer) MEMS MotionTracking
-
Texas Instruments TPS65632A Triple Output AMOLED Display Power Supply
-
-
-
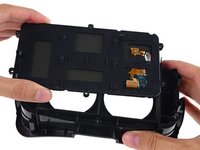
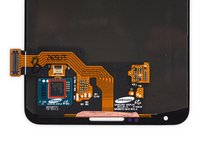
With the motherboard out of the way, we're ready to extract the DK2's display.
-
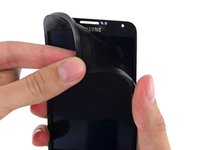
The display has a rubber case housed in a plastic backing. Our spidey senses start tingling when we peel off the rubber case...
-
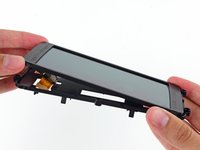
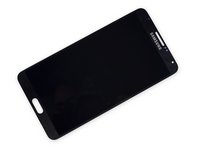
The display is—drumroll please—literally the front panel of a Samsung Galaxy Note 3.
-
-
-
The Galaxy Note 3 display panel that Oculus is using features a 5.7" Super AMOLED 1080p screen.
-
We take a closer look at the display panel, and find that Oculus even left the Synaptics S5050A touchscreen controller intact.
-
Oculus claims that the DK2 display is a low-persistence OLED screen capable of a 75 Hz refresh rate. This means that Oculus is overclocking the Note 3 display panel from its stock 60 Hz, which results in smoother motion.
-
-
-
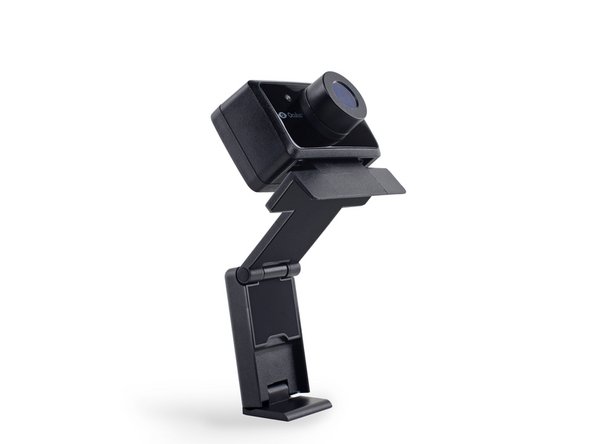
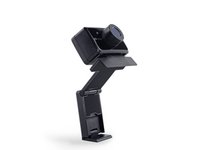
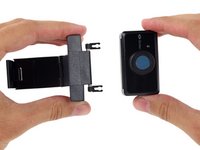
We may have exhausted the headset's goodies, but this teardown ain't over yet. We turn your attention now to the positional tracking camera.
-
The DK2 positional tracker's stand has several articulation joints and a tripod mount so you know it will always be there for you, bending over backward to help.
-
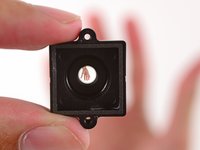
The positional camera itself is attached to its stand with two small clips. Once detached, we're free to crack it open to find the real goodies inside.
-
-
-
We take off a filter that we guess blocks visible light, allowing only IR light into the camera.
-
We use some high-tech hacking to prove our theory: tape, a cellphone, and a remote control.
-
Voilà! Visible light filtered out, IR beam clearly shining through. Visual victory!
-
-
Инструмент, используемый на этом этапе:iFixit Opening Picks (Set of 6)$4.99
-
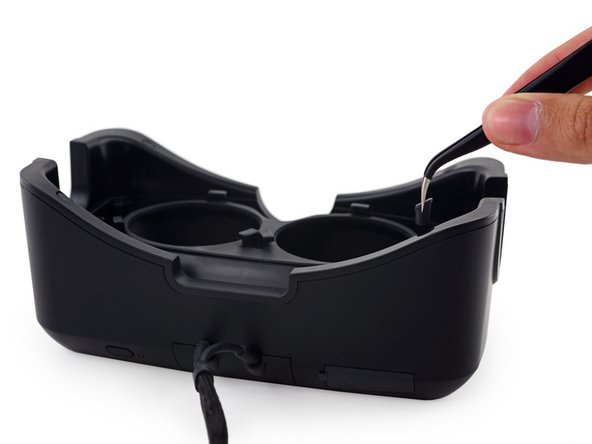
A sneaky cover plate hides a couple screws on the positional tracker's body, but our opening pick quickly sniffs them out.
-
-
-
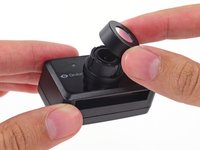
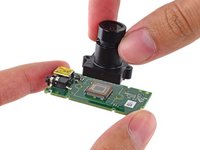
Once inside, the positional camera's motherboard and lens assembly are removed with ease.
-
We quickly dispense with two more screws, and then pop the lens assembly off the motherboard.
-
-
-
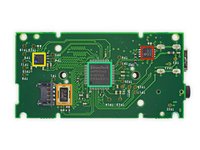
Upon freeing this baby motherboard from its enclosure, we spy the positional camera's CMOS image sensor.
-
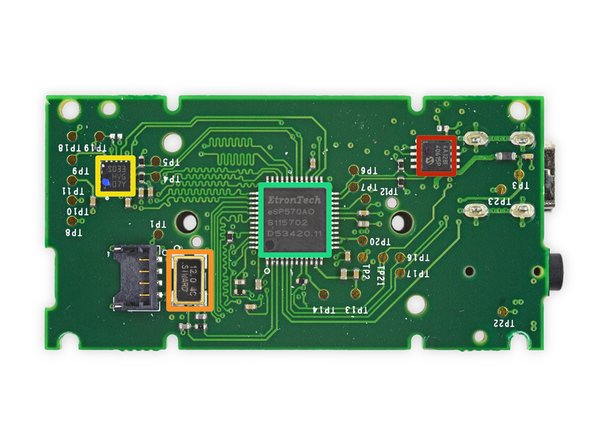
There are several ICs on the positional camera motherboard:
-
Microchip Technology 24AA128 I2C CMOS Serial EEPROM
-
SIWARD 12.0 4C Crystal Oscillator
-
S033 HVG 107Y
-
Etron Technology eSP570 webcam controller
-
-
-
The Oculus Rift Development Kit 2 Repairability Score: 9 out of 10 (10 is best)
-
Standard Phillips #0 screws are used in both the headset and positional tracker, making it a cinch to open them.
-
Cable management is much improved from the original development kit, and the elimination of the control box makes for a simpler, more streamlined device.
-
The use of a common smartphone display means that replacement parts are readily available!
-
Getting into the positional tracker without a repair guide is a bit of a doozy. Prying around the edge won't help you here, but a thin tool in the front will.
-


9 Комментарии к руководству
they should give it two 5mp cameras in the front.. augmented realities.. the possibilities are endless..
It'd be fantastic to have stereo camera and microphones on front, and speakers on the head band, so that I could use this device to watch and hear what's going on around me. Non of that virtual or augmented reality stuff, just pure reality - in real time! I could finally go outside and just enjoy watching and hearing stuff.
Heimo -
"Maybe they're planning on releasing an eyelash touchscreen controller add-on later." trolololl :D
"What's the lens diameter and focal length and approximate magnification?"
I am also interested in this information.
Diameter and focal lenght. And perhaps the distance between the middle of the lens and the surface of the screen.