Введение
The world of video game platforms has been changing quickly. Manufacturers have resorted to mid-gen refreshes to keep up with 4K TVs and VR headsets. Last month we tore apart the PS4 Slim, and now we're tackling the third iteration of this generation. We may be amateur gamers, but we're revved up to tear the PlayStation 4 Pro down, professionally.
Game on! Keep up with us on Facebook, Instagram, or Twitter for all the latest game console and VR hardware teardowns.
Выберете то, что вам нужно
Видео обзор
-
-
Since this is the third version of the PS4, maybe we should call it the PS4 3? Anyways, here are the specs:
-
8-core AMD "Jaguar" X86-64 CPU, clocked at 2.1 GHz (up from 1.6 GHz)
-
4.2 TFLOPS AMD Radeon-based graphics
-
8 GB GDDR5 RAM + 1 GB DRAM
-
1 TB removable and upgradeable hard drive storage
-
802.11 a/b/g/n/ac, Ethernet, and Bluetooth 4.0 (LE)
-
Blu-ray × 6 CAV, DVD × 8 CAV
-
-
-
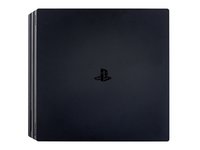
Hamburger, meet Big Mac—the Pro version has one layer on the Slim version. It's also quite a bit bigger overall.
-
Power
-
HDMI 2.0
-
PlayStation extension port
-
S/PDIF optical audio output
-
USB 3.0
-
Ethernet
-
-
-
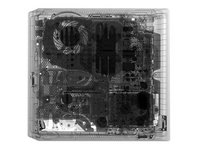
When you're exploring unknown territory, it helps to have a map.
-
We called up our buddies at Creative Electron, and they put their X-ray vision to good use.
-
-
-
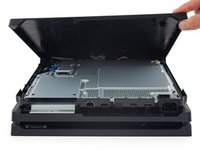
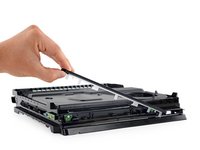
This triple-decker design is a little different from the ''first'' fourth PlayStation we tore down, but that doesn't stop our teardown engineers—without wasting time, we flip the console over, pop the first panel, and hit pay dirt!
-
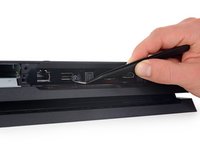
A single, standard Phillips #0 screw stands between us and hard-drive-swapping glory. Now that's what I'm talkin' 'bout.
-
Like the original PlayStation 3
-
... and the Slim
-
... and the Super Slim
-
... right up to the original PlayStation 4 and PlayStation 4 Slim.
-
-
-
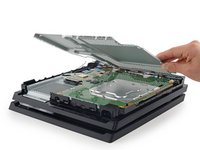
And just a couple more Phillips screws later, the 2.5" HGST HTS541010A9E680 hard drive is free from its caddy shackles.
-
While the PlayStation team boasted about the Pro's SATA III support, this stock hard disk drive is rated at 3.0 Gb/s (SATA II).
-
Or is it? According to various online sources, this guy is actually a 6.0 Gb/s HDD. Regardless, at 5400 RPM this platter drive will never reach SATA III speeds and is pretty similar to the drive we found in 2013.
-
-
Инструмент, используемый на этом этапе:Mako Driver Kit - 64 Precision Bits$39.95
-
As expected, we're gonna have to remove these "Warranty void if seal removed" stickers to go any further.
-
Adding a bit of insult to injury, the screws hidden beneath are Security Torx screws—specifically designed to stop you getting in.
-
Luckily, even the most dastardly screw head is no match for our 64 Bit Driver Kit. With the case cracked open, we can remove this large metal shield.
-
Unfortunately, all this does is give us a view of the motherboard's backside.
-
-
-
-
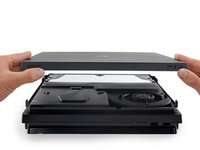
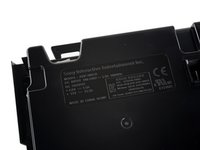
With the beast on its back, the opposite panel pops off after some prodigious prying—but no "warranty void" stickers!
-
Alas, removing this panel isn't the panel-cea we were hoping for. We can pull out the power supply, but nothing else.
-
While you can't remove the fan, you could certainly clean it from here—maybe that's why we're granted this non-warranty-voiding access zone.
-
-
-
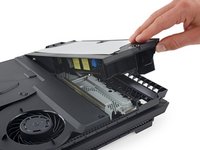
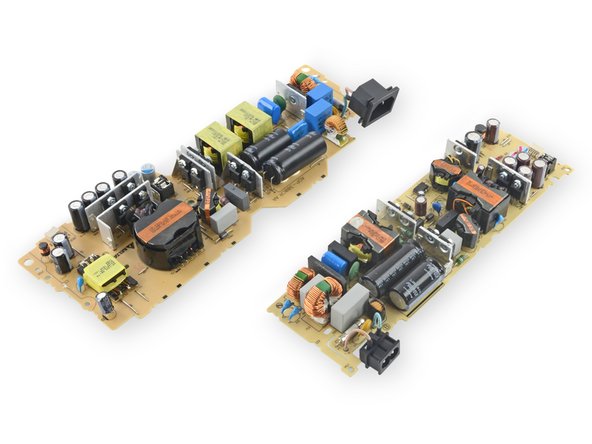
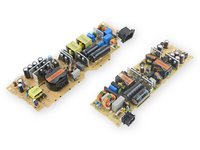
With the top panel removed, we focus our attention towards the power supply unit.
-
And now for the million dollar question: Why is this console so much bigger than the original?
-
-
-
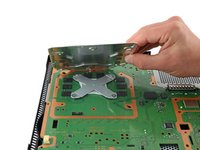
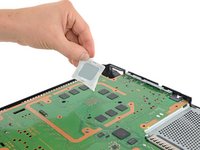
Burrowing through a layer of shielding behind the CPU reveals this cool X-shaped retaining bracket, similar to ones we found in another console.
-
And directly underneath it, we dig up a plastic-and-metal cover that looks to be the consumer electronics version of a pizza saver, protecting the back of the board from the heat sink retaining bracket.
-
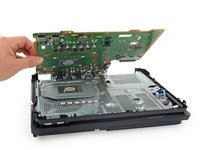
Lifting the motherboard reveals a lot more thermal management. Highlights include a giant copper heat sink and dedicated pads for six chips on the motherboard.
-
-
-
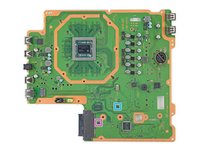
Let's take a closer look at the front side of the motherboard:
-
SCEI (Sony Computer Entertainment, Inc.) CXD90044G SoC (includes AMD "Jaguar" Cores and AMD Radeon GPU)
-
Panasonic MN864729 HDMI transmitter
-
Samsung K4B4G0846E-BYK0 512 MB DDR3 SDRAM
-
Sony/Renesas R9J04G011FP1 I/O controller (likely)
-
Infineon (formerly International Rectifier) IR35218 PWM controller
-
Fairchild Semiconductor FDMF6840C 50 A power stage
-
Cypress CYUSB3312 USB 3.0 hub controller
-
-
-
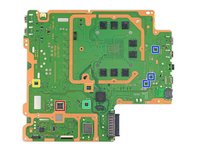
And bringing up the rear:
-
8 x Samsung K4G80325FB-HC28 8 GB GDDR5 (1 GB × 8 = 8 GB)
-
Sony J20H091 Wireless Communication module (Marvell Avastar 88W8897 underneath)
-
SCEI (Sony Computer Entertainment, Inc.) CXD90036G I/O controller (likely)
-
Samsung K4B4G0846E-HC28 512 MB DDR3 RAM
-
Rohm BD7764MUV motor controller
-
Rohm BD9685 synchronous step-down switching regulator
-
-
-
IC Identification, continued:
-
Sony A02-C0L2 secure microcontroller (likely)
-
Macronix MX25L25635FZ2I-10G 256 MB serial flash memory
-
ON Semiconductor CAT24C128WI−GT3 128 KB serial EEPROM memory
-
Richtek RT5069A power management
-
Texas Instruments TLV62090 3 A step-down converter
-
Richtek RT8237F synchronous buck PWM controller
-
Texas Instruments SN74AUC2G66 2-channel SPST analog switch
-
-
-
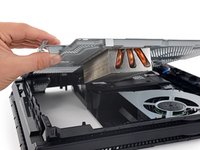
The fan and optical drive seem almost within reach—and yet they're screwed in from the bottom, where a large heat pipe assembly keeps guard. However, we're not scared.
-
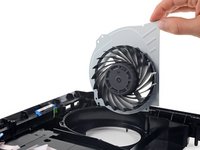
We manage to extract the heat pipe gear without serious injury, clearing our way to that spinny thing that blows air.
-
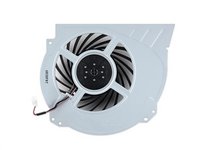
This Nidec fan is rated for 2.1 amps at 12 volts, or 25.2 watts. So that's where all that extra PSU power is going...
-
-
-
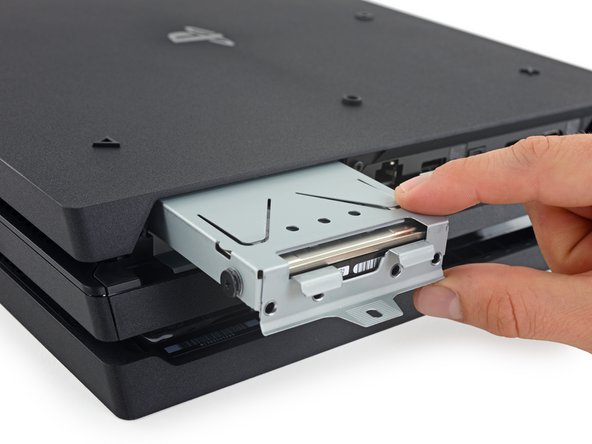
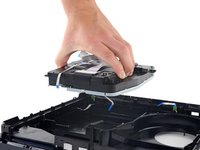
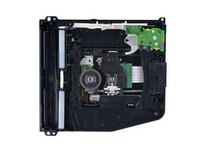
We pluck out the optical drive, claw-game style.
-
We do some more clawing (and unscrewing) to get this beast open. We find:
-
A lot of springs.
-
A lens assembly on a track, with some sweet stabilization action.
-
And some sweet gears.
-
-
-
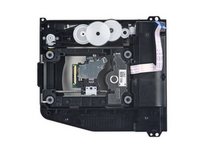
The optical drive's laser pickup assembly is ready for its closeup.
-
We use a little compressed air to move the pickup arm. It's super responsive and likely does a great job with skip protection.
-
-
-
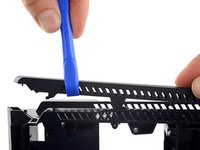
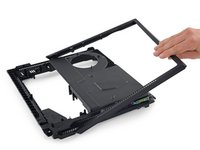
With some determined prying, we remove this triple-decker PS4's middle tier. Turns out it's just a plastic frame, which we quickly pull away, revealing a final component or two.
-
This LED light guide catches light from the LEDs on the left-hand board, and also serves as the button covers for the mechanical switches on the two right-hand boards.
-
-
-
PlayStation 4 Pro, deftly disassembled.
-
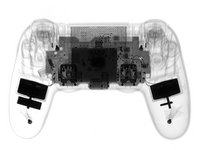
And because we love you, here's a bonus X-ray image of the PS4 Pro controller.
-
- No adhesive makes disassembly and reassembly easy.
- The non-proprietary hard drive is simple to access and upgrade/replace—and doing so will not void your warranty.
- While you can freely clean the fan, removing it—and other components—requires lots of (warranty-voiding) disassembly.
- Security screws and tamper-evident seals discourage users from disassembling and repairing their PS4.


Заключительные мысли
Уровень ремонтопригодности


(10 легче всего ремонтировать)
74 Комментариев
Can anyone confirm if the GPU in this Pro is actually a Radeon RX 480 put together with the Jaguar cores?
Its got 2304 cores so same as RX 480 but seeing as how they need to maintain compatibility id say the shaders aren't true GCN 4 like the 480 but still GCN1.1 like the original PS4.
i just bought a ps4 here in japan. i just want to know if can i use it in 220volts? thanks
nick -