Перейти к основному содержанию

Выберете то, что вам нужно

Это демонтаж а неруководство по ремонту. Чтобы отремонтировать RCA Radio Alarm Clock, воспользуйтесь нашим сервисным руководством.

  1. RCA RC2012 Alarm Clock Radio Teardown, RCA RC2012 Alarm Clock Radio Teardown: шаг 1, изображение 1 из 3 RCA RC2012 Alarm Clock Radio Teardown, RCA RC2012 Alarm Clock Radio Teardown: шаг 1, изображение 2 из 3 RCA RC2012 Alarm Clock Radio Teardown, RCA RC2012 Alarm Clock Radio Teardown: шаг 1, изображение 3 из 3
    • Fully assembled RC2012 alarm clock radio.

  2. RCA RC2012 Alarm Clock Radio Teardown: шаг 2, изображение 1 из 3 RCA RC2012 Alarm Clock Radio Teardown: шаг 2, изображение 2 из 3 RCA RC2012 Alarm Clock Radio Teardown: шаг 2, изображение 3 из 3
    • Remove the single screw from the bottom of the alarm clock radio with a Phillips head screwdriver.

  3. RCA RC2012 Alarm Clock Radio Teardown: шаг 3, изображение 1 из 3 RCA RC2012 Alarm Clock Radio Teardown: шаг 3, изображение 2 из 3 RCA RC2012 Alarm Clock Radio Teardown: шаг 3, изображение 3 из 3
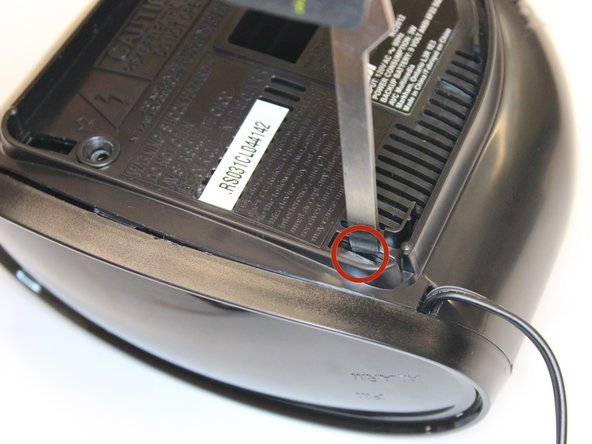
    • Pry the alarm clock's front panel by applying downward and forward pressure at the two tabs on the edges of the alarm clock. Be careful to not apply too much pressure as the tabs are fragile.

  4. RCA RC2012 Alarm Clock Radio Teardown: шаг 4, изображение 1 из 2 RCA RC2012 Alarm Clock Radio Teardown: шаг 4, изображение 2 из 2
    • Upon prying the front panel, take care to not puncture the grey shielded connectors for the LCD module.

  5. RCA RC2012 Alarm Clock Radio Teardown: шаг 5, изображение 1 из 3 RCA RC2012 Alarm Clock Radio Teardown: шаг 5, изображение 2 из 3 RCA RC2012 Alarm Clock Radio Teardown: шаг 5, изображение 3 из 3
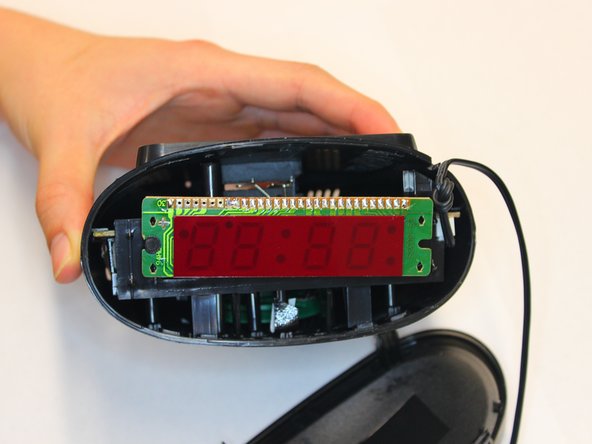
    • Gently, pry apart the LCD module from the alarm clock. There are two tabs at the edge of the LCD module (marked in red) that hold it in place.

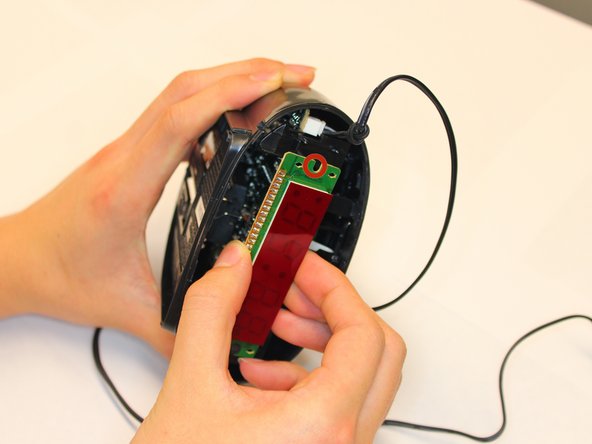
    • Using two fingers work the module back and forth until it separates from the plastic tabs. Be careful of snapping off the plastic tab as this would prevent the LCD module from fitting back in place.

  6. RCA RC2012 Alarm Clock Radio Teardown: шаг 6, изображение 1 из 3 RCA RC2012 Alarm Clock Radio Teardown: шаг 6, изображение 2 из 3 RCA RC2012 Alarm Clock Radio Teardown: шаг 6, изображение 3 из 3
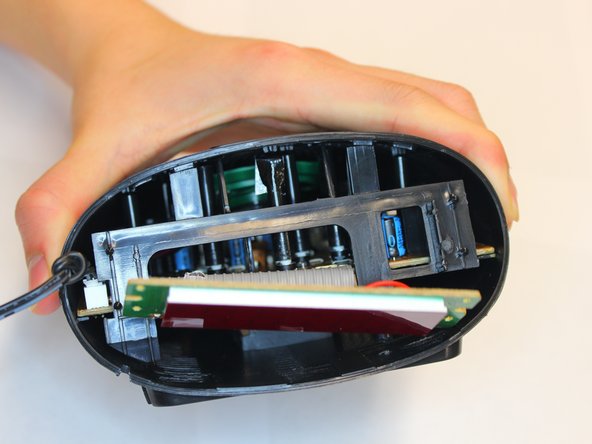
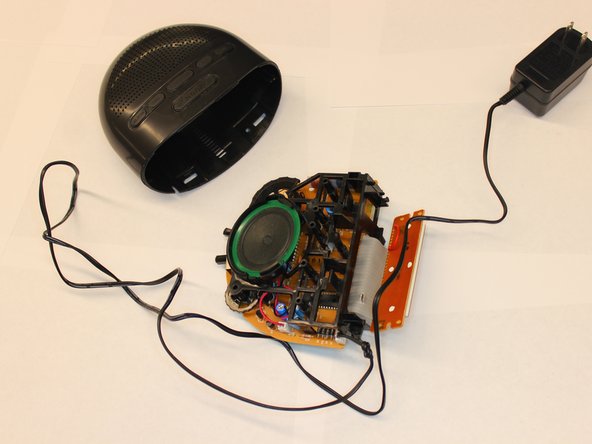
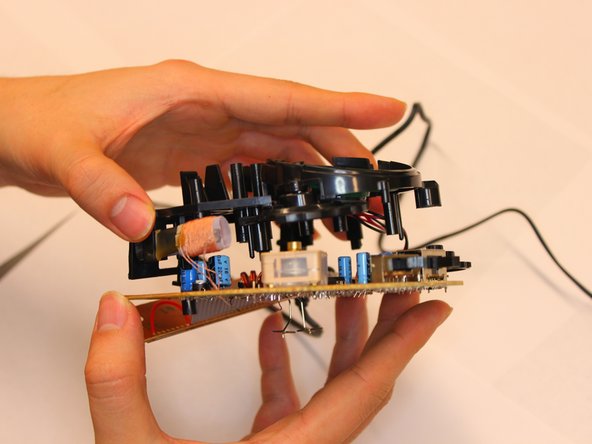
    • To remove the printer circuit board from the plastic housing, apply firm pressure to both sides of the housing.

    • The PCB is supported by a plastic chassis. Grab the the plastic chassis with one hand while applying pressure to both sides of the alarm clock housing with the other hand.

    • Pull out the PCB from the plastic housing.

  7. RCA RC2012 Alarm Clock Radio Teardown: шаг 7, изображение 1 из 3 RCA RC2012 Alarm Clock Radio Teardown: шаг 7, изображение 2 из 3 RCA RC2012 Alarm Clock Radio Teardown: шаг 7, изображение 3 из 3
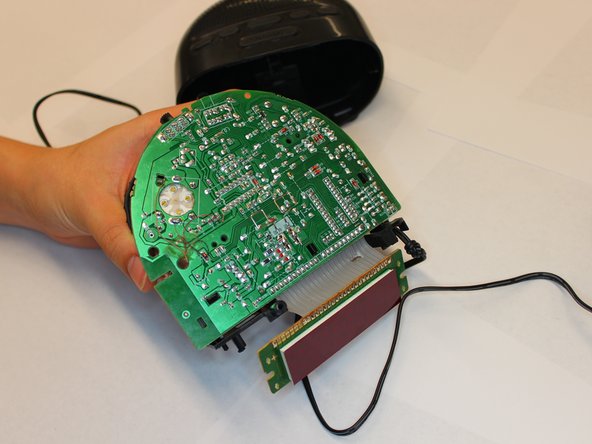
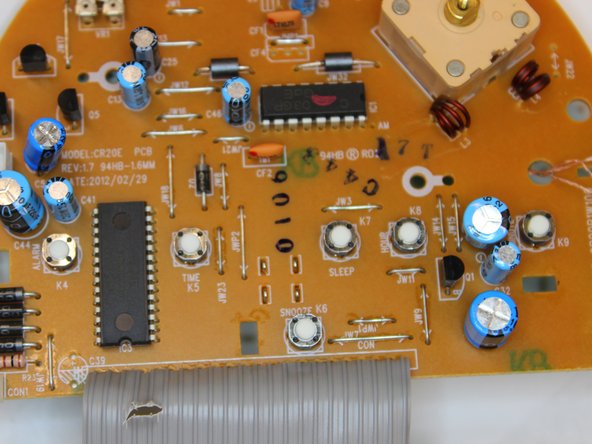
    • The bottom side of the PCB contains three plastic tabs that hold the PCB and plastic chassis together.

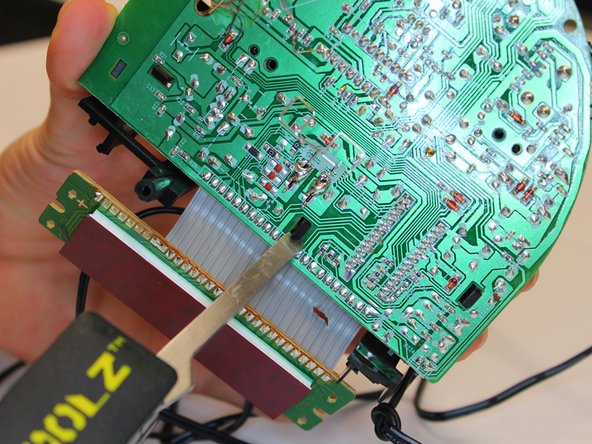
    • With a prying tool, gently push out each of the three tabs.

  8. RCA RC2012 Alarm Clock Radio Teardown: шаг 8, изображение 1 из 3 RCA RC2012 Alarm Clock Radio Teardown: шаг 8, изображение 2 из 3 RCA RC2012 Alarm Clock Radio Teardown: шаг 8, изображение 3 из 3
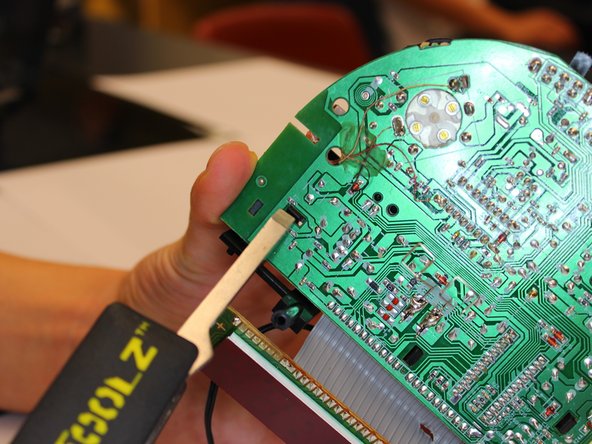
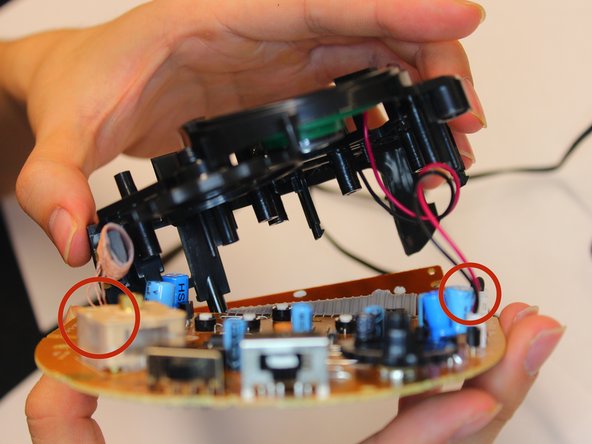
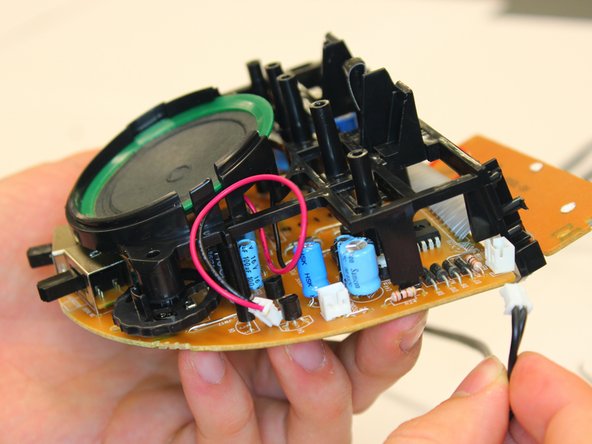
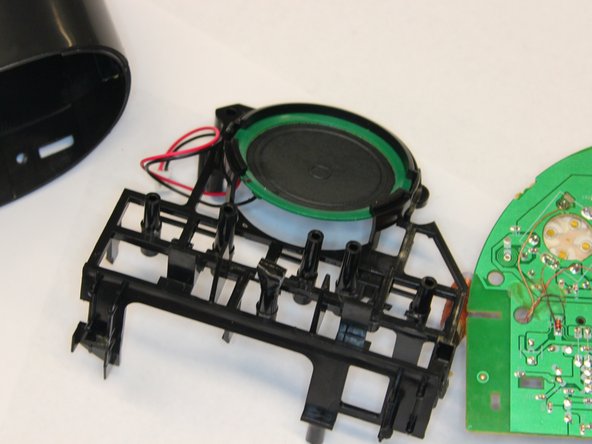
    • After removing the plastic tabs from under the PCB, carefully lift the plastic chassis away from the PCB.

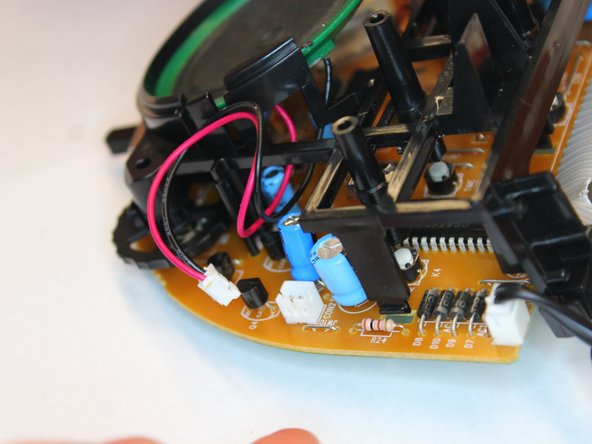
    • Do not use too much force when pulling apart the chassis from the PCB, there are two sets of two pin connectors and 1 wound up wire for the antenna that remains attached between the chassis and PCB.

  9. RCA RC2012 Alarm Clock Radio Teardown: шаг 9, изображение 1 из 3 RCA RC2012 Alarm Clock Radio Teardown: шаг 9, изображение 2 из 3 RCA RC2012 Alarm Clock Radio Teardown: шаг 9, изображение 3 из 3
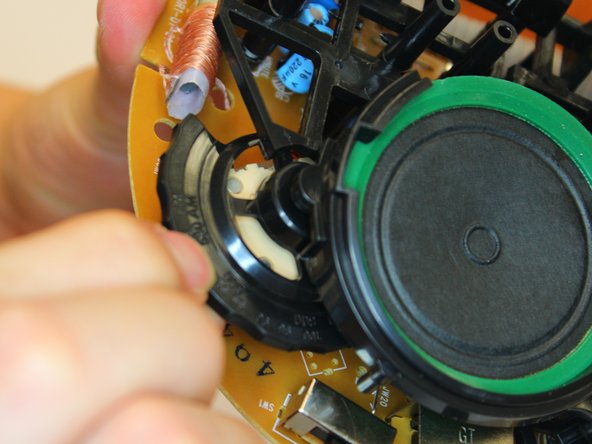
    • There is a plastic dial between the chassis and the PCB that controls the frequency of the radio.

    • To remove the dial, lift the chassis up slightly and simply push up to remove the dial from its fitting.

  10. RCA RC2012 Alarm Clock Radio Teardown: шаг 10, изображение 1 из 3 RCA RC2012 Alarm Clock Radio Teardown: шаг 10, изображение 2 из 3 RCA RC2012 Alarm Clock Radio Teardown: шаг 10, изображение 3 из 3
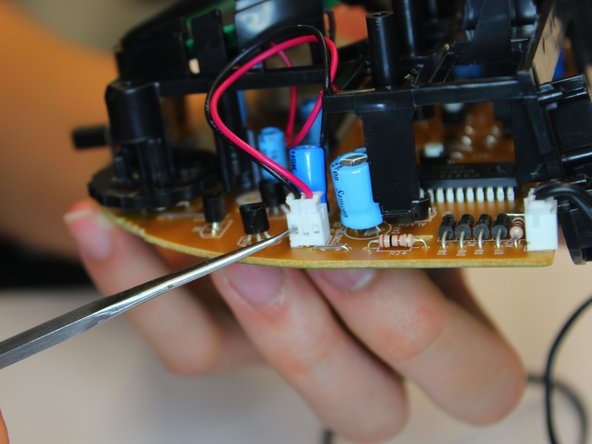
    • There is a two pin connector that connects the speakers on the chassis to the PCB.

    • With a small, pointed tool push the two tabs on the two pin connector holding the wire crimps in place. While applying pressure to the two tabs, gently pull the connector wires until the male connector separates from the female counterpart.

  11. RCA RC2012 Alarm Clock Radio Teardown: шаг 11, изображение 1 из 2 RCA RC2012 Alarm Clock Radio Teardown: шаг 11, изображение 2 из 2
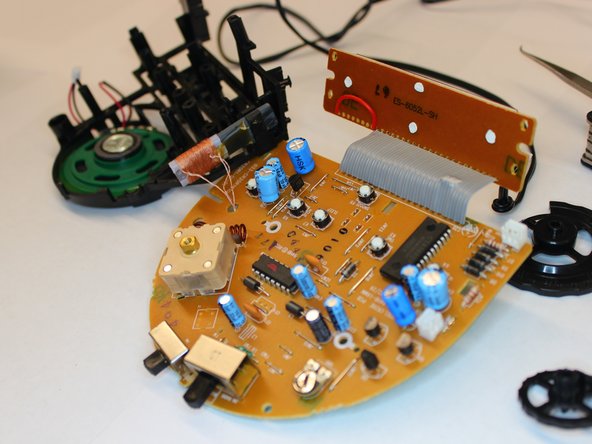
    • There is a two pin connector on the chassis to the PCB that provides power from the 120VAC adapter.

    • With a small, pointed tool push the two tabs on the two pin connector holding the wire crimps in place. While applying pressure to the two tabs, gently pull the connector wires until the male connector separates from the female counterpart.

  12. RCA RC2012 Alarm Clock Radio Teardown: шаг 12, изображение 1 из 3 RCA RC2012 Alarm Clock Radio Teardown: шаг 12, изображение 2 из 3 RCA RC2012 Alarm Clock Radio Teardown: шаг 12, изображение 3 из 3
    • Complete view of the topside of the PCB isolated from the plastic chassis.

  13. RCA RC2012 Alarm Clock Radio Teardown: шаг 13, изображение 1 из 2 RCA RC2012 Alarm Clock Radio Teardown: шаг 13, изображение 2 из 2
    • Complete view of the underside of the PCB and the provided speaker.

Kenneth Lim

Участник с: 04/07/11

61 Репутация

Автор 2 руководств

Команда

Cal Poly, Team 9-71, Walters Spring 2011 Участник Cal Poly, Team 9-71, Walters Spring 2011

CPSU-WALTERS-S11S9G71

4 членов

Автор 9 руководств

0 Комментариев

Добавить комментарий

Просмотр статистики:

За последние 24часов: 0

За последние 7 дней: 0

За последние 30 дней: 8

За всё время: 2,126