Перейти к основному содержанию

Эта разборка продолжается – Периодически обновляйте, чтобы увидеть последние изменения!

Выберете то, что вам нужно

  1. Samsung Galaxy S II Teardown, Samsung Galaxy S II Teardown: шаг 1, изображение 1 из 1
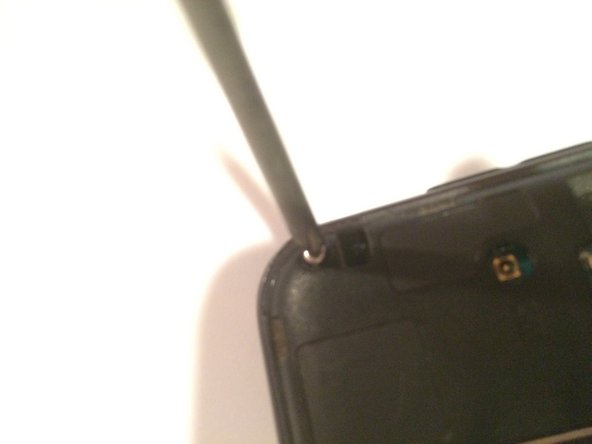
    • Step 1- Use an opening tool, or your fingernail into the opening at the top near the headphone jack.

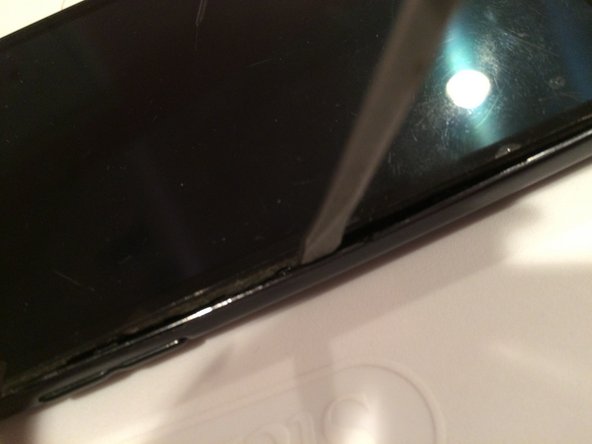
    • Use the tool or your fingernail to pry the opening open.

  2. Samsung Galaxy S II Teardown: шаг 2, изображение 1 из 2 Samsung Galaxy S II Teardown: шаг 2, изображение 2 из 2
    • If an microSD card is inserted, use the flat end of a spudger and push it until you hear a click sound and it will release right after.

    • Once you reassemble the midframe, place the microSD card back into it's slot

    • Do the exact same thing with your battery and do not damage the battery in any way.

  3. Samsung Galaxy S II Teardown: шаг 3, изображение 1 из 3 Samsung Galaxy S II Teardown: шаг 3, изображение 2 из 3 Samsung Galaxy S II Teardown: шаг 3, изображение 3 из 3
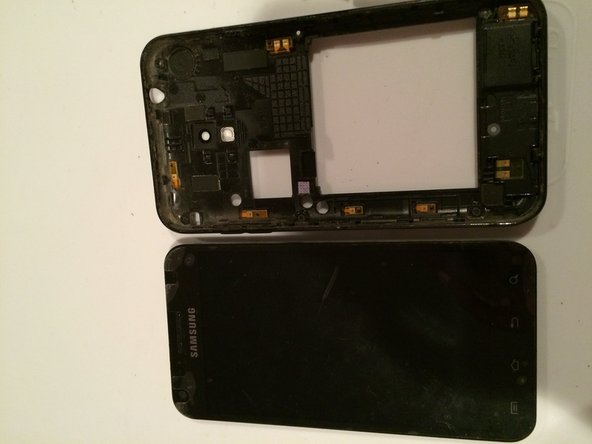
    • Remove all six pf the 4.0 mm Philips #00 screws securing the back of the device to the front

  4. Samsung Galaxy S II Teardown: шаг 4, изображение 1 из 1
    • Pry the midframe all around the device to carefully remove it

    • If you do not pry throughout the whole device, the midframe will be very hard to remove

    • A plastic tool opener would be better and it will not damage the phone.

  5. Samsung Galaxy S II Teardown: шаг 5, изображение 1 из 2 Samsung Galaxy S II Teardown: шаг 5, изображение 2 из 2
    • Remove the midframe carefully

    • If your previous midframe was broken, place a new one. When you hear a click sound throughout the device, you know you have snapped it into place

Vanessa Cardenas

Участник с: 11/01/16

241 Репутация

1 руководство автора

0 Комментариев

Добавить комментарий

Просмотр статистики:

За последние 24часов: 0

За последние 7 дней: 0

За последние 30 дней: 5

За всё время: 1,108