Введение
For iFixit's official Galaxy S6 teardown, click here. The guide you are currently viewing is retained for historical purposes only.
Выберете то, что вам нужно
Видео обзор
-
-
Power off the Samsung Galaxy S6.
-
Use an eject pin or pointed tweezers to take out the SIM Card Tray.
-
-
-
Heat up the Samsung Galaxy S6 Battery Door.
-
Draw the battery cover up with a suction cup. (Note: The battery door is adhered to the rear housing with quite strong adhesive, take your time during this process.)
-
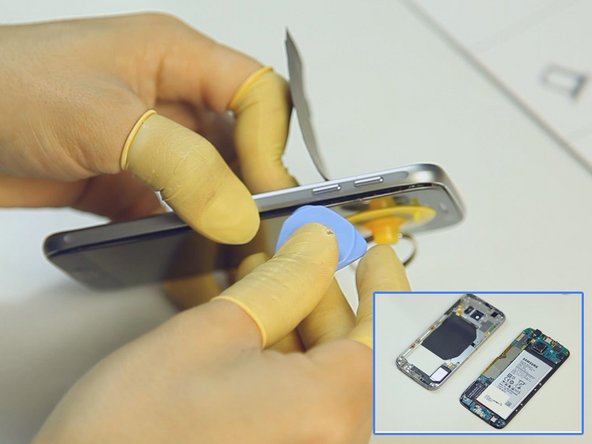
Separate the battery door with an opening pick.
-
-
-
Undo the 13 screws in the rear housing.
-
Heat up the LCD Assembly.
-
Separate the rear housing from the LCD Assembly with the help of suction cup tool and case opening tool. (Notice: be careful not to damage the wireless charging chip attached to the battery.)
It’s often a PIN on your bootup screen unlock security will face a brand new SIM card with the owner of a brand new handset. Packaging materials http://dailycome.com/how-to-change-or-di...
-
-
-
Remove the power button flex.
-
Remove the volume button flex.
-
Remove the side keys. (Note: the Galaxy S6 power button and volume buttons are compatible with each other.)
Excellent! !
I’m attempting to replace the battery but the rear cover is not releasing. I’ve heated the back repeatedly but the glue is holding. Not sure how much heat can be used?
Any suggestions?
Thank you.
Charles
-
-
-
-
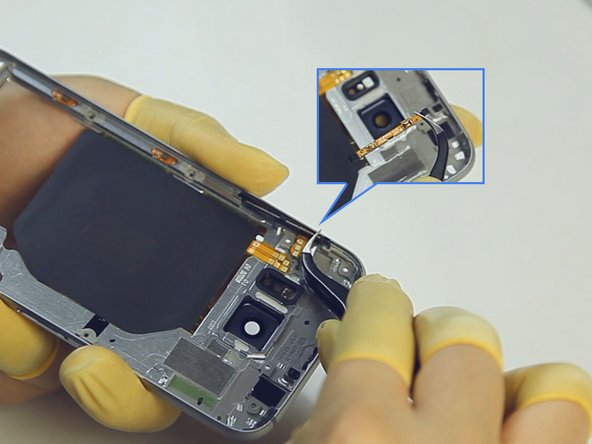
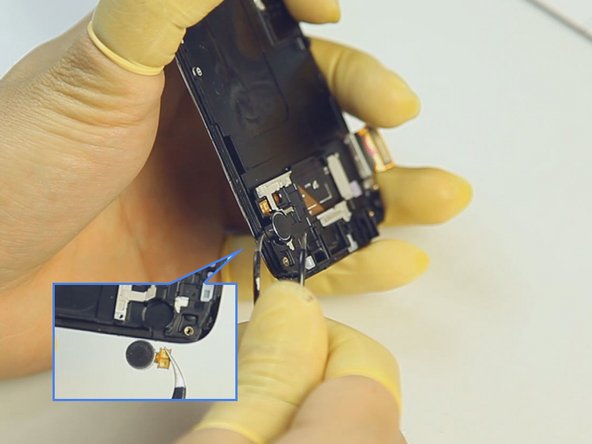
Pry up the charging chip flex ribbons on both sides of rear housing. (Notice: be careful not to damage the flex ribbons.)
-
-
-
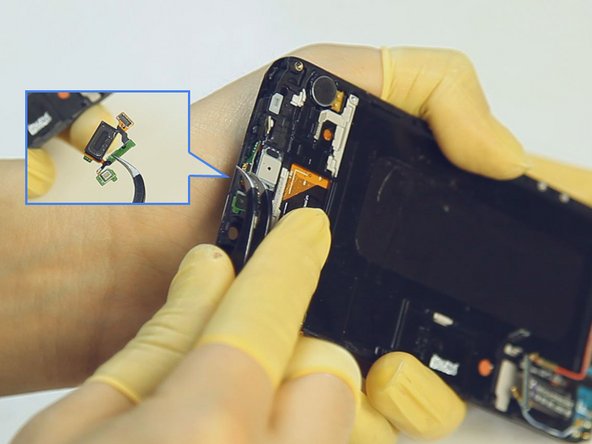
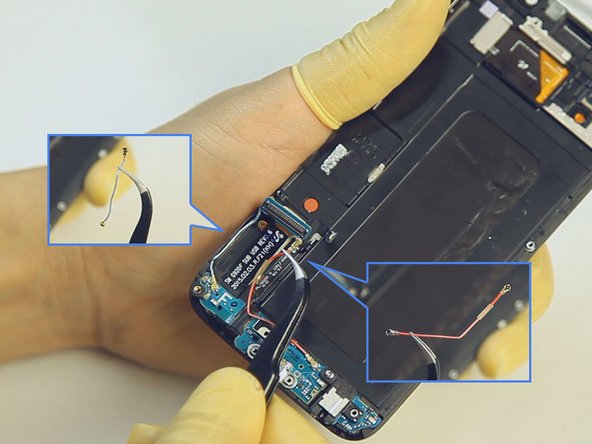
Pry up the LCD assembly connector, front facing camera connector, battery connector, ear speaker connector and home button flex ribbon connector.
-
Turn over the motherboard and pry up the connector.
I am more curious about the main board. Is there any in-depth description of component in main board?
-
-
-
Remove the front facing camera.
-
Remove the ear speaker. (Notice: be careful not to break the flex ribbon.)
-
Remove the vibrating motor.
-
-
-
Remove the back facing camera on the mainboard.
-
Remove the Bluetooth cable and Wi-Fi signal cable.
-
-
-
Undo the earphone jack screw. (Notice: the screw is different than the rear housing screws.)
-
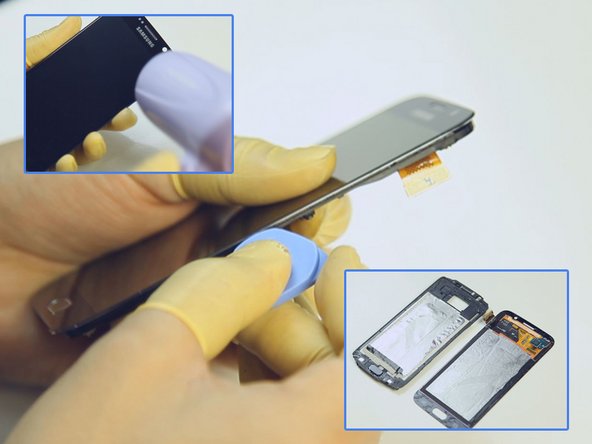
Heat up the LCD Assembly to release the front housing.
-
Pry up the navigation light stickers.
-
-
-
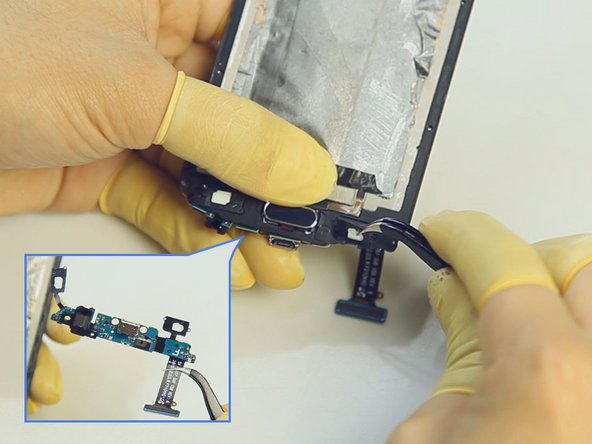
Pry up the connector on the back side of home button.
-
Pry up the home button.
-
-
-
The Samsung Galaxy S6 disassembly process is complete.
This, looks intense.
It looked quite easy to me. BTW i don't think there was any glue on the front. It looks like it is built like say the galaxy s2 with the front lcd assembly snapped in to the back. Meaning calling it a mid frame is not all that accurate. The mid frame would be the bezel of a s3 s4 etc. Where as on this you have back/battery cover and the outer back glass. Which seems to basically be only edged glued. I know what they did to break the glass on the front. They tried to pull it apart s5 style not thinking there was screws holding it in can we say a oh crap moment :p
-


20 Комментариев
I'm curious, what is the DAC on this phone? I know Cirrus Logic partnered with Wolfson so it could be interesting to find out.
The original author of this guide is ETrade Supply (as noted by the video itself). The video, images, and writeup were all produced and watermarked by them, though the image watermarks have since been removed via liberal cropping.
For the full and un-doctored photo set, please see:
I am trying to locate the JTAG connections - any ideas? Thanks!
Can the SIM card reader slot be removed from the logic board? Cuz my Galaxy 6 it's not reading my SIM card, thank you for the video
Hello! on the back at middle frame. without NFC ribbon are 3 more ribbons one top left side...right side one...and bottom left side one.. its says ZF-E4 on them. What are them FOR? it's a problme if a broke one?
And i have a problem. Please help me...i changed the display on my galaxy s6...everything works ok..but when i assembly on the middle frame...and i charge..it's says it's charging but not charge..the battery ramins the same.? do you know what is the problem?
My phone fell face down, it has a protective screen on it, however, the impact from the fall knocked it out. It has a previous crack on the left bottom side. But since the fall, the screen went out. I can see it light up, it rings and all, but the screen is black. Is this something that I can repair myself?
Thanks
Thanks for the video. I dropped S6 in the water sink and now battery gets hot very fast when I turn on. But I will NEVER going to buy another Samsung products again.
You dropped it in water and you blame the product . wow is all i can say
David -
¡Excelente aporte muy bien realizado!
Excellent! I may attempt to fix my GS6 now. After the Nougat OTA, my GS6 went black, would boot loop, go dead or not charge and was useless. I tried cache wipe, total reset, etc. but nothing worked. I discovered that if the phone were twisted slightly, that it would operate properly. Attached (twisted) to a board, it has been powered up now for eight hours and is still working perfectly with NO MALFUNCTIONS and is on the latest OS, Nougat 7.0 It has a poor connection internally!