Перейти к основному содержанию

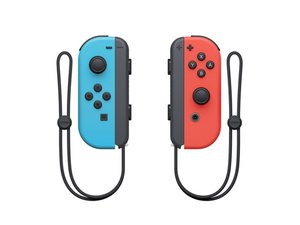
Repair guides and information for the Nintendo Switch Joy-Con controllers.

167вопросов Показать все

Does Anyone Else Have Issues Stripping Screws?

(Note: By stripped, I mean I backed the screw up to theoretically ensure I wasn't making a new hole, then tightened said screw down. Said screw reached a point where it wasn't flush, but had stopped tightening. Then, said screw began spinning freely in place instead of tightening down at all, and lost all grip.) I recently decided to replace my shells on two of my Joy-Cons (mainly because I somehow stripped one of the screws on the interior that holds the joystick in while replacing said joystick). It was all going well, until I stripped a screw out of the interior of the new shells putting the board back in. (Using a picture from the repair guide, it's the lower of the two screws.)

Block Image

I'm using the appropriate screwdrivers, only driven by my little ol' hands. Do I need to ask for replacement shells? Would I be better off trying to fill the stripped hole? What am I doing wrong here?

Ответ на этот вопрос У меня та же проблема

Это хороший вопрос?

Оценка 0
Добавить комментарий

1 ответ

Might sound lame but did you make sure to install the correct screws?

The ones that go in the battery caddy and thumbstick areas are slightly longer than the ones that go directly into the motherboard. The ones you have circled, the motherboard screws, are the shorter ones. At a glance they all look the same, the difference is small. Maybe....you got the wrong screws and when they wouldn't go flush to the board so you tightened a little pinch harder and....r.i.p.?

The battery caddy presses on the motherboard so maybe it'd be enough to keep the whole thing in place. Just make sure to use the longer silver screws in the thumbstick and the battery caddy.

Here's an idea. Make sure you have the correct screws (shortest silver ones). Paint a layer of nail polish or rubber cement on and between the threads of the screw. While it's still wet screw the screw back in. This will hold the screws and mobo in place while making it reasonably possible to remove them again later on. Better than super glue because super glue will melt the plastic and be a destructive pain to remove later.

Good luck.

Был ли этот ответ полезен?

Оценка 0

4 Комментариев:

Yes, I double checked I had the correct screws (both by comparing screw lengths against what came out of the old shell, and using the little guide that came with the new shells). Honestly, the length difference is pretty darn obvious when you're looking at both screws next to each other. I don't really want to use something like nail polish (nail polish reacts badly to a great deal of plastics, while super glue doesn't). I also don't want the board to be loose in there. It's just, having done this twice I'm starting to wonder if there's some kind of trick to this that I'm missing.

из

Agreed, but some people don't notice things as easily as others do. I personally have not had this happen to me on joycons, yet. I've done many including after market shells. There's no special "trick". The joycons are some of the most delicate/fragile controllers I've ever worked on. I think you just ran into a bit of bad luck, it does happen. Thankfully the shells aren't expensive. Good luck.

из

$20 or so bucks for each set is a bit expensive to just be relying on luck...

из

AliExpress $2-$5 per set. Extreme Rates are good but over priced, boutique, and can still be stripped (it happens). Most of the $9-$20 sets on ebay are just overpriced AliExpress units. Good luck.

из

Добавить комментарий

Добавьте свой ответ

ScribeGossett будет вечно благодарен.
Просмотр статистики:

За последние 24часов: 0

За последние 7 дней: 1

За последние 30 дней: 4

За всё время: 40