Введение
8BitDo SN30 Pro, SN30 Pro+, Pro2 all use the same style joystick caps with silicone rubber coating. If your caps are broken or worn out, this guide will walk you through the replacement. This guide helps with only the replacement of the stick caps, not the analog sticks.
Выберете то, что вам нужно
-
-
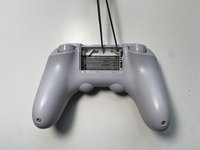
Place the controller face down.
-
Remove the battery cover.
-
Remove rechargeable battery or AA batteries.
-
-
-
Remove L2 and R2 trigger buttons by pushing them away from the grips.
-
-
Инструмент, используемый на этом этапе:Tweezers$4.99
-
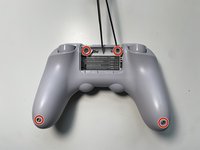
Use Tweezers to uncover two screws under the label in the battery compartment.
-
Use a T6 screwdriver to remove the four 7.3 mm screws securing the rear cover.
-
-
-
-
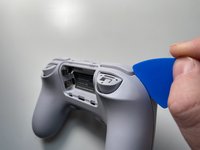
At the end of each grip, pry apart the covers.
-
Use fingernail or opening pick to undo the two top clips.
-
One clip next to L button.
-
One clip next to R button
-
Undo the final clip between the joysticks.
-
-
-
Carefully move the rear cover away and from the front cover. Place it to the left.
-
-
-
Grab the top and pull straight up on the joystick cap. Pulling out the caps one-by-one.
-
-
-
One at a time, Orient the new cap to match the analog stick.
-
Push the cap straight down onto the analog stick.
-
You should hear the click of the stick button
-


To reassemble your device, follow these instructions in reverse order.
Отменить: Я не выполнил это руководство.
11 человек успешно провели ремонт по этому руководству.

5 Комментарии к руководству
Was wondering, does other brand joystick cap other than 8bitdo (eg:ps4, ps5, xbox one) fits ?
looks like PS5 hole size and cone shape. Confirmation needed.
I did the repair with a third party analog cap meant for the PS5 (being extra cheap) on the Pro 2. Despite the bottom hole being bigger on the original, the replacement joystick fit right in.
Did you manage to find a replacement? Looking for an alternative as well since 8bitdo doesn't ship here.
Hello Joseph, I've purchased my replacements from Core Electronics with no issues, how ever they are based in Australia so unsure if they will ship to where you need them.