Эта версия возможно содержит некорректные исправления. Переключить на последнюю проверенную версию.
Выберете то, что вам нужно
-
Этот шаг не переведен. Помогите перевести
-
Open the laptop until it is flat and lay it screen down.
-
Remove eight 9.6mm Phillips #00 screws from the bottom of the laptop.
-
Remove two 4.8mm Phillips from the corners of the device.
-
-
Этот шаг не переведен. Помогите перевести
-
Turn the device face up.
-
Use the plastic Opening Pick to separate the keyboard panel from the chassis that was just unscrewed.
-
-
Этот шаг не переведен. Помогите перевести
-
With the keyboard panel pulled up, detach the two ribbon cables from the motherboard using the blue tabs on the cables.
-
Remove the keyboard panel completely.
-
-
-
Этот шаг не переведен. Помогите перевести
-
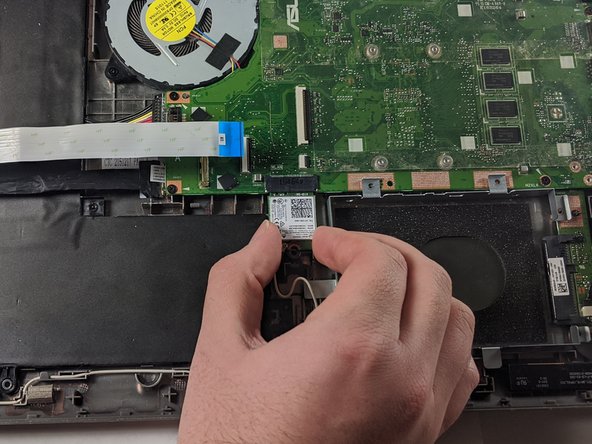
Locate and remove the single 3.17 mm screw holding in the WiFi card suing a Phillips #00 driver.
-
Disconnect the card from the motherboard by pulling down on the card.
-
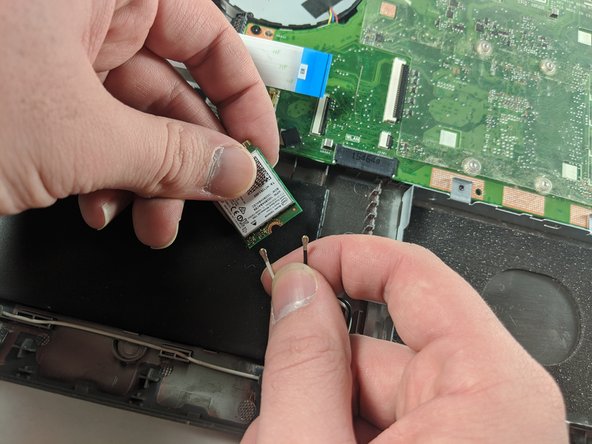
Unplug the two black and white wires from the bottom of the card. They should pop off.
-
-
Этот шаг не переведен. Помогите перевести
-
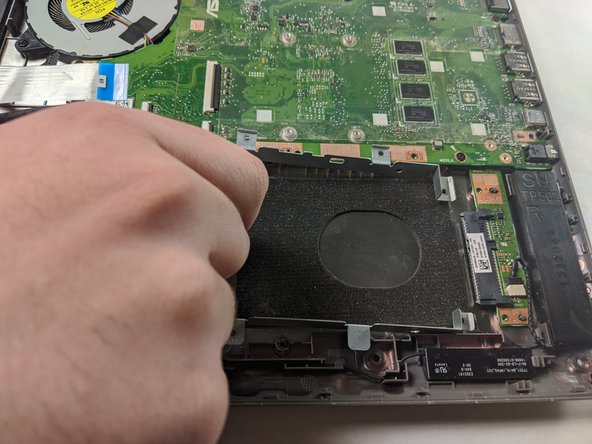
Unscrew the five 4.8mm Phillips #00 screws holding in the hard drive mounting bracket.
-
Slide the mounting bracket towards the battery to disconnect the hard drive from the motherboard.
-
-
Этот шаг не переведен. Помогите перевести
-
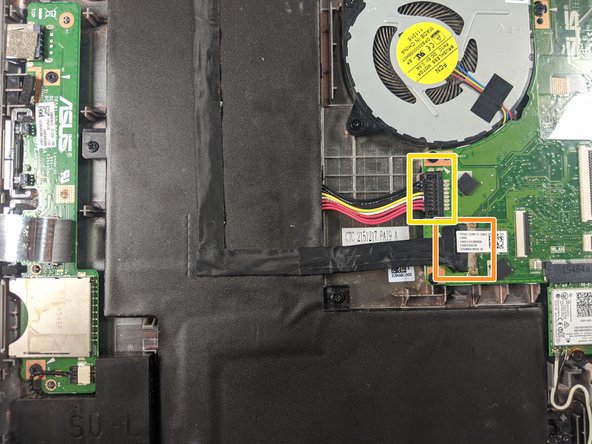
Detach the white ribbon cable.
-
Detach the black ribbon cable.
-
Disconnect the battery from the motherboard.
-
Disconnect the motherboard power cable.
-
-
Этот шаг не переведен. Помогите перевести
-
Flip over the motherboard to see the underside.
-
Depress the clips keeping the RAM in place and remove the current RAM stick.
-


Отменить: Я не выполнил это руководство.
Еще один человек закончил это руководство.
Команда

Embry-Riddle Aeronautical University, Team S1-G1, Cromer Twal Spring 2020 Участник Embry-Riddle Aeronautical University, Team S1-G1, Cromer Twal Spring 2020
ERAU-CROMER TWAL-S20S1G1
4 членов
Автор 6 руководств
Один комментарий
does this laptop support ddr4 ram? i have looked everywhere and it doesnt give me a clear answer.