Перейти к основному содержанию

ASUS VivoBook S400C Touch Screen + LCD Replacement

Архивированное руководство
Это руководство сохранено для исторических целей. Используйте его обновлённую версию, чтобы выполнить ремонт.

Выберете то, что вам нужно

  1. ASUS VivoBook S400C Touch Screen + LCD Replacement, Remove the Bottom Cover: шаг 1, изображение 1 из 1
    • Flip the device over and remove the ten 5.7 mm screws with a Phillips #0 screwdriver.

  2. ASUS VivoBook S400C Touch Screen + LCD Replacement: шаг 2, изображение 1 из 2 ASUS VivoBook S400C Touch Screen + LCD Replacement: шаг 2, изображение 2 из 2
    • Use a spudger or your fingers to go around and lift the edges and release the back panel.

  3. ASUS VivoBook S400C Touch Screen + LCD Replacement, Disconnect the Battery: шаг 3, изображение 1 из 1
    • Using a spudger, lift up the plug connecting the battery to the motherboard.

  4. ASUS VivoBook S400C Touch Screen + LCD Replacement, Wifi Card: шаг 4, изображение 1 из 2 ASUS VivoBook S400C Touch Screen + LCD Replacement, Wifi Card: шаг 4, изображение 2 из 2
    • Use a spudger to release the cables from the wifi card.

  5. ASUS VivoBook S400C Touch Screen + LCD Replacement: шаг 5, изображение 1 из 1
    • Remove the singular 3.8 mm screw with a Phillips #0 screwdriver.

  6. ASUS VivoBook S400C Touch Screen + LCD Replacement: шаг 6, изображение 1 из 1
    • Pull the wifi card up and out.

  7. ASUS VivoBook S400C Touch Screen + LCD Replacement, Touch Screen + LCD: шаг 7, изображение 1 из 1
    • Lift up the black tape.

  8. ASUS VivoBook S400C Touch Screen + LCD Replacement: шаг 8, изображение 1 из 1
    • Peel the clear tape on the connector and pull the connector out.

  9. ASUS VivoBook S400C Touch Screen + LCD Replacement: шаг 9, изображение 1 из 2 ASUS VivoBook S400C Touch Screen + LCD Replacement: шаг 9, изображение 2 из 2
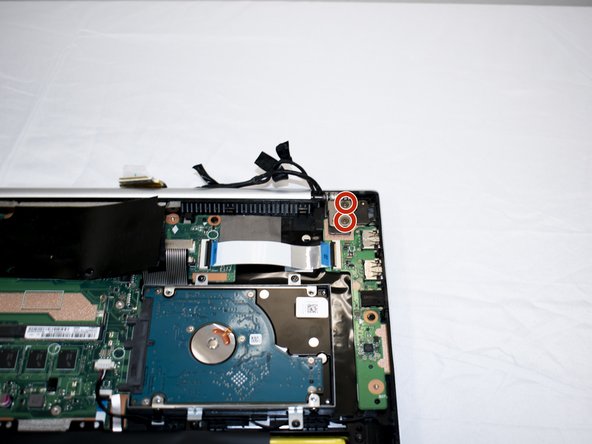
    • Using a Phillips #0 screwdriver, remove the four 6 mm hinge screws.

  10. ASUS VivoBook S400C Touch Screen + LCD Replacement: шаг 10, изображение 1 из 2 ASUS VivoBook S400C Touch Screen + LCD Replacement: шаг 10, изображение 2 из 2
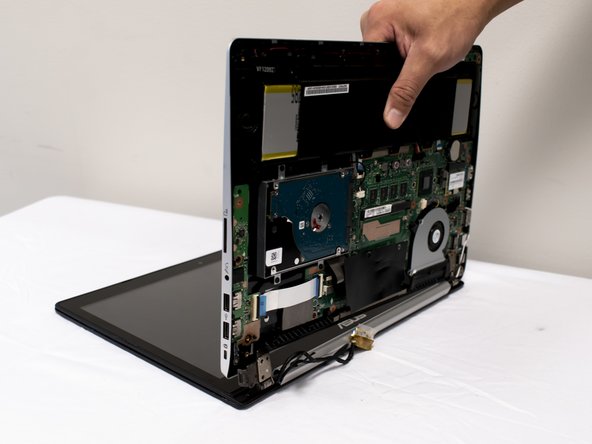
    • Lift the bottom (keyboard) portion of the laptop up holding closely to the hinge. Keep rotating along the hinge until the bottom portion becomes detached.

    • After rotating open to about a 90 degree angle, lift the bottom portion outwards.

  11. ASUS VivoBook S400C Touch Screen + LCD Replacement: шаг 11, изображение 1 из 2 ASUS VivoBook S400C Touch Screen + LCD Replacement: шаг 11, изображение 2 из 2
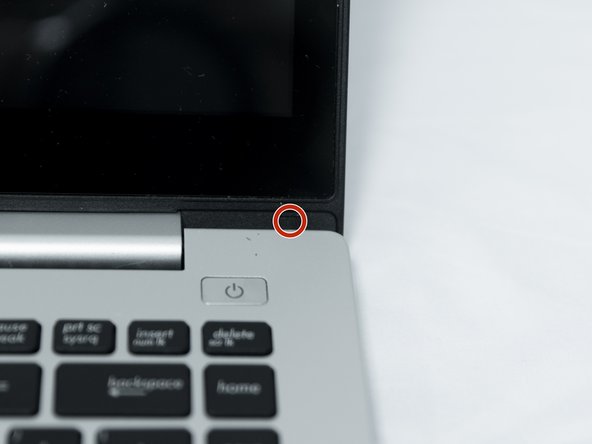
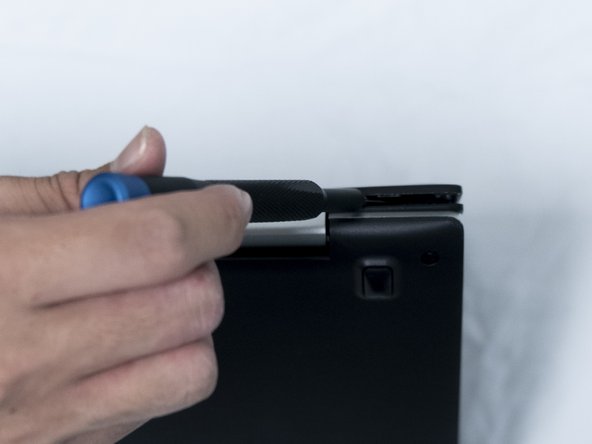
    • Using a #3 flathead screwdriver, pull the black tabs covering the screws.

  12. ASUS VivoBook S400C Touch Screen + LCD Replacement: шаг 12, изображение 1 из 3 ASUS VivoBook S400C Touch Screen + LCD Replacement: шаг 12, изображение 2 из 3 ASUS VivoBook S400C Touch Screen + LCD Replacement: шаг 12, изображение 3 из 3
    • With a Phillips #0 screwdriver, remove the two 3.8 mm screws holding the bezel in place.

  13. ASUS VivoBook S400C Touch Screen + LCD Replacement: шаг 13, изображение 1 из 3 ASUS VivoBook S400C Touch Screen + LCD Replacement: шаг 13, изображение 2 из 3 ASUS VivoBook S400C Touch Screen + LCD Replacement: шаг 13, изображение 3 из 3
    • Use a plastic opening tool to go around the edges and release the bezel panel along the sides, switching to a #3 flathead screwdriver along the bottom edges.

  14. ASUS VivoBook S400C Touch Screen + LCD Replacement: шаг 14, изображение 1 из 1
    • Peel the clear tape on the connector and pull the connector out.

  15. ASUS VivoBook S400C Touch Screen + LCD Replacement: шаг 15, изображение 1 из 1
    • Release the latch and unclip the ribbon cables from the top antenna daughterboard.

    • Gently pull to the right toward the center of the panel and lift it up and out.

  16. ASUS VivoBook S400C Touch Screen + LCD Replacement: шаг 16, изображение 1 из 1
    • Pull out the smaller microphone daughterboard with a spudger.

  17. ASUS VivoBook S400C Touch Screen + LCD Replacement: шаг 17, изображение 1 из 1
    • Remove the camera daughterboard.

  18. ASUS VivoBook S400C Touch Screen + LCD Replacement: шаг 18, изображение 1 из 1
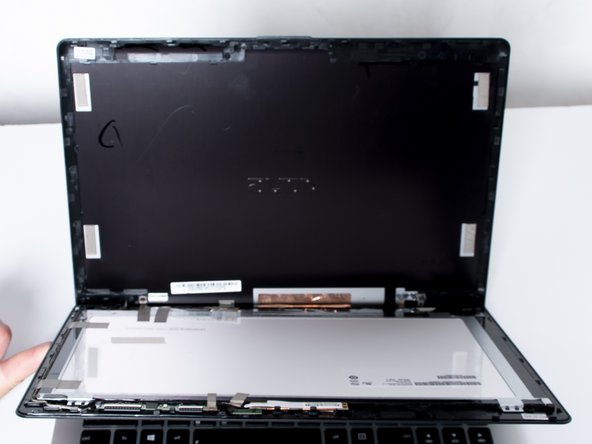
    • Carefully remove the tape and unravel the wiring fixing the daughterboards to the front bezel and remove the bezel from the panel.

Заключение

To reassemble your device, follow these instructions in reverse order.

Еще один человек закончил это руководство.

Ashley Panduro

Участник с: 10/16/19

572 Репутация

Автор 3 руководств

Команда

UC Santa Barbara, Team S4-G4, Bator Fall 2019 Участник UC Santa Barbara, Team S4-G4, Bator Fall 2019

UCSB-BATOR-F19S4G4

3 членов

Автор 4 руководств

3 Комментариев

I would advise you not to use this guide. Specifically, following step 15 will result in damage to your display bezel and/or the display housing. The LCD/touch screen assembly slides down to release it from the latches holding it in place. If you simply pry it apart without sliding it down, you will break the retainers that hold it together.

Jerry Wheeler - Ответить

I found this out the hard way, by following this guide. I'm in the process of rewriting the entire guide with the correct procedure for removing the screen assembly from the housing, which should be done soon. When it's complete, the "In Progress" flag will be removed.

ASUS VivoBook S400C LCD / Touch Screen Assembly Replacement

Jerry Wheeler - Ответить

The new guide is complete. Please, for the sake of your display, use it instead of this one.

ASUS VivoBook S400C LCD / Touch Screen Assembly Replacement

Jerry Wheeler - Ответить

Добавить комментарий

Просмотр статистики:

За последние 24часов: 1

За последние 7 дней: 3

За последние 30 дней: 8

За всё время: 1,130