Введение
This guide will show you how to replace a I/O board in an Asus A53S.
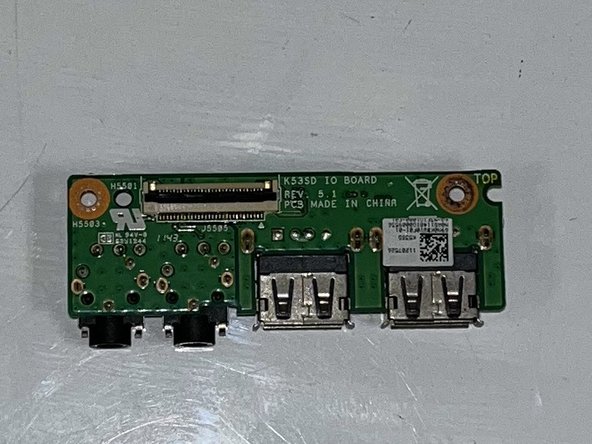
An I/O board allows you to connect a wide range of devices to your laptop.
Before using this guide, make sure to review the troubleshooting page. Most USB-related issues can be solved without removing the I/O board.
Make sure to power off your laptop completely, disconnect from any external power source, and remove the battery before beginning the process.
Выберете то, что вам нужно
-
-
Flip the laptop so the underside is facing up.
-
Using a Phillips #01 screwdriver, unscrew the two 6 mm screws.
-
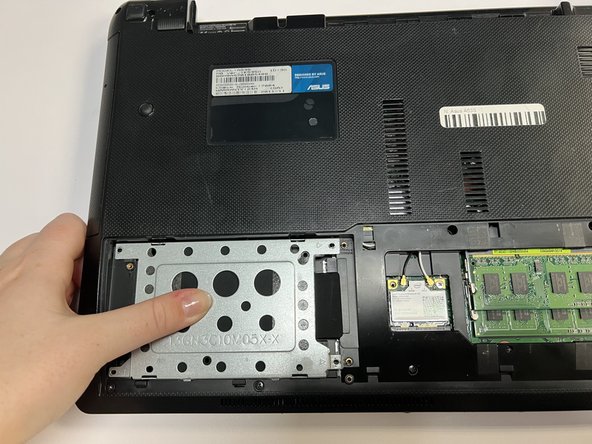
Remove the back plate.
-
-
-
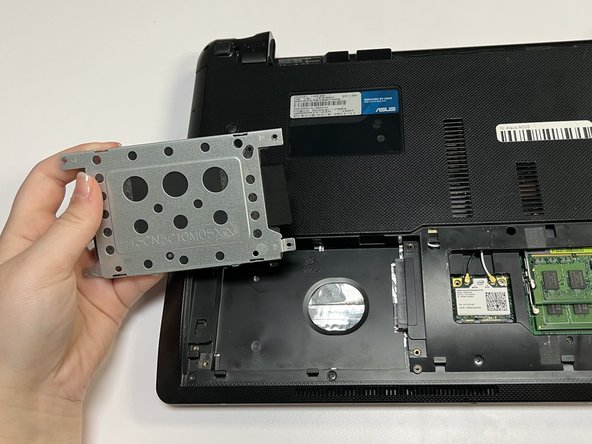
Place the spudger under the white wire and pull it up gently, disconnecting it from the wifi card.
-
Use the same method on the black wire.
-
-
-
Using a Phillips #01 screwdriver, unscrew the fifteen 6 mm screws at the indicated places.
-
-
-
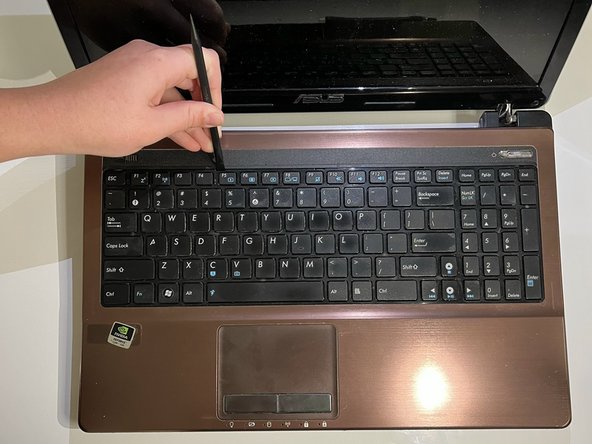
Flip over the laptop and open it.
-
Using the spudger, insert the flat end into the notches at the top of the keyboard and slowly slide and "pop" the keyboard up and out of the device.
-
-
-
-
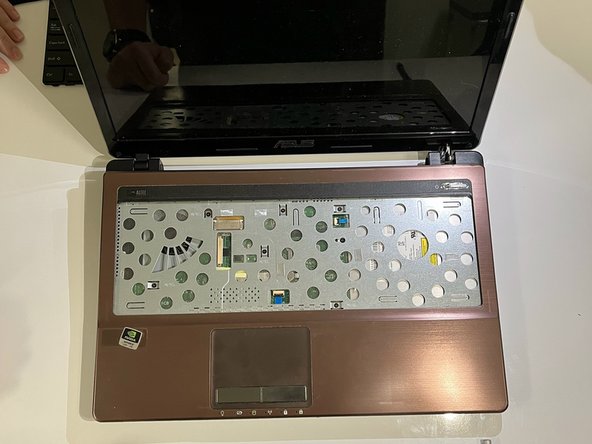
Using the flat end of the spudger, lift the black ZIF connector lock bar and disconnect the keyboard from the computer.
-
Remove the keyboard.
-
-
-
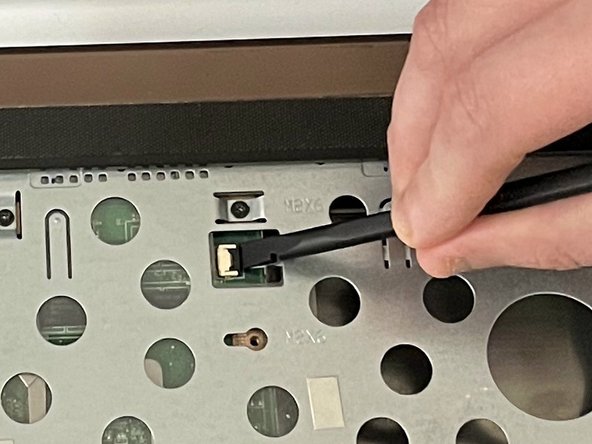
Using the spudger, place the flat end under the ZIF connector lock bar holding the power switch. Push the spudger up and to the left, disconnecting the power switch.
-
Use the same technique on the touchpad to disconnect it.
-
-
-
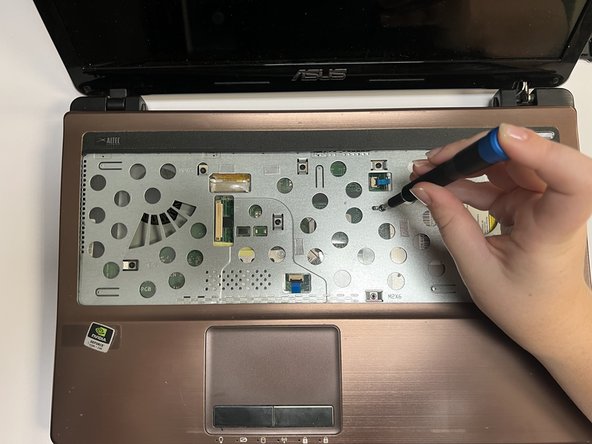
Using a Phillips #01 screwdriver, unscrew the seven 6 mm screws at the indicated places.
-
-
-
Flip the laptop back over so that the bottom is facing up.
-
Use a Phillips #01 screwdriver to unscrew the three 6 mm screws at the indicated places.
-
-
-
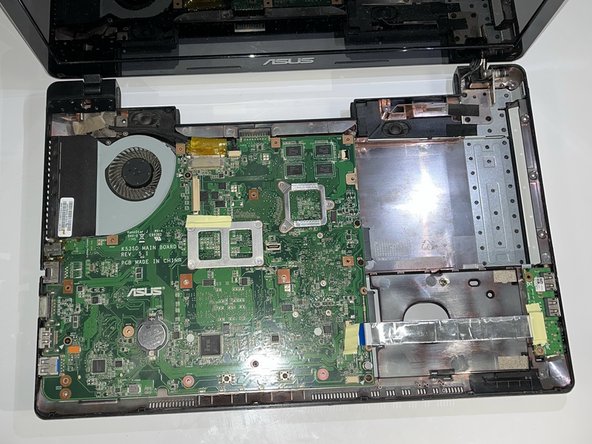
Turn the laptop back over so that you can open it.
-
Gently separate the cover from the laptop by putting an iFixit Opening Tool between the cover and the lower part of the laptop and levering them apart.
-
-
-
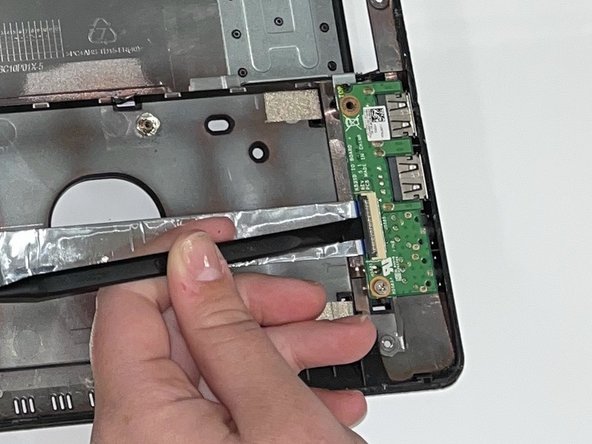
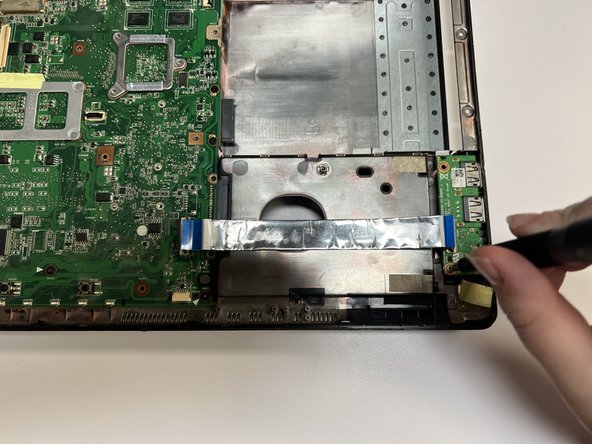
Using the flat end of a spudger, flip up the ZIF connector lock bar, disconnecting the USB board from the mother board.
-
Repeat this technique on the other side of the USB connector.
-
-
-
Using a Phillips #01 screwdriver, unscrew the 5 mm screw at the indicated place.
-
Gently remove the USB board.
-


To reassemble your device, follow these instructions in reverse order.
To reassemble your device, follow these instructions in reverse order.
Отменить: Я не выполнил это руководство.
3 человек успешно провели ремонт по этому руководству.

Команду

University of North Texas, Team 3-1, Saru Jimmy Fall 2022 Участник University of North Texas, Team 3-1, Saru Jimmy Fall 2022
UNT-SARU JIMMY-F22S3G1
4 членов
Автор 6 руководств