Введение
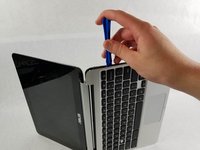
The Asus Chromebook C101P only has one item keeping it from overheating. The heat sink is an L-shaped piece of copper that is attached to the CPU on the motherboard to dissipate heat. It is attached using thermal paste so be sure to have some on hand. Ensure that the Chromebook is fully powered off and not plugged in before removing the heat sink. Also, be sure to wait a few minutes after powering off, as the heat sink may be hot.
Выберете то, что вам нужно
-
-
Flip the Chromebook so that the bottom is facing up.
-
Remove the nine T5 Torx screws.
-
-
-
Remove the four rubber grips on the bottom side of the Chromebook using an opening tool.
-
-
-
-
Reorient the Chromebook so the right side is facing upwards.
-
Wedge an opening tool or spudger between the keyboard (upper case) and the lower case of the bottom portion of the Chromebook.
-
-
Инструмент, используемый на этом этапе:Tweezers$4.99
-
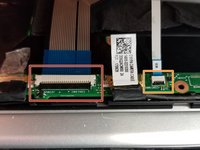
Pull back the black lever on the base of the cable. While pulling back, take your tweezers and pull back on the large ribbon cable.
-
Pull back the black lever on the base of the cable. While pulling back, take your tweezers and pull back on the small ribbon cable.
-
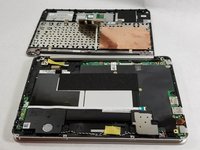
Separate the keyboard from the rest of the laptop.
-
-
Инструмент, используемый на этом этапе:Tweezers$4.99
-
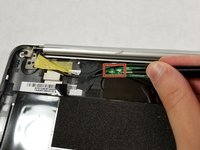
Detach the the screen cables from the motherboard using a pair of tweezers.
-
Peel off the tape or seal to easily remove the screen cables.
-
-
-
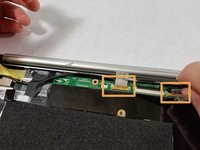
Flip up the black lever on the base of the small white ribbon cable. Remove the cable and set it aside.
-
-
-
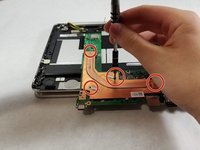
Remove the nine Phillips #0 screws.
-
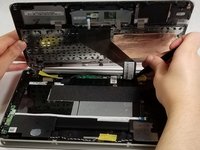
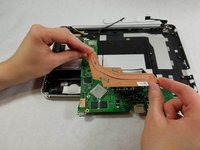
Remove the battery cable if possible. Otherwise, gently flip the motherboard upside down to reveal the heat sink.
-
-
-
Remove the four Phillips #0 screws from the heat sink.
-
Detach the heat sink from the motherboard.
-


To reassemble your device, follow these instructions in reverse order.
To reassemble your device, follow these instructions in reverse order.
Команду

UMass Dartmouth, Team S1-G2, O'Connell Fall 2019 Участник UMass Dartmouth, Team S1-G2, O'Connell Fall 2019
UMASSD-O'CONNELL-F19S1G2
2 членов
Автор 5 руководств