Введение
The keyboard on the top of the laptop connected the motherboard. Before starting the guide, make sure the laptop's charger is not plugged in.
Выберете то, что вам нужно
-
-
Start by placing the laptop upside-down on a flat surface.
-
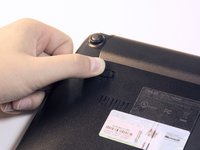
Find the two clips on the back portion of the laptop.
 Спросите у FixBot
-
-
-
Using your finger, push the clip labeled with a "1" on the laptop from the lock position to unlock position.
-
-
-
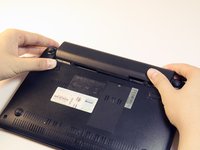
Using your finger, push and hold the pin indicated by a "2" on the laptop from the lock to unlock position.
-
While holding this pin in the unlock position, use your other hand to pull the battery horizontally away from the laptop.
-
-
-
-
Using both hands, pull the battery horizontally away from the laptop.
-
-
-
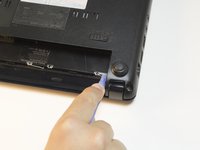
Face the laptop so the 4 silver "clips" along the middle of the battery cartridge are in front of you.
-
-
-
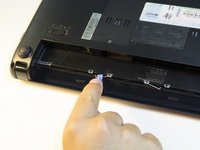
Using the wide opening tool, unhook each clip from its original position by pulling the clip towards you.
-
Repeat for all four of the clips.
-
-
-
Turn the laptop right side up and lift the lid.
-
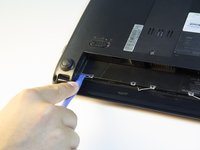
Insert the flat end of the spudger into the small gap between the top of the keyboard and the plastic of the laptop.
-
Using the spudger as leverage, lift the keyboard up from the rest of the laptop.
-
Run the spudger across the seam until the entire top edge is exposed. The two sides of the keyboard should also pop up in this process.
-
-
-
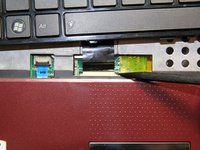
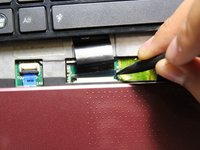
Using the pointed end of the spudger tool, disconnect the ribbon cable that extends from the bottom of the keyboard to the computer by pushing on the connections of the cable.
-
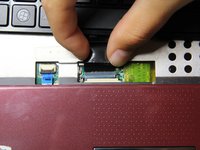
Once the ribbon cable is disconnected, the keyboard can be fully removed by lifting it away from the laptop.
-


To reassemble your device, follow these instructions in reverse order.
Отменить: Я не выполнил это руководство.
4 человек успешно провели ремонт по этому руководству.
Команда

Cal Poly, Team 13-32, Maness Spring 2014 Участник Cal Poly, Team 13-32, Maness Spring 2014
CPSU-MANESS-S14S13G32
5 членов
Автор 5 руководств