Перейти к основному содержанию
Присоединяйся к сообществу ремонтников - Создай аккаунт

Asus X55C CPU Intel Replacement

Выберете то, что вам нужно

Видеообзор

    1. Asus X55C CPU Intel Replacement, Keyboard: шаг 1, изображение 1 из 1
      • Switch off the laptop and remove the battery.

      Спросите у FixBot

      Добавить комментарий

    2. Asus X55C CPU Intel Replacement: шаг 2, изображение 1 из 3 Asus X55C CPU Intel Replacement: шаг 2, изображение 2 из 3 Asus X55C CPU Intel Replacement: шаг 2, изображение 3 из 3
      • The Keyboard is held by 5x locking clips.

      • Pick up a little the one side of the Keyboard and start opening the clips one by one.

      • Disconnect the Keyboard flex cable from the mother board and remove the KB.

      • Please SUBSCRIBE to my channel ツ

      Спросите у FixBot

      Добавить комментарий

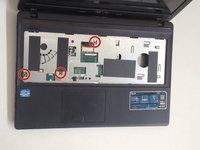
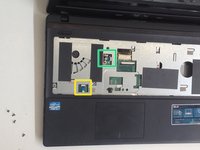
    1. Asus X55C CPU Intel Replacement, Motherboard: шаг 3, изображение 1 из 2 Asus X55C CPU Intel Replacement, Motherboard: шаг 3, изображение 2 из 2
      • Remove 3x Philips screws.

      • Disconnect the two small flex cables:

      • Power On button flex cable

      • Touch pad flex cable

      Спросите у FixBot
      Добавить комментарий

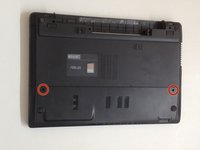
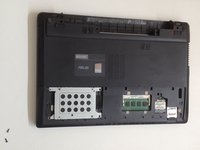
    2. Asus X55C CPU Intel Replacement: шаг 4, изображение 1 из 3 Asus X55C CPU Intel Replacement: шаг 4, изображение 2 из 3 Asus X55C CPU Intel Replacement: шаг 4, изображение 3 из 3
      • Unscrew the two Philips screws and remove the HDD / RAM Cover.

      • Remove three screws securing the hard drive caddy (hard drive assembly).

      • Slide the hard drive assembly to the left to disconnect it from the motherboard.

      Спросите у FixBot
      Добавить комментарий

    3. Asus X55C CPU Intel Replacement: шаг 5, изображение 1 из 2 Asus X55C CPU Intel Replacement: шаг 5, изображение 2 из 2
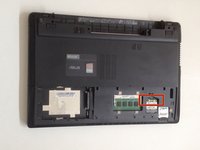
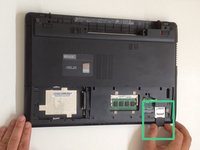
      • Disconnect the two coaxial antenna cables from the Wi-Fi card.

      • Remove any Memory or Dummy card.

      Спросите у FixBot
      Добавить комментарий

    4. Asus X55C CPU Intel Replacement: шаг 6, изображение 1 из 3 Asus X55C CPU Intel Replacement: шаг 6, изображение 2 из 3 Asus X55C CPU Intel Replacement: шаг 6, изображение 3 из 3
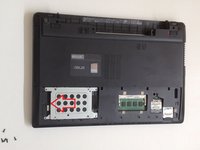
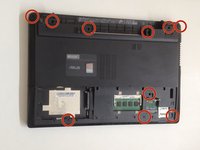
      • The bottom cover is held by 10x Phillips screws. Remove them.

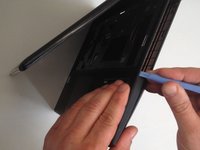
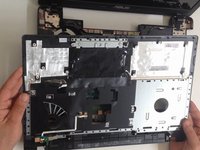
      • With a plastic tool separate the Upper cover and remove it.

      Спросите у FixBot

      Добавить комментарий

    5. Asus X55C CPU Intel Replacement: шаг 7, изображение 1 из 3 Asus X55C CPU Intel Replacement: шаг 7, изображение 2 из 3 Asus X55C CPU Intel Replacement: шаг 7, изображение 3 из 3
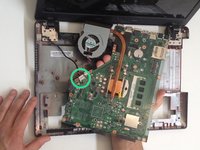
      • Disconnect:

      • The Microphone cable

      • The LCD Display flex cable

      • Remove 3x Pillips screws.

      • Lift the board first from the right edge.

      • There is another one cable, from the DC connector, connected to the underside of main board. We should spun the the board to disconnect the DC connector cable.

      Спросите у FixBot

      Добавить комментарий

    6. Asus X55C CPU Intel Replacement: шаг 8, изображение 1 из 2 Asus X55C CPU Intel Replacement: шаг 8, изображение 2 из 2
      Спросите у FixBot

      Добавить комментарий

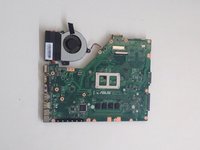
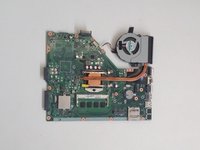
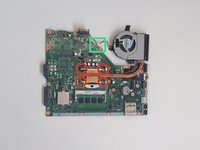
    1. Asus X55C CPU Intel Replacement, CPU Intel: шаг 9, изображение 1 из 3 Asus X55C CPU Intel Replacement, CPU Intel: шаг 9, изображение 2 из 3 Asus X55C CPU Intel Replacement, CPU Intel: шаг 9, изображение 3 из 3
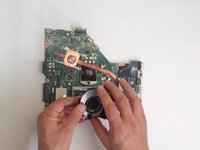
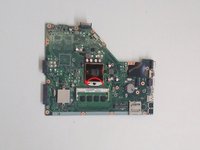
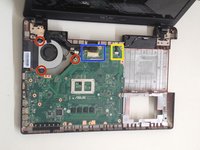
      • Disconnect the Fan cable from the Motherboard.

      • Remove the screws (4x Phillips screws) that hold the cooling system to the Motherboard

      • Remove the Cooling System.

      Спросите у FixBot
      Добавить комментарий

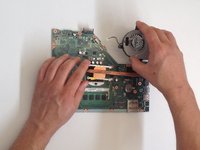
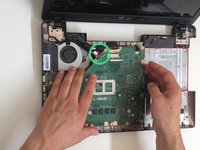
    2. Asus X55C CPU Intel Replacement: шаг 10, изображение 1 из 3 Asus X55C CPU Intel Replacement: шаг 10, изображение 2 из 3 Asus X55C CPU Intel Replacement: шаг 10, изображение 3 из 3
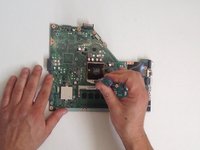
      • Counter clockwise release the screw securing the CPU using a flat head screwdriver.

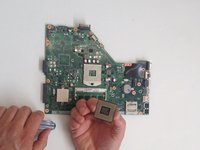
      • Guideline, lift with equal pressure on two sides of the processor chip to avoid bending any of the pins.

      • Intel Core i3-2370M

      • Before installing the new CPU, clean the Cooling system and put new thermal compound / paste.

      Спросите у FixBot
      Добавить комментарий

Заключение

To reassemble your device, follow these instructions in reverse order.

Отменить: Я не выполнил это руководство.

4 человек успешно провели ремонт по этому руководству.

ZFix

Участник с: 12/09/13

197 378 Репутация

Автор 330 руководств

Команда

Master Techs Участник Master Techs

Community

334 членов

Автор 3 973 руководств

5 Комментарии к руководству

In step 3 my computer had an extra screw for the DVD drive. So make sure your not trying to pry it open with the screw in like i did.

bill cool - Ответить Поделиться

Hi there!… I have an old Asus X550CL laptop with an I3 processor. So you know if it’s upgradeable to an I7?

Best Regards!

angelo.cesar79 - Ответить Поделиться

I’ve the same laptop. Were you able to upgrade it?

Manish - Ответить Поделиться

Hi, someone let me know if I can upgrade a Asus X55VD's processor from B980 to i7 2670QM.

Or what to take into account? Power usage? Should I only get an i5?

Thanks in advance

Robert Indries - Ответить Поделиться

Hi there what about the shutdown every 30min exactly

SAINTE-COLOMBE Vonjy - Ответить Поделиться

Добавить комментарий

Статистика просмотров:

За последние 24 часов: 0

За последние 7 дней: 8

За последние 30 дней: 43

За всё время: 6,638