Введение
Direct access to the print mechanism is limited, whether you need to investigate a fault or clear a particularly severe paper jam. Removal of the scanner unit makes it much easier, and is a prerequisite to further disassembly.
Ribbon cables are all of the push fit type. Pull gently but firmly to disengage from the socket. To reconnect, simply push the reinforced end of the ribbon firmly into the socket, making sure it's the correct way round.
Выберете то, что вам нужно
-
-
You may wish to remove the ink cartridges if you are planning a radical disassembly, though this is not necessary for the purposes of this guide. Follow the instructions in the User Manual, and place them in a polythene bag, both to prevent them drying out and to avoid ink stains on your work surface or clothes.
-
Switch off the printer if it's on, by pressing the power button and waiting for the power light to stop flashing. Now unplug the power cable and USB lead (if connected).
-
Lift the scanner lid as far as it will go. Squeeze the finger in the centre of each hinge in order to detach it.
 Спросите у FixBot
-
-
-
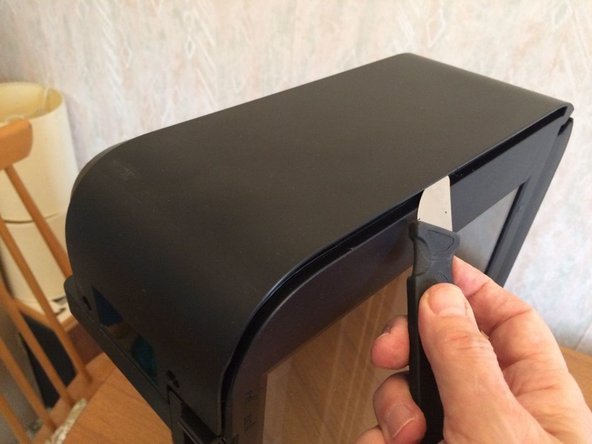
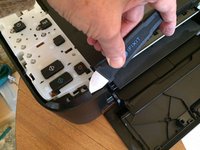
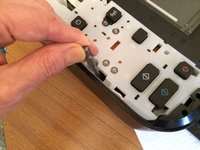
Using a jimmy (or similar tool), release the clips around the edge of the control panel cover, then lift off the cover.
-
-
-
Remove 2 cross head screws from each side of the back of the printer.
-
-
-
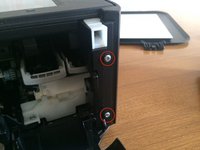
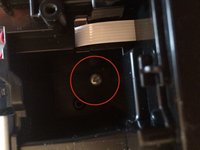
Remove 2 cross head screws from the front of the printer on the right hand side.
-
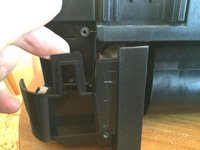
Standing the printer on its left hand side, unclip the right side panel, first along the top edge and then at the back. It should now come away completely.
-
-
-
-
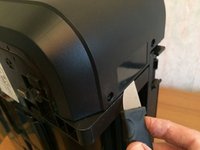
Unclip the rear of the left side panel.
-
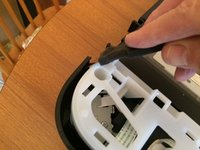
Unclip the front of the left side panel.
-
The side panel is still retained by a hidden clip beneath a rectangular hole near the edge of the control panel. Release it by pressing down on it with a flat screwdriver blade. The left panel should now come away.
-
-
-
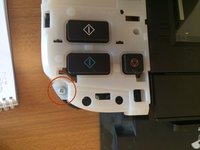
Remove a screw from the front left hand corner of the control panel.
-
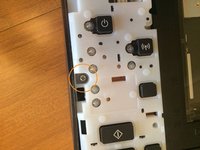
Remove a screw from the middle of the left hand side of the control panel.
-
Remove a screw from the rear of the control panel.
-
-
-
Lift off the control panel, taking care not to strain the ribbon cable, still attached.
-
Disconnect the ribbon cable.
-
-
-
Disconnect the WiFi module ribbon from the main logic board,
-
Remove the screw holding the WiFi module bracket in place and remove the bracket and module together.
-
-
-
Disconnect a wide ribbon cable from the top of the logic board.
-
Disconnect a narrow folded ribbon from the bottom left hand corner.
-
(The connector with 2 red wires on the left hand side of the logic board does not need to be disconnected.)
-
-
-
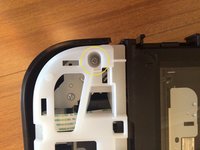
Remove the screw at the top left of the glass pane
-
Remove the screw at the bottom left of the glass pane
-
Then gently lift the 2 tabs of the screws you just removed, and slide the whole glass pane by about 1/4inch (5 mm) to the left
-
(Note: Avoid any dust inside the scanner unit.)
-
You can stop here if you're not interested in the printer part, or put back the glass pane and go on.
-
-
-
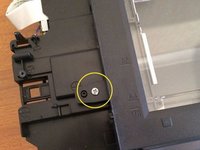
Remove a screw from the well that housed the WiFi module.
-
Remove the screw from the front left of the device.
-
-
-
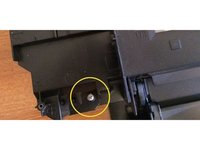
Remove a screw from the front right hand side.
-
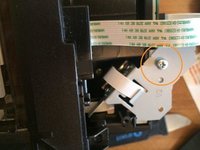
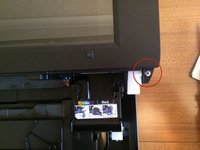
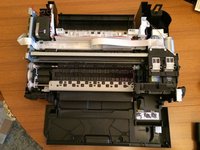
Release a catch on the rear left hand side of the device (as seen from the rear) and lift the scanner unit off.
-
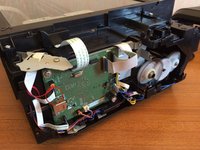
You will now be able to see the print mechanism much more easily and proceed with any further disassembly that might be needed.
-


To reassemble your device, follow these instructions in reverse order.
Отменить: Я не выполнил это руководство.
50 человек успешно провели ремонт по этому руководству.

Команда

18 Комментарии к руководству
Very good description. I need to empty my ink collection tank/tray. Once I have removed the scanner assembly as you describe, will I then gain access to theis container? Thanks.
See link to YouTube video below. You need long tweezers and be careful when replacing the pads as they can drop into the mechanism easily .. which is why I found this tutorial on how to dismantle the printer!
Hi. Where inside the printer to look in order to clear the error 5b02_ Thank you!
Hi, how can i clean my ink tank to clear the 5B02 error code? Thank you
Habe schön zerlegt, werde sicher zusammenbauen, wollte aber noch wissen warum das Papier im rechten Drittelbereich zerrissen wird.
Muß noch versuchen den Papiereinzug zu putzen bzw. den Fehler zu beheben.
Joksi