Выберете то, что вам нужно
-
-
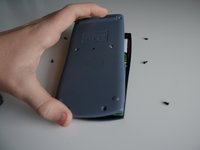
This is the calculator in question.
-
Features a black and white dot matrix screen.
-
-
-
Turn the calculator over.
-
Locate the six screws on the rear of the device.
-
These are Philips #00 screws.
-
-
-
-
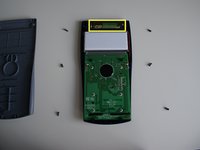
Once the screws are removed, carefully lift the back panel off, lifting the top end first.
-
Place the panel to one side.
-
You can now see the battery.
-
-
-
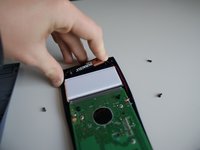
Now you can insert the new battery
-
Ensure you place it in spring-first.
-
Congratulations! You have replaced the battery.
-
When reassembling, take care not to trap the red or black wires in the screws as this would sever them, making the calculator unusable.
-


To reassemble your device, follow these instructions in reverse order, noting the two reassembly instructions in the last step.
Отменить: Я не выполнил это руководство.
26 человек успешно провели ремонт по этому руководству.
3 Комментарии к руководству
For some reason the two top screws made the calculator unstable, but removing them made it stable. Only occurred after removing the battery