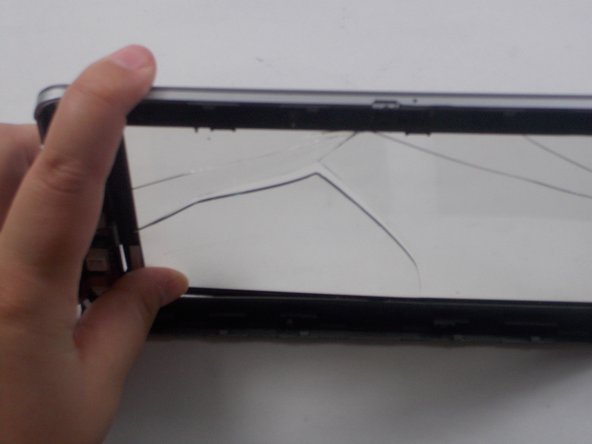
Перейти к основному содержанию

Coby KYROS MID7125 Screen Replacement

Выберете то, что вам нужно

  1. Coby KYROS MID7125 Screen Replacement, Screen: шаг 1, изображение 1 из 1
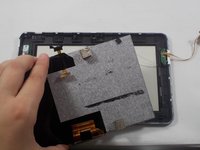
    • Use iFixit plastic opening tool to make small opening in the side of the device, and continue opening back panel.

  2. Coby KYROS MID7125 Screen Replacement: шаг 2, изображение 1 из 3 Coby KYROS MID7125 Screen Replacement: шаг 2, изображение 2 из 3 Coby KYROS MID7125 Screen Replacement: шаг 2, изображение 3 из 3
    • There are 5 ribbon cables connected to the motherboard. Two of these cables are clipped on and one is soldered on. Remove the 4 ribbon cables you can clip off using the plastic spudger.

    • For large ribbon cable use plastic spudger or your fingers to release ribbon cable clip by pulling the black edges down and pulling ribbon cable out.

    • For ribbon cable on the left side, flip up black hinge to remove ribbon cable

    • Desolder fifth ribbon cable with soldering station.

    • If soldering is new for you, then follow this useful guide on soldering and desoldering connections.

  3. Coby KYROS MID7125 Screen Replacement: шаг 3, изображение 1 из 3 Coby KYROS MID7125 Screen Replacement: шаг 3, изображение 2 из 3 Coby KYROS MID7125 Screen Replacement: шаг 3, изображение 3 из 3
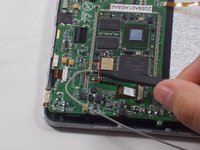
    • Desolder 2 speaker wires

    • Desolder Battery

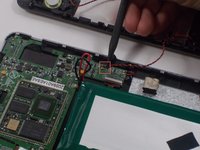
    • Desolder antenna wire

    • Disconnect all wires you desoldered

  4. Coby KYROS MID7125 Screen Replacement: шаг 4, изображение 1 из 1
    • Desolder the microphone wire

    • Disconnect the wires you just desoldered.

  5. Coby KYROS MID7125 Screen Replacement: шаг 5, изображение 1 из 1
    • Remove 4 screws that connect the motherboard to the device.

  6. Coby KYROS MID7125 Screen Replacement: шаг 6, изображение 1 из 1
    • Take off motherboard by lifting off right hand side and pulling sideways.

  7. Coby KYROS MID7125 Screen Replacement: шаг 7, изображение 1 из 2 Coby KYROS MID7125 Screen Replacement: шаг 7, изображение 2 из 2
    • Remove 4 screws on corners of the digitizer and lift off.

  8. Coby KYROS MID7125 Screen Replacement: шаг 8, изображение 1 из 2 Coby KYROS MID7125 Screen Replacement: шаг 8, изображение 2 из 2
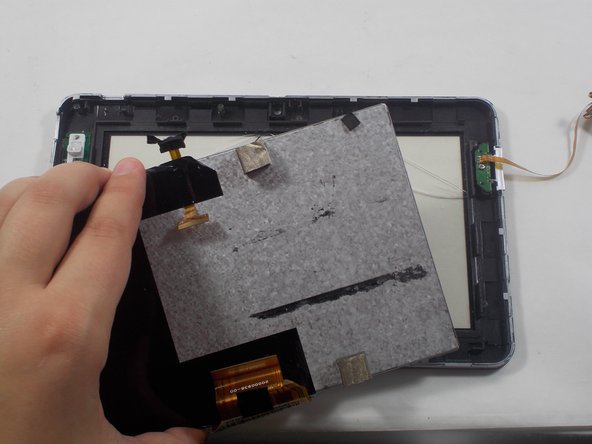
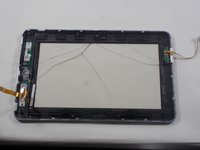
    • Now that the digitizer is disconnected from the screen you can replace the screen.

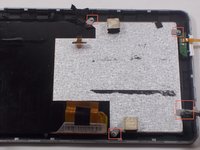
    • Place the screen face down in front of you facing downward and apply pressure with your thumbs around the outside of the glass to remove the screen.

    • Next, replace with your new screen and follow steps in reverse order to reassemble.

Заключение

To reassemble your device, follow these instructions in reverse order.

Nicole Connelly

Участник с: 10/20/16

1 Репутация

Автор 3 руководств

Команда

UMass Dartmouth, Team 5-2, Martin Fall 2016 Участник UMass Dartmouth, Team 5-2, Martin Fall 2016

UMASSD-MARTIN-F16S5G2

3 членов

Автор 10 руководств

0 Комментариев

Добавить комментарий

Просмотр статистики:

За последние 24часов: 0

За последние 7 дней: 0

За последние 30 дней: 0

За всё время: 211