Введение
While many repairs can be accomplished without soldering, there are times when it's necessary to replace soldered-down components, e.g., joysticks, headphone batteries, and rumble motors. Learning how to solder opens up a new world of fun electronics projects. It may sound intimidating, but it's easy to get started!
This guide will demonstrate basic soldering skills as well as specific instructions for the following:
Выберете то, что вам нужно
-
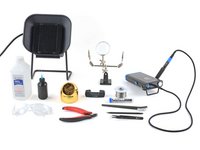
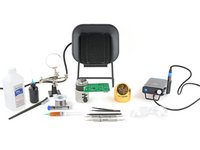
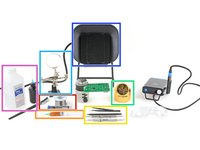
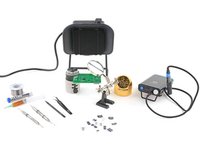
Инструмент, используемый на этом этапе:Helping Hands$9.99
-
A vise, clamp, or "helping hands" tool. If you're joining two wires, our Soldering Splint is a great tool.
-
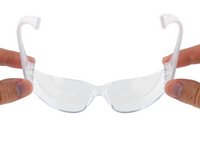
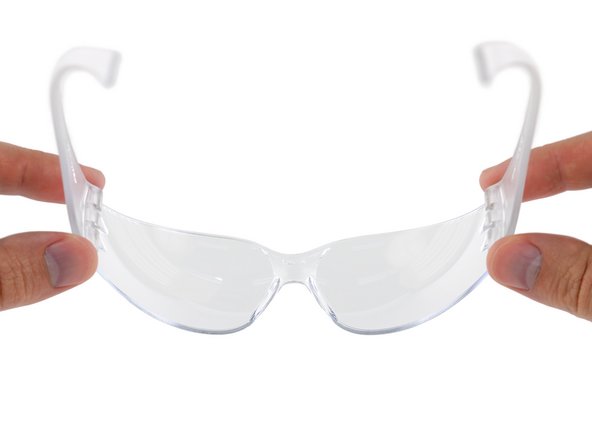
A pair of safety glasses (eyeglasses will protect your eyes, but solder spatter will damage the glasses).
-
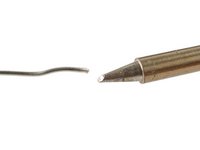
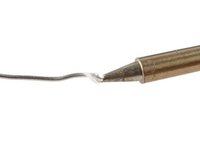
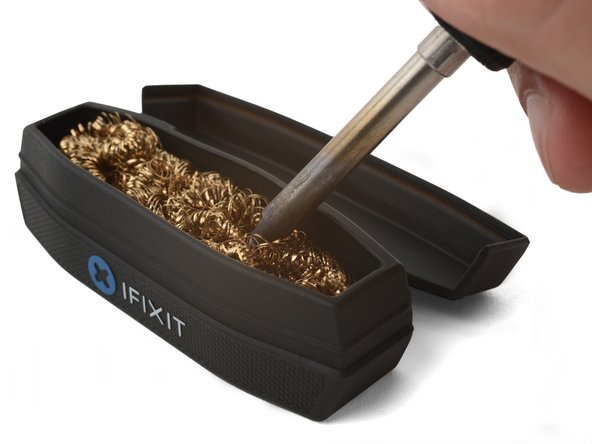
A tip cleaning tool (wet sponge or brass wire)
-
A fume extractor (if you're working indoors)
-
High concentration (>90%) isopropyl alcohol and a soft bristle brush (like a toothbrush)
-
A spudger, tweezers, and flush cutters
-
-
Инструмент, используемый на этом этапе:FixHub | Power Series Portable Soldering Station$249.95
-
Set up your tools in a well-lit area, away from anything flammable.
-
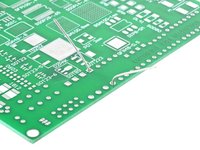
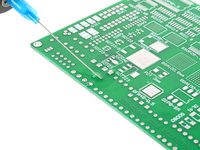
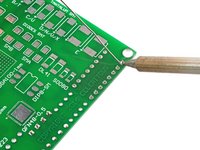
Secure the circuit board with a vise or a "helping hands" tool. Angle the board such that you can easily access the solder pads.
-
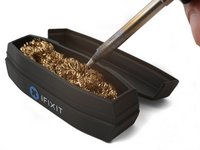
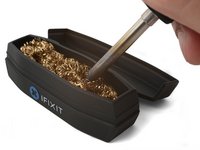
Place the fume extractor close to the project so it'll catch the solder fumes.
-
Wear your safety goggles.
-
-
-
Thread the component leads through the circuit board holes. Most components should lie flat, close to the board.
-
-
-
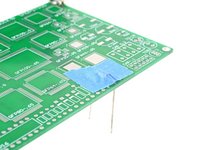
Bend the leads out slightly to help keep the component in place. Alternatively, you can use painter's tape to secure the component.
-
-
Инструмент, используемый на этом этапе:FixHub | Power Series Smart Soldering Iron$79.95
-
Turn on your soldering iron. If your soldering iron has temperature control:
-
Set it to 300 °C (~570 °F) if you're using leaded solder
-
Set it to 375 °C (~700 °F) if you're using lead-free solder
-
Clean the tip of your soldering iron. If you're using a sponge, wet the sponge and quickly wipe the tip across it. If you're using brass wire, stab the tip into the wire a few times.
-
-
Инструмент, используемый на этом этапе:Tack Flux SMD291 no clean 5cc ROHS$13.99
-
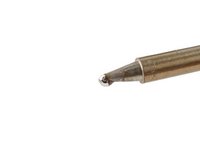
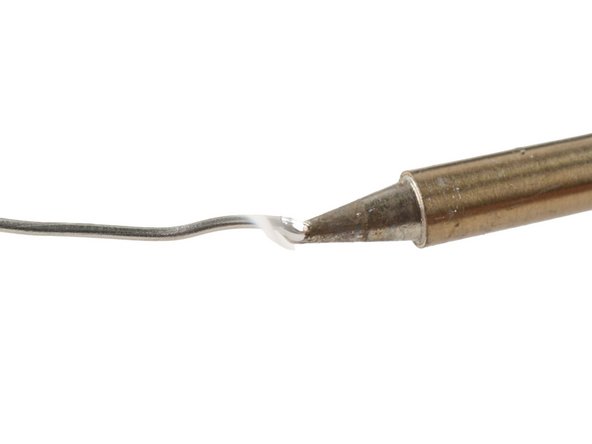
Melt a small glob of solder onto the tip of the iron. This is called "tinning the tip" and will help with heat transfer.
-
-
-
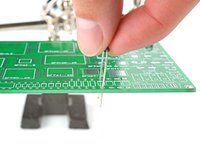
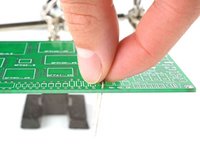
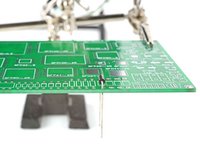
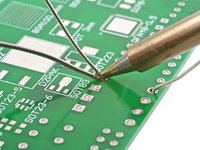
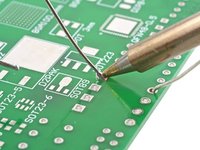
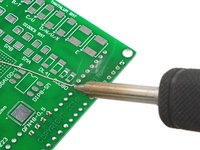
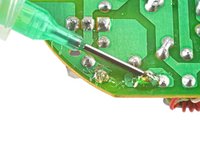
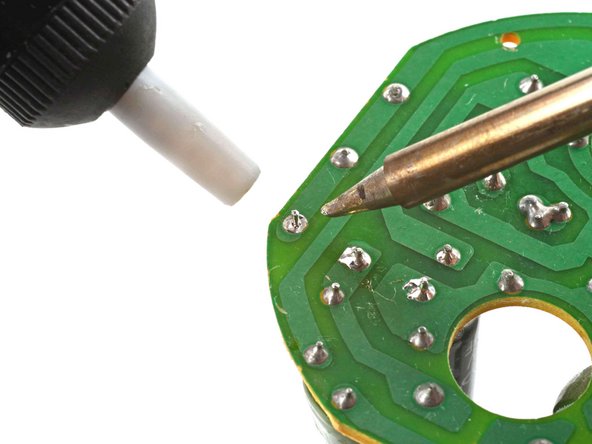
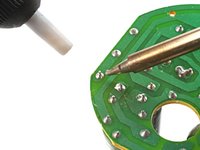
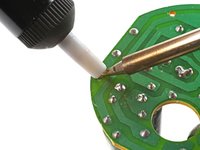
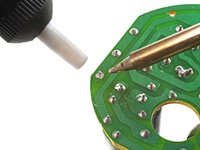
Press the tip against the circuit board's solder pad and the component lead for about 1 second to heat them both. Angle the tip so it has maximum contact with the pad and lead.
-
Feed the solder wire into the heated area until there's a concave pool of solder surrounding the lead.
-
Remove the solder wire, then remove the soldering iron from the solder pad.
-
-
-
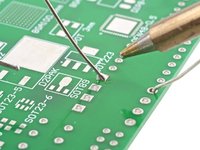
Congratulations—you've created a solder joint! Inspect the joint to see if it formed correctly:
-
Leaded solder joints should look like a shiny, concave tent surrounding the entire lead.
-
Lead-free solder joints should look like a concave tent surrounding the entire lead. They may be shiny or dull.
-
-
-
-
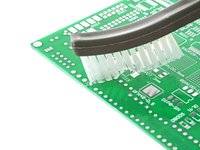
Apply some isopropyl alcohol to the solder joints and scrub the area with a soft-bristled brush to remove any flux residue.
-
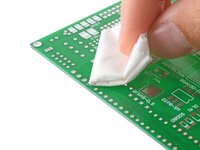
Wipe the solder joint with a lint-free cloth to soak up the flux and alcohol residue.
-
-
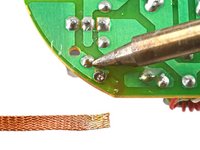
Инструмент, используемый на этом этапе:Solder Wick Braid$4.99
-
Solder wick (aka desoldering braid) and/or a desoldering pump.
-
A spudger, tweezers, and/or pliers (to help loosen stubborn components)
-
-
-
Secure the circuit board with a vise or a "helping hands" tool. Angle the board such that you can easily access the solder pads. Wear safety goggles.
-
If possible, use a tip with the largest surface area that can still fit between the solder joint.
-
Turn on your soldering iron. If your soldering iron has temperature control:
-
Set it to 350 °C (~650 °F) if you're using leaded solder
-
Set it to 375 °C (~700 °F) if you're using lead-free solder
-
-
-
Clean the tip of your soldering iron. If you're using a sponge, wet the sponge and quickly wipe the tip across it. If you're using brass wire, stab the tip into the wire a few times.
-
Melt a small glob of solder onto the tip. This will help with heat transfer.
-
-
Инструмент, используемый на этом этапе:Tack Flux SMD291 no clean 5cc ROHS$13.99
-
Apply a bead of flux to the solder joint.
-
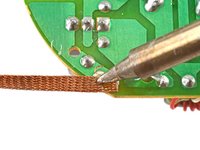
Place a clean portion of the solder wick on top of the solder joint.
-
Press the soldering iron tip firmly against the wick for 2-3 seconds. You're trying to heat the wick hot enough so that it melts the solder underneath it.
-
As the solder saturates the wick, slide the wick so that a new portion touches the joint. You'll know it's saturated when the wick's color changes from copper to silver.
-
Once most of the solder has soaked into the wick, lift the wick and tip away together from the joint.
-
-
-
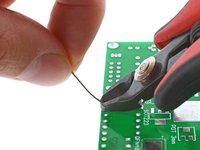
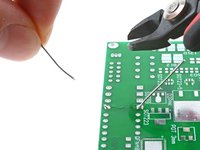
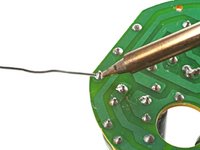
Use tweezers to grip the component and remove it.
-
Use flush cutters to remove your used wick.
-
-
-
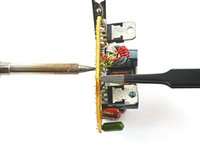
Depress the desoldering pump plunger until it locks in place.
-
-
-
Press the soldering iron tip against the solder joint.
-
Once the solder melts, position the pump nozzle as close to the molten solder as possible without touching the tip.
-
Press the side button to activate the pump and suck up the molten solder.
-
-
Инструмент, используемый на этом этапе:ChipQuik SMD Removal Kit$17.99
-
Инструмент, используемый на этом этапе:Solder Leaded 63/37 Rosin Core$19.99
-
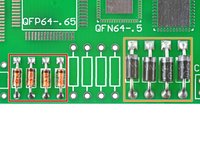
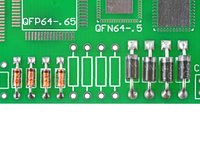
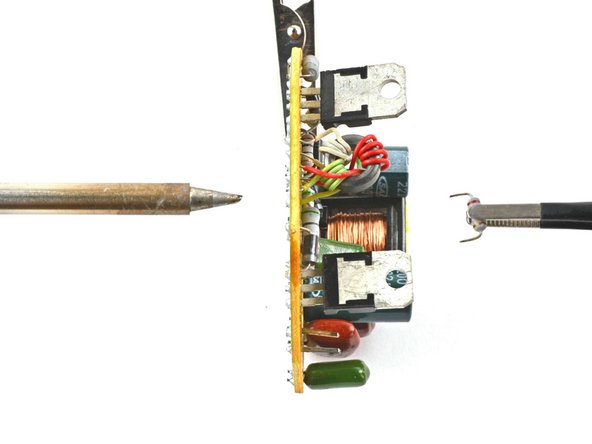
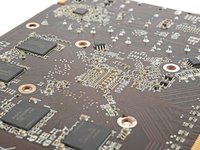
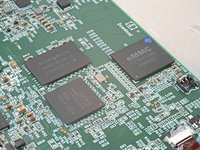
The next 6 steps will show you how to solder surface-mount components onto a circuit board. You'll need a fine-tipped soldering iron in addition to the following:
-
A tip cleaning tool (wet sponge or brass wire)
-
A magnifying glass or lens
-
A fume extractor (if you're working indoors)
-
High concentration (>90%) isopropyl alcohol and a soft bristle brush (like a toothbrush)
-
-
Инструмент, используемый на этом этапе:Omnivise Board Holder Hakko C1390C$64.99
-
Set up your tools in a well-lit area, away from anything flammable.
-
Set the circuit board on a flat, non-flammable, heat-resistant surface or secure it with helping hands or a PCB vise.
-
Place the fume extractor close to the project so that it'll catch the solder fumes.
-
Wear your safety goggles.
-
-
-
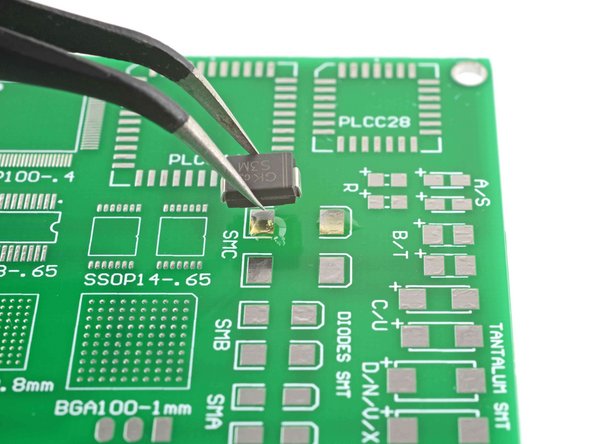
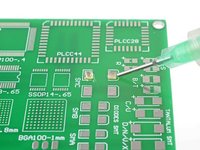
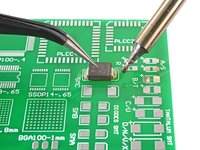
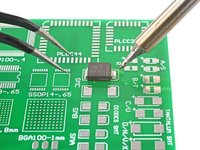
Apply a small bead of flux onto each solder pad.
-
Use tweezers and picks to carefully maneuver your component so that it straddles between the solder pads.
-
-
-
Turn on your soldering iron. If your soldering iron has temperature control:
-
Set it to 350 °C (~650 °F) if you're using leaded solder
-
Set it to 400 °C (~750 °F) if you're using lead-free solder
-
Clean the tip of your soldering iron. If you're using a sponge, wet the sponge and quickly wipe the tip across it. If you're using brass wire, stab the tip into the wire a few times.
-
If you're not using solder paste, melt a small amount of solder onto the tip. You'll transfer this solder onto the joint.
-
-
-
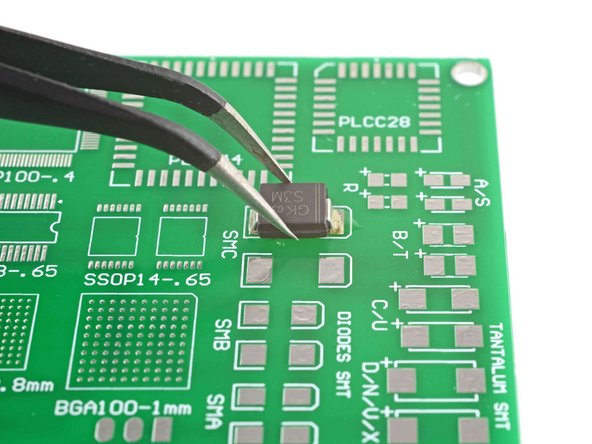
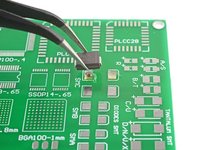
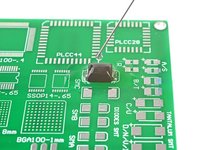
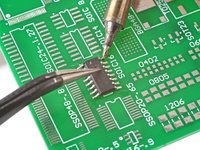
Carefully press a tweezer point or the tip of a spudger on top of the component to hold it in place.
-
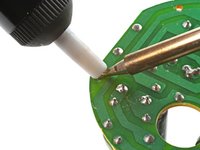
Touch the soldering iron tip to the solder pad and the component. Once the pad heats up, it will draw the molten solder onto itself.
-
Remove the tip from the solder joint.
-
Repeat this process for the rest of the component leads.
-
-
-
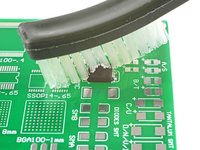
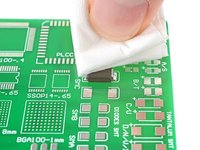
Apply some isopropyl alcohol to the solder joints and scrub the area with a soft bristled brush to remove any flux residue.
-
Wipe the solder joint with a lint-free cloth to soak up the flux and alcohol residue.
-
-
Инструмент, используемый на этом этапе:Polyimide Tape$9.99
-
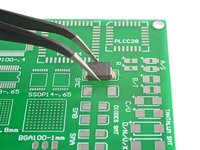
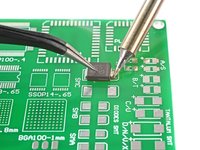
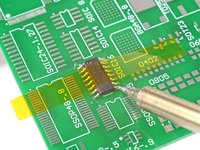
Hold the component in place and solder the corner leads to secure it in place.
-
Alternatively, you can secure the component to the board using polyimide tape and then solder the corner leads.
-


Congratulations on completing this introductory soldering guide! You've taken the first step toward mastering a valuable and versatile skill. With the basics under your belt, you're well-equipped to tackle various electronics projects and repairs. Remember, practice makes perfect, so don't hesitate to experiment and refine your techniques.
For more soldering information, click here.
Отменить: Я не выполнил это руководство.
485 человек успешно провели ремонт по этому руководству.

Команда

36 Комментарии к руководству
TIP: Another method which works well for clearing solder from holes (especially on repairs like AC Jacks on laptops) is to use compressed air to clear melted solder from holes. A quick blast with a duster can works well (I have even used a drink straw in a pinch and blown out with a blast of air from mouth). Heat the solder until it liquefies, put the duster straw right above the solder and quickly hit the melted solder with an air blast to instantly clear the hole of solder. This works well on very small holes as melted solder does not always push out cleanly with metal tools. You have to be quick with the air blast because the solder re-hardens rapidly.
just be careful doing this lol, flying molten solder can and will burn you or other components.
Logixal -
Flying solder might also get into places you don't want it. Making shorts and other unwanted connections of which you don't know where they are, so it can give you a very hard time finding them.
This is not IPC standards but for the ghetto approach, it will get the job done. I solder in manufacture settings, run my own shop. This is wrong to a degree but will do. If ifixit would like tips from ILLFIXIT then your more then welcome!