Введение
This guide will show the user how to replace a cracked, broken, or damaged base panel on the Dell Alienware 13 laptop.
Выберете то, что вам нужно
-
-
-
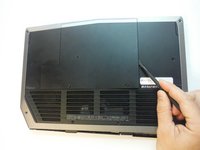
Remove (2) 5 mm Phillips head screws attaching the small access panel to the base using a Phillips # 1 screwdriver.
-
-
Инструмент, используемый на этом этапе:Heavy-Duty Spudger$4.99
-
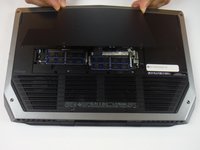
Remove the small access panel using a heavy duty spudger.
-


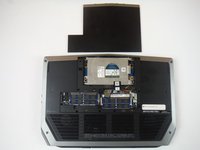
To reassemble your device, follow these instructions in reverse order.
Отменить: Я не выполнил это руководство.
2 человек успешно провели ремонт по этому руководству.

Команда

USF Tampa, Team 14-2, Eyestone Fall 2016 Участник USF Tampa, Team 14-2, Eyestone Fall 2016
USFT-EYESTONE-F16S14G2
3 членов
Автор 7 руководств