Введение
This guide will aid you in replacing your Dell Chromebook 5190 WLAN card.
The Dell Chromebook 5190 was released alongside its sister model Dell Chromebook 5190 2-in-1. This guide will focus on the 5190 model that lacks a touchscreen.
If your laptop is having trouble or failing to connect Wi-fi, the WLAN card may be the issue. Make sure to check the troubleshooting page first. If the same problem persists, then you will need to replace the WLAN card.
Выберете то, что вам нужно
-
-
Remove the nine M2.5x7.5 screws located on the bottom side of the laptop.
-
-
-
With the opening tool, pry open the upper left corner by the laptop hinge.
-
With the opening tool, pry open the upper right corner by the laptop hinge.
-
Lift off base cover.
-
-
-
Unscrew and remove the M2x3 screw holding the silver metal brackets labeled "Battery Bracket" located on the top left side of the battery.
-
Unscrew and remove the M2x3 screw holding the silver metal brackets labeled "Battery Bracket" located on the top right side of the battery.
-
-
-
-
Remove the clear adhesive tape on the system board from the battery cable from where it's seated above the battery.
-
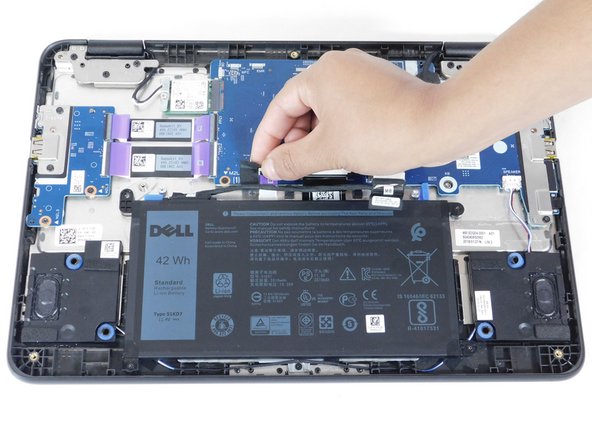
Pull out the keyboard cable toward you to disconnect it.
-
-
-
Remove the black adhesive tape on the system board from the battery cable.
-
Dismount the cable from where it's seated above the battery.
-
-
-
Unscrew and remove the four M2x3 screws on each corner of the battery.
-
Dismount the battery.
-


To reassemble your device, follow these instructions in reverse order.
To reassemble your device, follow these instructions in reverse order.
Команда

Gateway, Team 1-3, Pee Spring 2022 Участник Gateway, Team 1-3, Pee Spring 2022
GCC-PEE-S22S1G3
3 членов
Автор 5 руководств