Перейти к основному содержанию

Dell Studio 1737 Keyboard Replacement

Выберете то, что вам нужно

  1. Dell Studio 1737 Keyboard Replacement, Battery: шаг 1, изображение 1 из 2 Dell Studio 1737 Keyboard Replacement, Battery: шаг 1, изображение 2 из 2
    • Slide the battery release slider all the way to the right and push the battery straight out of the back of the computer

  2. Dell Studio 1737 Keyboard Replacement, Keyboard: шаг 2, изображение 1 из 1
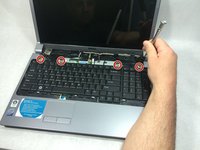
    • Use a plastic opening tool to detach the internal clips (marked with red boxes in photo) and release the small plastic panel above the keyboard

    • This panel doesn't come off just yet, this step is just to make it easier when it comes time to remove it

  3. Dell Studio 1737 Keyboard Replacement: шаг 3, изображение 1 из 1
    • Remove the 4mm ph1 screw under the battery

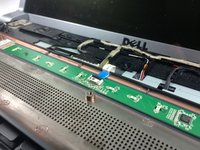
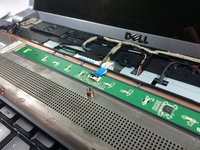
  4. Dell Studio 1737 Keyboard Replacement: шаг 4, изображение 1 из 3 Dell Studio 1737 Keyboard Replacement: шаг 4, изображение 2 из 3 Dell Studio 1737 Keyboard Replacement: шаг 4, изображение 3 из 3
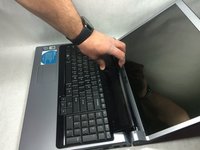
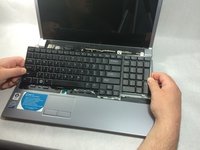
    • Pry black panel away from laptop body starting at the base of the screen

    • Be careful when flipping the panel over, as the panel is still attached by the fragile ribbon cable

    • Flip the panel over onto the keyboard

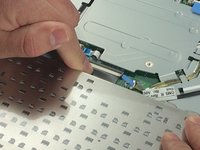
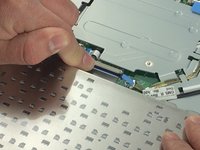
    • Detach the ribbon cable from the motherboard as shown

  5. Dell Studio 1737 Keyboard Replacement: шаг 5, изображение 1 из 1
    • Starting at the top where you just removed the black panel, pry the black bezel away from the outside of the keyboard

  6. Dell Studio 1737 Keyboard Replacement: шаг 6, изображение 1 из 2 Dell Studio 1737 Keyboard Replacement: шаг 6, изображение 2 из 2
    • Use a small screwdriver to take out the 4 4mm ph1 screws along the top of the keyboard

    • Lift from the top of the keyboard and flip it over onto the palmrest

    • Again, be very careful of the ribbon cable attaching it, as these are easily damaged

  7. Dell Studio 1737 Keyboard Replacement: шаг 7, изображение 1 из 2 Dell Studio 1737 Keyboard Replacement: шаг 7, изображение 2 из 2
    • Remove the ribbon cable as shown

Заключение

To reassemble your device, follow these instructions in reverse order.

2 участников успешно повторили данное руководство.

Joseph Jacavone

Участник с: 03/10/17

785 Репутация

Автор 6 руководств

Команда

UMass Dartmouth, Team S8-G4, Catania Spring 2017 Участник UMass Dartmouth, Team S8-G4, Catania Spring 2017

UMASSD-CATANIA-S17S8G4

3 членов

Автор 8 руководств

0 Комментариев

Добавить комментарий

Просмотр статистики:

За последние 24часов: 0

За последние 7 дней: 3

За последние 30 дней: 10

За всё время: 694