Введение
In order to fix any issues with sound your tablet may be experiencing, this guide will show you how to remove and replace the speaker entirely. You will need certain tools such as a Phillips Head screwdriver, #00 3mm screws, spudger, plastic opening tool, a pair of tweezers, and a soldering iron, as well as careful movements so you don't break any other components.
Выберете то, что вам нужно
-
-
Use a Phillips 00 bit to remove two 3mm screws from the bottom of the tablet.
-
-
-
Insert the nylon spudger into the bottom of the tablet, and gently slide it up the side.
-
Pull apart the two sides of the tablet, exposing the circuit board, battery, and other components of the tablet.
-
-
-
-
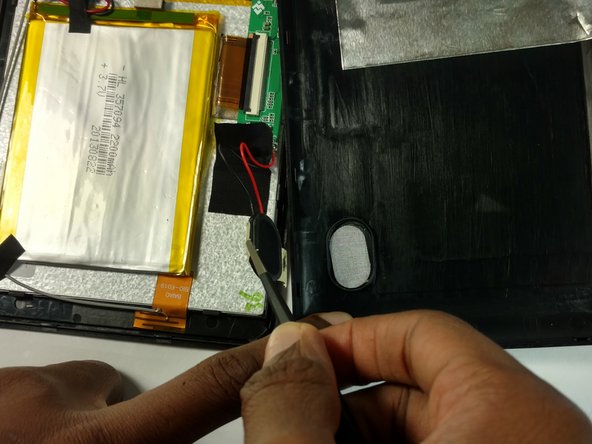
Using tweezers, carefully remove the tape covering the speaker.
-
-
-
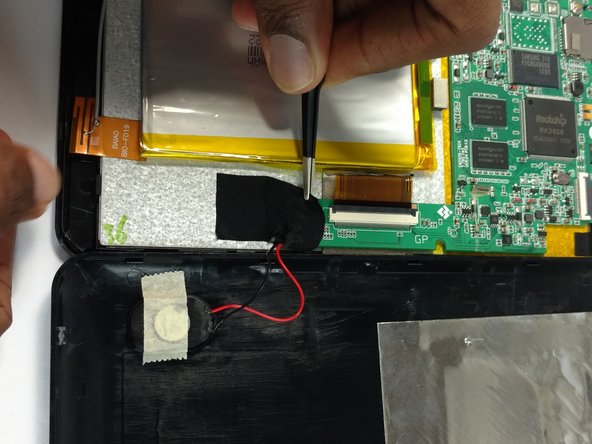
Desolder the negative (black) wire from the negative (-) lead, followed by desoldering the positive (red) wire from the positive (+) lead.
-
Refer to the soldering technique guide.
-


To reassemble your device, follow these instructions in reverse order.
To reassemble your device, follow these instructions in reverse order.
Отменить: Я не выполнил это руководство.
Еще один человек закончил это руководство.
Команда

USF Tampa, Team 2-5, Blackwell Fall 2016 Участник USF Tampa, Team 2-5, Blackwell Fall 2016
USFT-BLACKWELL-F16S2G5
4 членов
Автор 12 руководств