Перейти к основному содержанию

Fan Replacement

Выберете то, что вам нужно

  1. Fan Replacement, Fan/Heat Sink: шаг 1, изображение 1 из 1
    • Remove all the screws that hold the plastic bottom cover on. There are some more screws that cant be seen in the photo.

  2. Fan Replacement: шаг 2, изображение 1 из 1
    • Once screws are removed, remove the back cover.

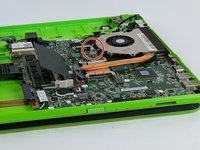
  3. Fan Replacement: шаг 3, изображение 1 из 1
    • Encased in red is the area where we are working on

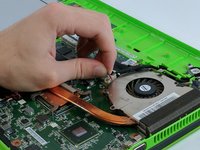
  4. Fan Replacement: шаг 4, изображение 1 из 2 Fan Replacement: шаг 4, изображение 2 из 2
    • Locate the two strips of cables projecting from the fan to the white holders circled in red.

    • Using your hand carefully remove the two strips of cables from the white sockets. Preferably grabbing the strip by the head(the white section where the cables are engulfed). If unable to gingerly pull on the cables.

    • Make care to not rip the connectors and the cables

  5. Fan Replacement: шаг 5, изображение 1 из 1
    • Unscrew the four screws surrounding the heat sink.

  6. Fan Replacement: шаг 6, изображение 1 из 1
    • You are now clear for liftoff. The fan may fly freely.

    • Now is a prime time to reapply thermal paste if necessary.

Заключение

To reassemble your device, follow these instructions in reverse order.

Еще один человек закончил это руководство.

Eric Martinez

Участник с: 02/14/17

637 Репутация

Автор 6 руководств

Команда

USF Tampa, Team 20-5, Remmell Spring 2017 Участник USF Tampa, Team 20-5, Remmell Spring 2017

USFT-REMMELL-S17S20G5

3 членов

Автор 12 руководств

0 Комментариев

Добавить комментарий

Просмотр статистики:

За последние 24часов: 0

За последние 7 дней: 2

За последние 30 дней: 4

За всё время: 483