Введение
The keyboard and touchpad of your HP Chromebook 14-Q010DX are essential for typing, scrolling, and navigating your laptop. If they are damaged or malfunctioning, you may want to replace them with a new part. The repair should take 5-10 minutes and this guide will help you to replace the Keyboard and touchpad and will show you how to open the laptop, disconnect the old part, and connect the new one. You will need a new keyboard, touchpad, a Phillips #00 screwdriver, a Spudger and an iFixit opening tool which can be found online.
Выберете то, что вам нужно
-
-
Flip the laptop so the base of the laptop is facing you.
-
Using the #00 screwdriver, unscrew the 13 screws.
-
-
-
Start from the top right corner of the laptop and work clockwise with an iFixit opening tool or spudger to pry the keyboard from the frame of the laptop.
-
-
-
-
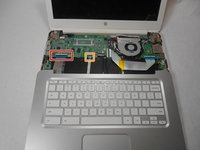
Gently pull the keyboard in the opposite direction of the screen, so the wires beneath are exposed.
-
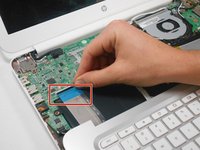
Lift the black flap and pull the blue ribbon gently towards you until it is disconnected.
-
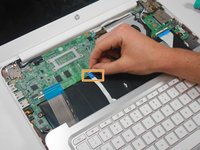
Lift the white flap and pull the blue ribbon towards you until it is disconnected.
-
-
-
Lift keyboard slightly and remove the strip gently to prevent damaging any parts.
-
To reassemble your device, follow these instructions in reverse order.
Отменить: Я не выполнил это руководство.
17 человек успешно провели ремонт по этому руководству.
10 Комментарии к руководству
In the black variant of this model I found that there are two screws under the rubber feet near the hinge.
This was very close to a similar HP Chromebook I had to repair recently. Such a beautiful and simple process. I cleaned the keyboard connectors and everything functioned perfectly after I was done. The whole process took about 30 minutes (allotting 10 minutes to find my rubbing alcohol that my wife hid from me).
Any idea how to get the replacement keyboard?
At the top of this page under "Relevant parts" there is a link to purchase the keyboard replacement.


