Введение
This guide will take you through the process of replacing the screen on an HP Compaq nc6400 Laptop. You will need the correct replacement screen for your laptop to complete the installation.
Выберете то, что вам нужно
-
-
Locate the battery lock below the battery labeled one.
-
Slide the lock all the way to the left to release the left lock of the battery.
-
-
-
Locate the lock labeled two at the bottom right corner below the battery.
-
Slide and hold the lock to the left.
-
-
-
Once both the battery locks are unlocked, slide the battery out to remove.
-
-
-
Remove the four 1.2mm Philips #1 screws attaching the plastic cover to the monitor.
-
The screws may have a small, black plastic cover that lays flush with the screen. Remove these using a pointed tool such as the spudger or philips head screwdriver by prying them out.
-
-
-
-
Remove the four 1.2 Philips #1 screws attaching the face plate to the body.
-
-
-
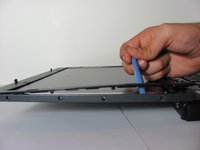
Pry up the plastic screen cover using a pry tool.
-
Keeping the pry tool under the trim, slide it around the entire screen until the the cover has completely detached from the base.
-
-
-
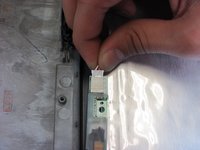
Remove the two 1.2 Philips #1 screws holding down the sensor board at the bottom of the monitor.
-
-
-
Remove the right-most 1.2mm Philips #1 screw on the bottom of the monitor.
-
-
-
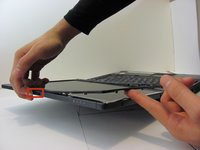
Without lifting the bottom of the monitor, gently flip the screen and lay it face down on the keyboard.
-
-
-
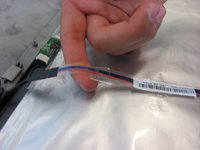
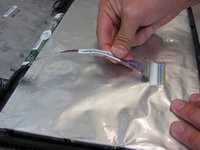
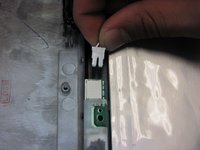
Remove the tape holding down the video cable to the monitor.
-
Gently pull out the video cable from the monitor.
-
-
-
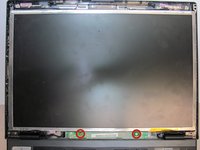
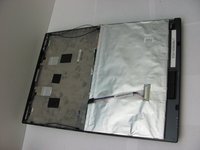
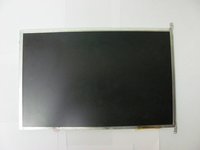
Once all cables attaching the casing to the monitor have been disconnected, remove the entire screen from the computer and lay it on a flat surface.
-
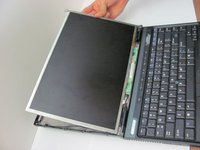
Remove the four 1.2 Philips #1 screws attaching the bezel to the right side of the monitor.
-
Attach bezel to replacement screen.
-


To reassemble your device, follow these instructions in reverse order.
Отменить: Я не выполнил это руководство.
4 человек успешно провели ремонт по этому руководству.
Команда

Cal Poly, Team 14-6, Forte Fall 2013 Участник Cal Poly, Team 14-6, Forte Fall 2013
CPSU-FORTE-F13S14G6
5 членов
Автор 5 руководств