Введение
Use this guide to replace your keyboard.
There are many possible reasons as to why you may need to replace your keyboard. Before beginning to take apart your computer be sure to check out the troubleshooting guide for possible issues and solutions to your keyboard problems.
Some of the issues that may cause you to replace your keyboard include multiple keys not functioning, messages not appearing on screen, or simply the keyboard is old and faulty.
As always before beginning the tedious task of breaking down the laptop be sure that all power supply is disconnected from the computer.
Выберете то, что вам нужно
-
-
Turn the laptop over so the back is facing up. Use a Phillips #0 screwdriver to remove the 11 screws from the bottom cover. Rotate the screws counter-clockwise.
-
Eight 5mm screws.
-
Three 10mm screws.
-
-
-
Gently remove the CD-ROM drive by using a plastic opening tool and sliding it out of the laptop housing.
-
Using the opening tool, gently pry open the back panel of the laptop. Slowly work around the edge of the laptop with gentle pressure.
-
Remove the back cover from the laptop.
-
-
-
Remove the six 5mm screws securing the battery using the Phillips #0 screwdriver.
-
Gently disconnect the battery from the motherboard with a plastic opening tool and remove it from the device.
-
Charge it to 100% and continue to charge it for an additional two hours. Next, unplug the charger and use the laptop normally to completely drain the battery. Wait at least five hours and recharge the battery to 100%.
-
-
-
Disconnect the ribbon cable connecting the hard drive to the motherboard.
-
Remove the hard drive from the device.
-
-
-
-
Release the metal tabs on each side of the RAM module by pushing each tab away from the module simultaneously .
-
-
-
Remove the four screws securing the motherboard using the Phillips #0 screwdriver.
-
-
-
Remove the three screws securing the fan to the motherboard using the Phillips #0 screwdriver.
-
Unplug the cables that run from the fan to the motherboard and remove the fan.
-
-
-
Remove the four ribbon cables attached to the motherboard by lifting the black clip.
-
-
-
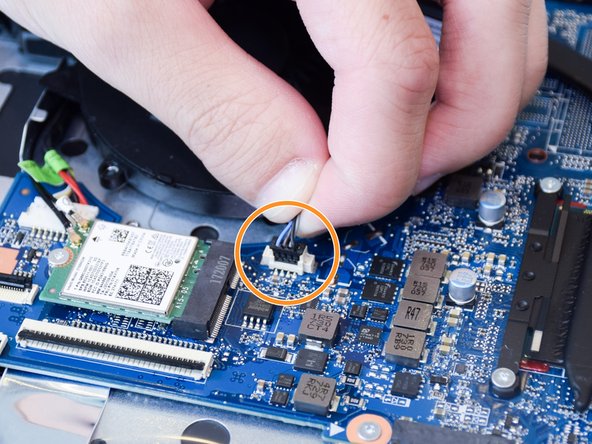
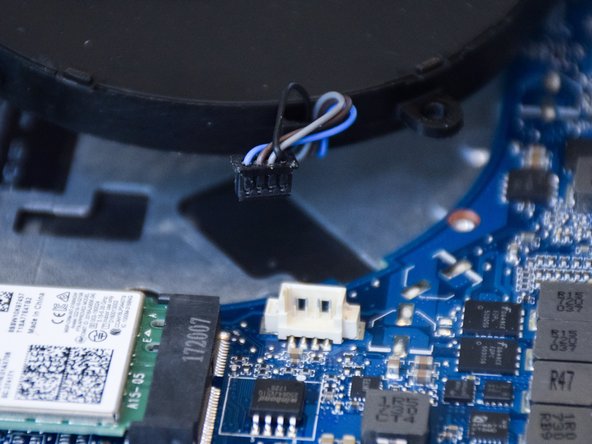
Remove the wires attached to the WiFi card.
-
Pull the wires straight and directly parallel to the motherboard.
-
-
-
Pull the motherboard back and up in order to remove it without it getting caught by the innards of the outlets on the side of the laptop.
-
-
-
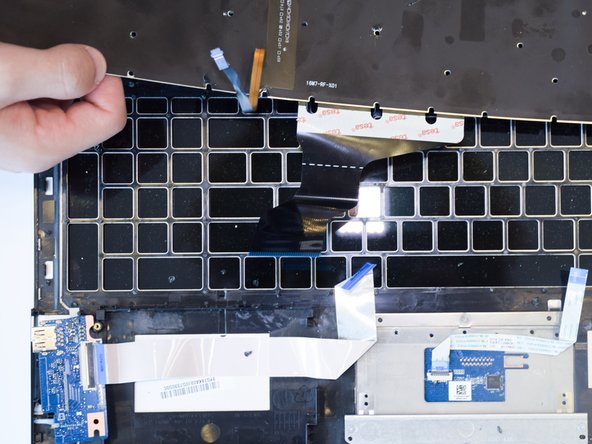
Lift the silver plating from the back of the keyboard enough so that the keyboard is visible.
-
-
-
Grab the corner of the keyboard, then lift and remove the keyboard from the computer.
-


To reassemble your device, follow these instructions in reverse order.
To reassemble your device, follow these instructions in reverse order.
Отменить: Я не выполнил это руководство.
Еще один человек закончил это руководство.
Команда

Embry-Riddle Aeronautical University, Team S24-G1, McClure Fall 2019 Участник Embry-Riddle Aeronautical University, Team S24-G1, McClure Fall 2019
ERAU-MCCLURE-F19S24G1
4 членов
Автор 5 руководств