Введение
Screen Replacement
- If your device screen on the HP Star Wars Special Edition 15-an051dx is not displaying any output follow this guide to help facilitate the process of replacing your screen.
- After powering your device and there is no output on your screen make the necessary changes with the steps shown below.
- Ensure you have powered off your device completely and disconnected any external power source.
- Gather the necessary tools shown in the tools section and begin your disassembling process.
Выберете то, что вам нужно
-
-
Remove the two circular plastic screw covers, then remove the two 4.5 mm screws in the using a Phillips #1 screwdriver.
-
-
-
Insert a spudger in between the bezel and display, at the top.
-
Move the tool around all sides of the bezel.
-
With your finger, lift the inside part of the bezel.
-
Pull the bezel back; it will pop-off.
-
-
-
-
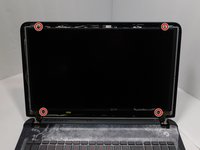
Remove the four 2.75 mm screws using a Phillips #1 screwdriver
-
Lift the screen using a spudger.
-
-
-
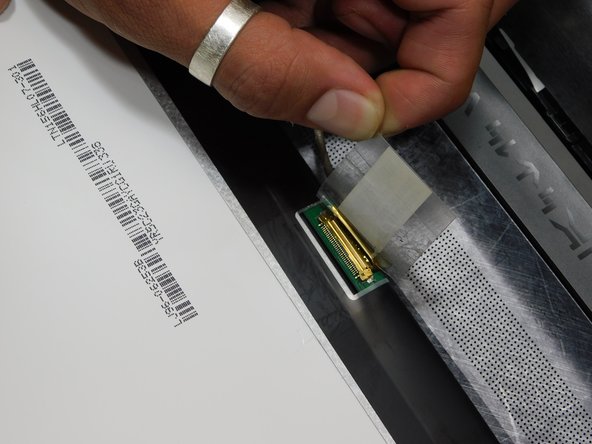
Lifting the tape on the back of the screen and peel it off.
-
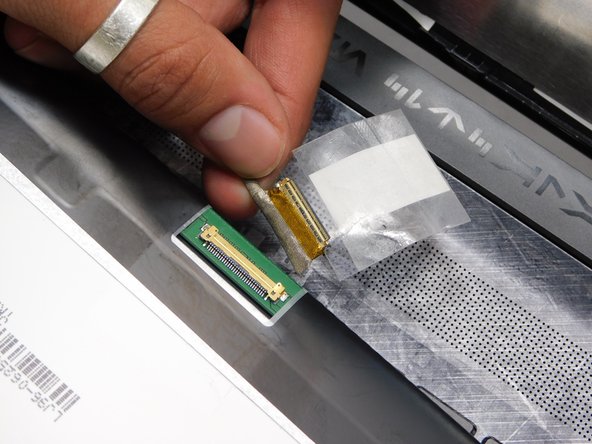
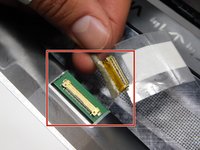
Remove the connection.
-


Enjoy your new screen!
Take your e-waste to an R2 or e-Stewards certified recycler.
Enjoy your new screen!
Take your e-waste to an R2 or e-Stewards certified recycler.
Отменить: Я не выполнил это руководство.
2 человек успешно провели ремонт по этому руководству.

Команду

Gateway, Team 1-2, Pee Fall 2022 Участник Gateway, Team 1-2, Pee Fall 2022
GCC-PEE-F22S1G2
4 членов
Автор 5 руководств