Введение
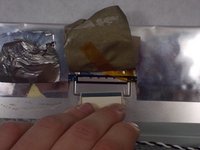
Is your image flickering, shattered or discolored ? Replacing your screen could solve these problems. Always uses caution when working with glass, a scratch or slight fall could completely ruin a screen.
Выберете то, что вам нужно
-
-
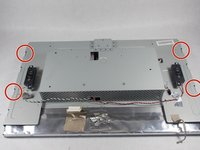
Use the Philips #000 screwdriver to remove the 4 round12mm screws on the back panel.
 Спросите у FixBot
-
-
-
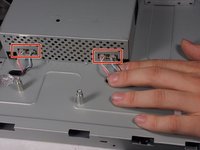
Using a Philips #000 head remove 2 flat 12 mm screws above stand mounting bracket.
-
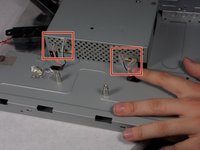
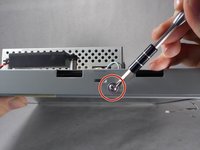
Using a PH1 Philips head with the 150 mm flexible extension remove 1 Philips head screw under the stand mounting bracket.
-
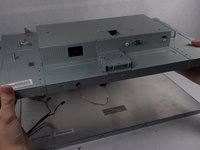
Stand will easily pull off.
-
-
-
Turn monitor so that the screen is facing you.
-
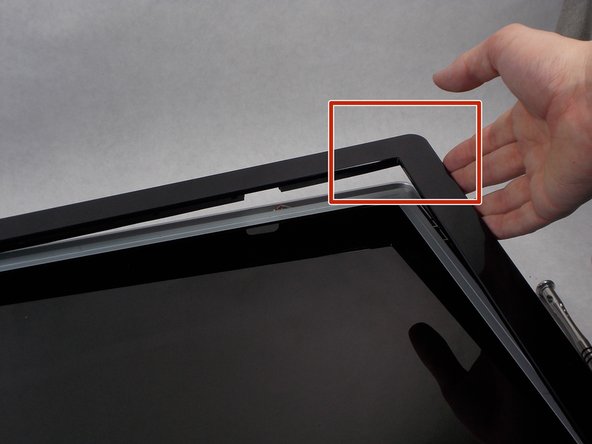
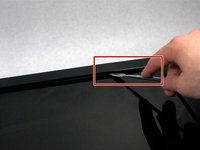
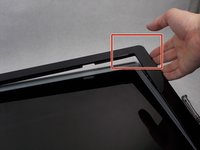
Pry the black bezel from above the metal by placing your metal spudger between the bezel and the metal and twisting the tool slightly.
-
-
-
-
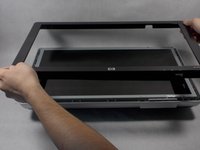
Lift the screen assembly from the plastic housing from the corners.
-
-
-
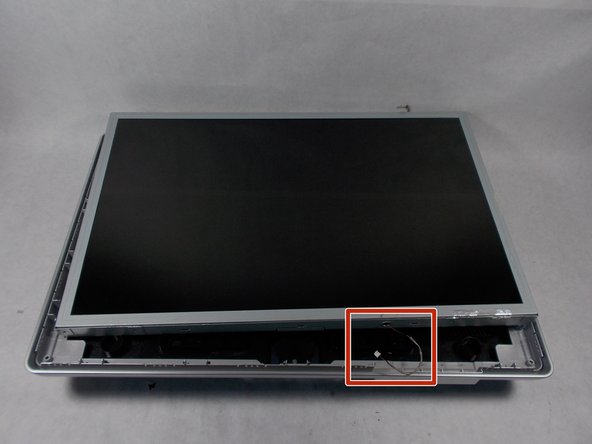
Remove the 4 connectors from the left side of the monitor on the back.
-
-
-
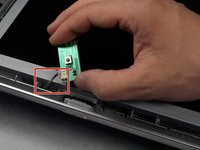
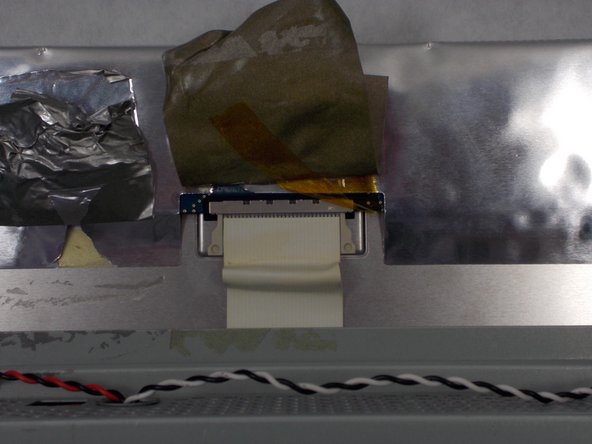
Lift the gray tape of the top of the monitor to expose the ribbon cable.
-
Remove the ribbon cable by sliding the connector towards the center of the screen assembly.
-
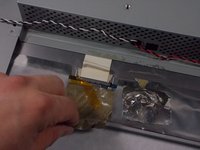
Lift the reflective tape next to the gray tape.
-
-
-
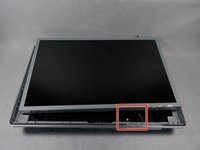
Remove the 4 PH1 8mm Philips round screws on the outer edge of the screen's assembly.
-
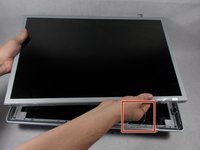
Lift the screen from the screen assembly.
-


To reassemble your device, follow these instructions in reverse order.
Отменить: Я не выполнил это руководство.
4 человек успешно провели ремонт по этому руководству.
Команда

UMass Dartmouth, Team 1-1, Miles Spring 2016 Участник UMass Dartmouth, Team 1-1, Miles Spring 2016
UMASSD-MILES-S16S1G1
4 членов
Автор 12 руководств
3 Комментарии к руководству
I have an HP laptop. How can i fix the screen to my laptop? Will it be the same thing? And how would i know what screen to get for it? Thanks.
Contact hp corporate they can sell u a replacement screen or a local electronic repair store or even a monitor of equal size should work and assembly is very simular but components are much more sensitive and fragile be careful and best of luck i love comouter repair
The lcd panel of my HP 2210i 21.5 inchs monitor has been cracked. No way to find any replacement of this single part. The monitor works, but must go to recicle bin. Very sad.