Введение
Give your phone a battery boost by replacing the battery in your HTC One S.
Выберете то, что вам нужно
-
-
Heat the iOpener for thirty seconds.
-
Throughout the repair procedure, as the iOpener cools, reheat it in the microwave for an additional thirty seconds at a time.
-
-
-
Remove the iOpener from the microwave, holding it by one of the two flat ends to avoid the hot center.
-
-
-
Fill a pot or pan with enough water to fully submerge an iOpener.
-
Heat the water to a boil. Turn off the heat.
-
Place an iOpener into the hot water for 2-3 minutes. Make sure the iOpener is fully submerged in the water.
-
Use tongs to extract the heated iOpener from the hot water.
-
Thoroughly dry the iOpener with a towel.
-
Your iOpener is ready for use! If you need to reheat the iOpener, heat the water to a boil, turn off the heat, and place the iOpener in the water for 2-3 minutes.
-
-
-
Handling it by the tag, place the heated iOpener across the bottom casing.
-
-
-
-
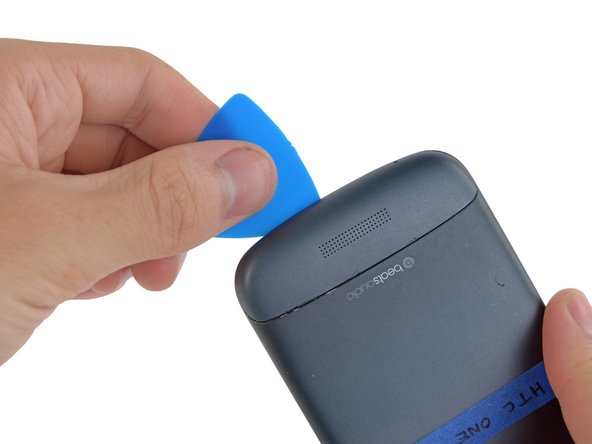
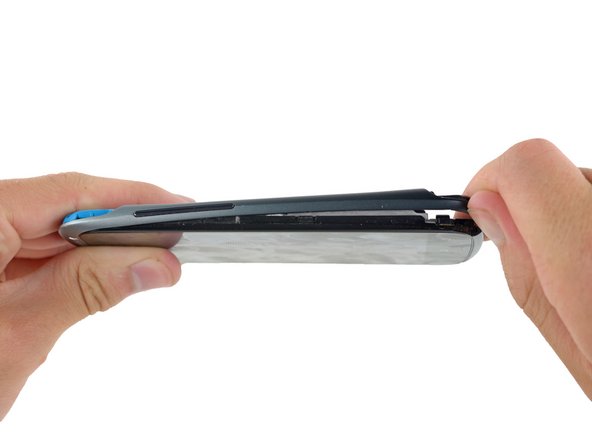
Gently place an opening pick in the corner of the gap between the bottom casing and rear case.
-
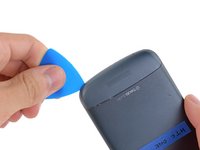
Slide the opening pick along the side of the casing, prying it away from the adhesive as you go.
-
-
-
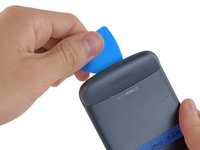
Starting at the groove near the headphone jack, use a plastic opening tool to lift the top casing.
-
-
-
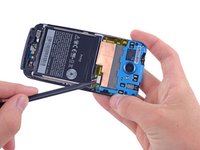
Remove the following screws holding the rear case to the rest of the phone:
-
Two 3.15 mm Phillips #00 screws
-
One 4.15 Torx T5 screw
-
One 4 mm Torx T5 screw
-
-
-
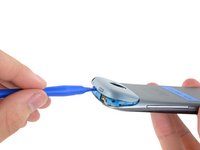
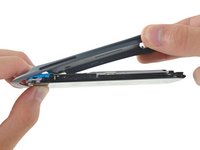
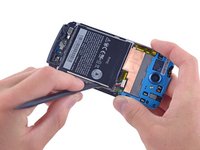
Place your fingers on either side of the phone and gently push up on the rear case.
-
-
-
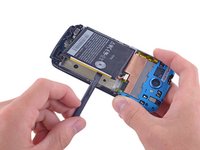
Using the pointed end of a spudger, lift the battery cable and release the connector.
-
-
-
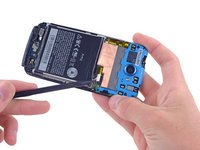
Switching to the flat end of the spudger, work your way underneath the battery and peel it away from the adhesive.
-


To reassemble your device, follow these instructions in reverse order.
Отменить: Я не выполнил это руководство.
12 человек успешно провели ремонт по этому руководству.
Команда

Cal Poly, Team 10-55, Amido Spring 2014 Участник Cal Poly, Team 10-55, Amido Spring 2014
CPSU-AMIDO-S14S10G55
4 членов
Автор 37 руководств
4 Комментарии к руководству
i charge the battery very well but once i on the phone it will go off immediately
Hello thank you for the guide. Getting the backplate off was tough. When assembling a little rubber block was loose. this goes next to the motor
What do you use to glue the cover back on, so that in the future you can replace the battery again?
What adhesive(s) should be used under the battery and to
reseal the case after completing replacement of the battery?