Перейти к основному содержанию

Hover-1 Charger LED Headlight Replacement

Выберете то, что вам нужно

  1. Hover-1 Charger LED Headlight Replacement, Unplugging the Battery: шаг 1, изображение 1 из 2 Hover-1 Charger LED Headlight Replacement, Unplugging the Battery: шаг 1, изображение 2 из 2
    • Flip the hoverboard over so that the warning label is facing up.

    • Remove the twelve 12 mm screws with a Phillips #2 screwdriver.

    • Remove the four 10 mm screws with a Phillips #2 screwdriver.

    • The screws nearest to the wheels may be hard to access. Be sure to use a long, thin screwdriver.

  2. Hover-1 Charger LED Headlight Replacement: шаг 2, изображение 1 из 1
    • Pull the right cover away from the hoverboard to expose the battery.

  3. Hover-1 Charger LED Headlight Replacement: шаг 3, изображение 1 из 2 Hover-1 Charger LED Headlight Replacement: шаг 3, изображение 2 из 2
    • Disconnect the two pronged black and yellow cable.

  4. Hover-1 Charger LED Headlight Replacement: шаг 4, изображение 1 из 1
    • Pull the left cover away from the hoverboard.

  5. Hover-1 Charger LED Headlight Replacement: шаг 5, изображение 1 из 2 Hover-1 Charger LED Headlight Replacement: шаг 5, изображение 2 из 2
    • Disconnect the two pronged black and yellow cable. The battery is now fully disconnected.

  6. Hover-1 Charger LED Headlight Replacement, LED Headlight: шаг 6, изображение 1 из 2 Hover-1 Charger LED Headlight Replacement, LED Headlight: шаг 6, изображение 2 из 2
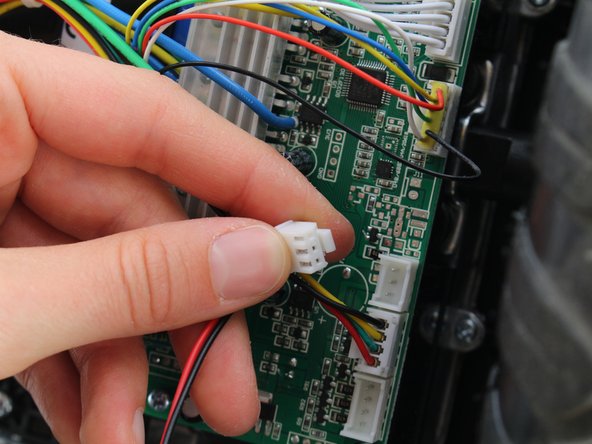
    • Remove the black and red two pin connector from the circuitboard.

  7. Hover-1 Charger LED Headlight Replacement: шаг 7, изображение 1 из 2 Hover-1 Charger LED Headlight Replacement: шаг 7, изображение 2 из 2
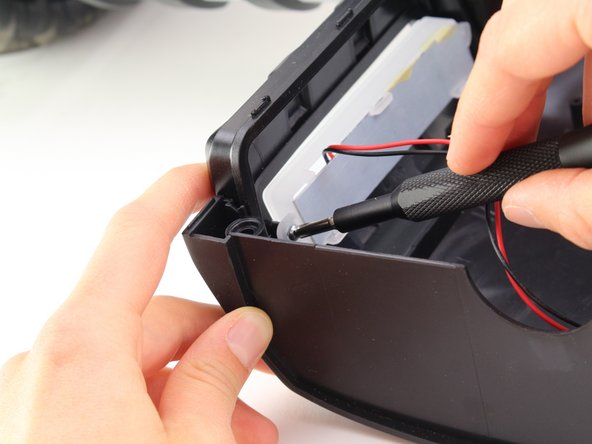
    • Remove the two 12mm screws holding the LED to the front cover with a Phillips #2 screwdriver.

    • Our Hoverboard was missing a screw in the LED housing. Yours may or may not be missing screws as well.

  8. Hover-1 Charger LED Headlight Replacement: шаг 8, изображение 1 из 1
    • With the wire unplugged and screws removed, you can now safely seperate the LED from the Hoverboard.

Заключение

To reassemble your device, follow these instructions in reverse order.

Benji Forest

Участник с: 10/10/19

266 Репутация

Автор 2 руководств

Команда

Cal Poly, Team S12-G1, Regan Fall 2019 Участник Cal Poly, Team S12-G1, Regan Fall 2019

CPSU-REGAN-F19S12G1

4 членов

Автор 6 руководств

0 Комментариев

Добавить комментарий

Просмотр статистики:

За последние 24часов: 1

За последние 7 дней: 5

За последние 30 дней: 7

За всё время: 206