Эта версия возможно содержит некорректные исправления. Переключить на последнюю проверенную версию.
Выберете то, что вам нужно
-
Этот шаг не переведен. Помогите перевести
-
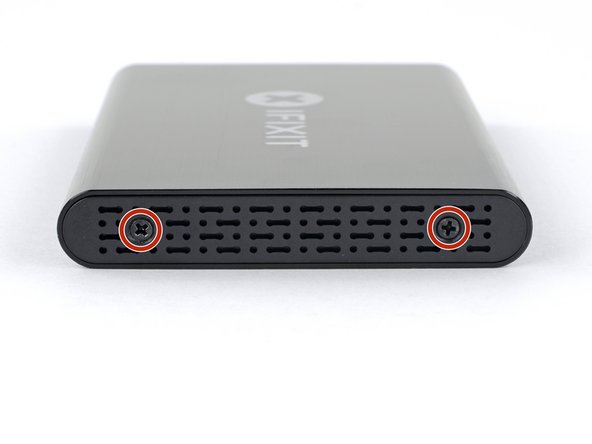
Use the included screwdriver to remove the two Phillips screws.
-
-
Этот шаг не переведен. Помогите перевести
-
Set the drive in the plastic tray and align the drive ports with the tray socket.
-
Carefully push the drive into the tray socket to seat the ports.
-
Press the drive's raised edge down into the plastic tray.
-
-
Этот шаг не переведен. Помогите перевести
-
Flip the drive tray over.
-
Use the a Phillips screwdriver to install the four mounting screws (included in the kit) to secure the drive to the tray.
-
-
-
Этот шаг не переведен. Помогите перевести
-
Slide the tray back into the aluminum housing.
-
Reinstall the two Phillips screws to secure the tray.
-
-
Этот шаг не переведен. Помогите перевести
-
Power on your Mac and wait for it to fully load.
-
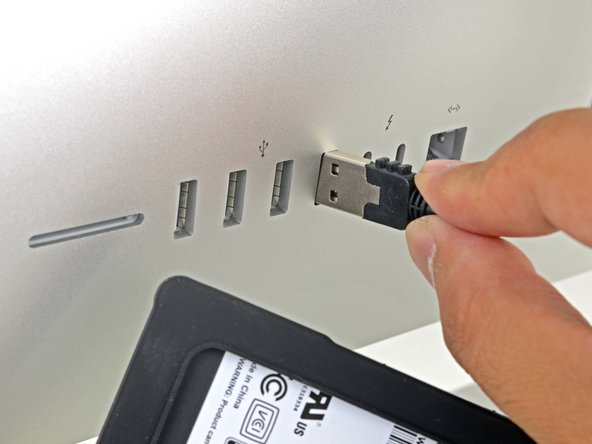
Plug the enclosure into your Mac's USB port.
-
-
Этот шаг не переведен. Помогите перевести
-
Under the Go pulldown menu, select Utilities.
-
Open Disk Utility from the Utilities window.
-
-
Этот шаг не переведен. Помогите перевести
-
Select your new hard drive from the left column in Disk Utility.
-
Select the Erase option near the top row of buttons.
-
Select a name for your new drive, and select "APFS" for the format.
-
Press the erase button.
-
Quit Disk Utility once the erase is complete.
-
-
Этот шаг не переведен. Помогите перевести
-
Download and install SuperDuper!
-
Under the Go pulldown menu, select Applications.
-
Open SuperDuper!
-
-
Этот шаг не переведен. Помогите перевести
-
In the copy pulldown menu, select your current drive.
-
In the destination pulldown menu, select the new drive.
-
In the method pulldown menu, select "Backup—all files".
-
-
Этот шаг не переведен. Помогите перевести
-
Press the "Copy Now" button.
-
If prompted, provide your password.
-
Click "Copy" when warned about erasing the drive.
-
-
Этот шаг не переведен. Помогите перевести
-
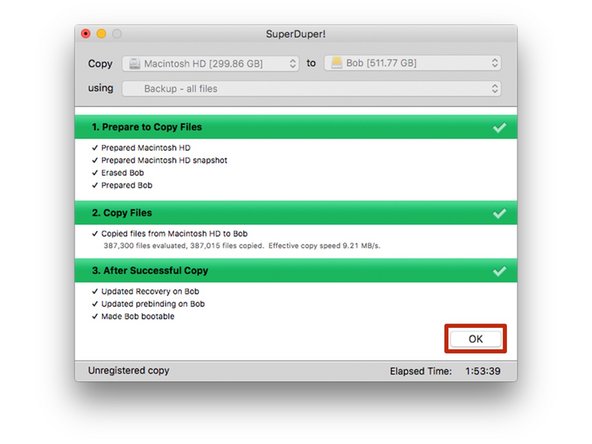
Wait for the drive to copy (this could take several hours if you have a lot on your hard drive).
-
When prompted for registration by SuperDuper!, either choose "Register" to purchase the software or "Later" to register later.
-
After the copy is complete, click "Ok" and quit SuperDuper!
-
-
Этот шаг не переведен. Помогите перевести
-
At this point, your new hard drive should be a clone of your existing drive and ready to install.
-
Keep the enclosure connected to the computer and restart the computer. Hold down the "option" key as it reboots until a boot option menu shows up.
-
-
Этот шаг не переведен. Помогите перевести
-
Select your new hard drive from the boot option menu.
-
Wait for the computer to boot up to verify if it works properly.
-
Your new hard drive is now ready to be installed in your computer.
-


Отменить: Я не выполнил это руководство.
110 участников успешно повторили данное руководство.

Команда

Mike's Super Duper Computer Repairs Участник Mike's Super Duper Computer Repairs
Business
1 член
Автор 8 руководств
24 Комментариев
This guide was straightforward and helpful along the way when I replaced my hard drive! My only comment is that this should be a link in the "MacBook Pro 13" Unibody Early 2011 Hard Drive Replacement" article, since the Youtube videos link to each other, but the articles do not. Thanks for all your help with these fantastic guides!
Wow! Thank you Mike.
Everything went very well with a big bonus. My older version of Photoshop does not work with the newer Mac operating systems. Now that I installed a new 1TB hard drive, I can upgrade OS if I want. Then I can use the old drive in an internal enclosure replacing the DVD running the old OS X keeping all of my older Adobe apps!
Ifixit rocks!
Hi BuckNYC,
As far as I know, SuperDuper will not clone the BootCamp partition. You will have to use something like Winclone to do that.