Перейти к основному содержанию

How to Replace the Adhesive for Your Google Pixel 6a

Выберете то, что вам нужно

  1. How to Replace the Adhesive for Your Google Pixel 6a, Clean the frame: шаг 1, изображение 1 из 3 How to Replace the Adhesive for Your Google Pixel 6a, Clean the frame: шаг 1, изображение 2 из 3 How to Replace the Adhesive for Your Google Pixel 6a, Clean the frame: шаг 1, изображение 3 из 3
    Инструмент, используемый на этом этапе:
    Microfiber Cleaning Cloths
    $3.99
    Купить
    • Any residual adhesive or debris on the frame will prevent your screen from sealing properly.

    • Use the flat end of your spudger to scrape off as much adhesive from the frame as you can.

    • Use tweezers or your fingers to peel and remove any remaining adhesive.

    • Clean the perimeter of the frame with a small amount of highly-concentrated isopropyl alcohol (over 90%) and a lint-free or microfiber cloth.

  2. How to Replace the Adhesive for Your Google Pixel 6a, Clean the screen: шаг 2, изображение 1 из 3 How to Replace the Adhesive for Your Google Pixel 6a, Clean the screen: шаг 2, изображение 2 из 3 How to Replace the Adhesive for Your Google Pixel 6a, Clean the screen: шаг 2, изображение 3 из 3
    • If you're reusing your screen, clean it as you did for the frame.

  3. How to Replace the Adhesive for Your Google Pixel 6a, Orient the adhesive: шаг 3, изображение 1 из 2 How to Replace the Adhesive for Your Google Pixel 6a, Orient the adhesive: шаг 3, изображение 2 из 2
    • Before removing any liners, position the adhesive with the clear liner facing down over the frame to find the proper orientation.

    • Use features such as the upper loudspeaker cutout and conductive tape to orient the adhesive.

  4. How to Replace the Adhesive for Your Google Pixel 6a, Remove the adhesive liner: шаг 4, изображение 1 из 1
    • Peel the clear liner off of the adhesive.

  5. How to Replace the Adhesive for Your Google Pixel 6a, Apply the adhesive: шаг 5, изображение 1 из 3 How to Replace the Adhesive for Your Google Pixel 6a, Apply the adhesive: шаг 5, изображение 2 из 3 How to Replace the Adhesive for Your Google Pixel 6a, Apply the adhesive: шаг 5, изображение 3 из 3
    • Be very careful during this step! The adhesive is very sticky and can't be repositioned once it sticks. Misaligned adhesive can lead to an improper seal.

    • Lay the adhesive onto the frame, starting with the bottom or top edge. Make small corrections as you go.

  6. How to Replace the Adhesive for Your Google Pixel 6a: шаг 6, изображение 1 из 2 How to Replace the Adhesive for Your Google Pixel 6a: шаг 6, изображение 2 из 2
    • Use a spudger or your fingers to press along the perimeter of the adhesive and adhere it to the frame.

  7. How to Replace the Adhesive for Your Google Pixel 6a, Remove the liners: шаг 7, изображение 1 из 3 How to Replace the Adhesive for Your Google Pixel 6a, Remove the liners: шаг 7, изображение 2 из 3 How to Replace the Adhesive for Your Google Pixel 6a, Remove the liners: шаг 7, изображение 3 из 3
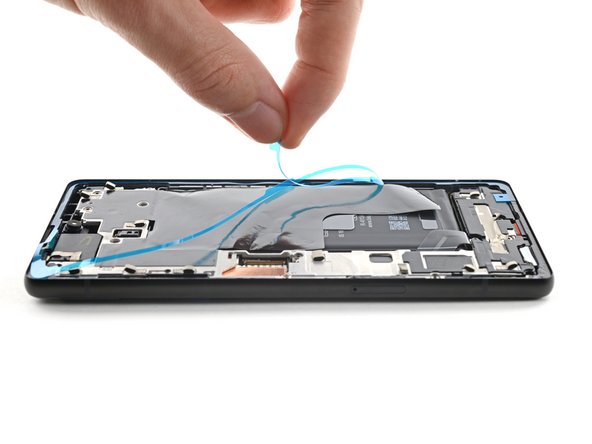
    • Grab the pull tab on the upper right of the frame and peel off the main liner.

  8. How to Replace the Adhesive for Your Google Pixel 6a, Check for small liners: шаг 8, изображение 1 из 1
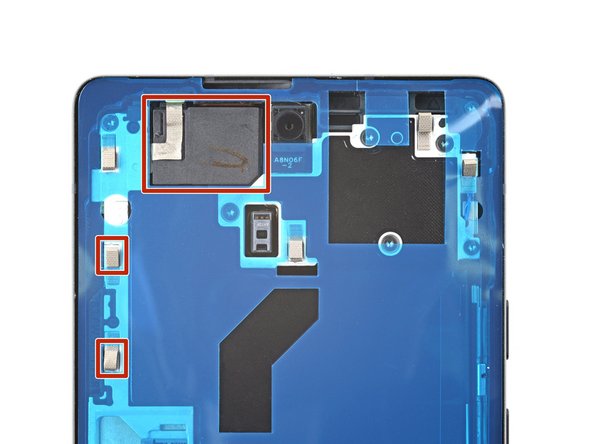
    • Check the front-facing camera hole on the replacement screen and remove any remaining protective liners in it.

    • Check the sensor cutout on the replacement screen and remove any remaining protector liners in it.

  9. How to Replace the Adhesive for Your Google Pixel 6a, Continue reassembly: шаг 9, изображение 1 из 1
    • Return to your phone's guide and continue reassembly.

    • Remember to reinstall the display cable bracket.

    • Finish this guide when your screen is installed and you're ready to seal the phone up.

  10. How to Replace the Adhesive for Your Google Pixel 6a, Remove the final liner: шаг 10, изображение 1 из 3 How to Replace the Adhesive for Your Google Pixel 6a, Remove the final liner: шаг 10, изображение 2 из 3 How to Replace the Adhesive for Your Google Pixel 6a, Remove the final liner: шаг 10, изображение 3 из 3
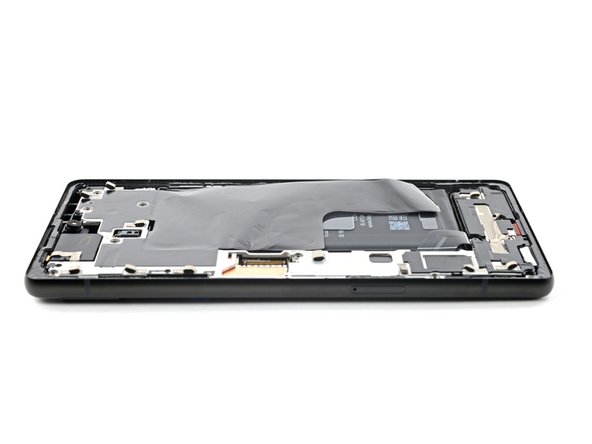
    • Grab the pull tab on the bottom edge of the frame and peel off the remaining liner.

  11. How to Replace the Adhesive for Your Google Pixel 6a, Install the screen: шаг 11, изображение 1 из 2 How to Replace the Adhesive for Your Google Pixel 6a, Install the screen: шаг 11, изображение 2 из 2
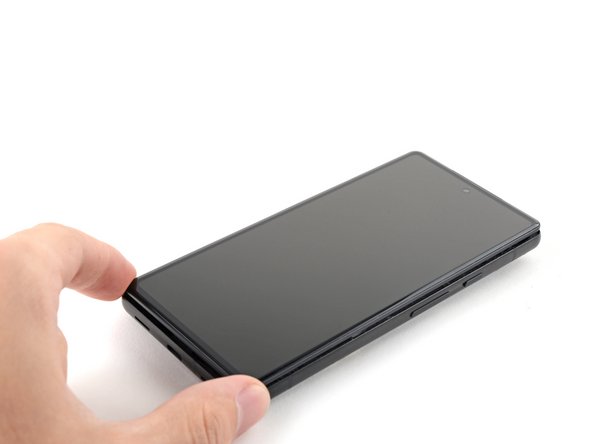
    • Flip the screen over and lay it onto the frame.

    • Press along the perimeter of the screen to secure it.

Финишная черта

89 участников успешно повторили данное руководство.

Alex Diaz-Kokaisl

Участник с: 01/16/22

124 456 Репутация

Автор 581 руководств

Команда

iFixit Участник iFixit

Staff

135 членов

Автор 17 277 руководств

10 Комментариев

Yup. That worked, Don't rush it, and get a proper suction cup, but i have a perfectly repaired 6a, very happy, and thank you

Eoin Fleming - Ответить

Great advice, but there must be something I'm missing. Now my phone can't show the screen

icanwecanyoucan - Ответить

Will this provide the same water resistance as the original screen?

Noam Etten - Ответить

Depends on how well you seat the adhesive, but generally speaking, it's very hard to get to the same level of water resistance. It will probably be somewhat resistant.
Water resistance should be treated as an additional protection, not as a feature. Do not submerge your electronic device in water by purpose. (even if it's factory new)

Gabriele Turelli (CappyT) -

You guys are awesome, you know that? After almost 2 hours of work, everything works again. Thanks a lot. Greetings from Belgium

DaMuf84 - Ответить

Добавить комментарий

Просмотр статистики:

За последние 24часов: 44

За последние 7 дней: 237

За последние 30 дней: 1,189

За всё время: 22,401