Введение
Use this guide to remove or replace the interconnect cable including the charging port in the Huawei P20 Pro.
Opening the Huawei P20 Pro will damage the waterproof sealing on the device. If you do not replace the adhesive seals, your phone will function normally, but will lose its water-protection.
You’ll need replacement adhesive to reattach components when reassembling the device.
Выберете то, что вам нужно
-
-
Switch off your phone.
-
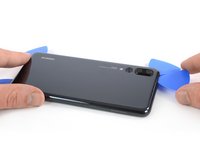
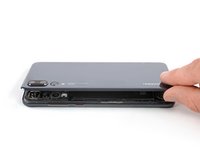
Use an iOpener to loosen the adhesive beneath the rear glass. Apply the iOpener for at least two minutes. You might want to repeat this step several times during the back cover removal.
-
-
-
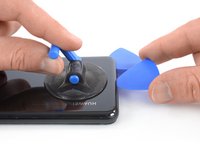
Press a suction cup onto the rear glass close to the bottom edge of the phone.
-
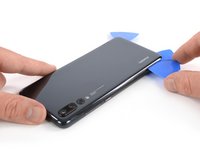
Lift the bottom edge with the suction cup, opening a slight gap between the rear glass and the frame.
-
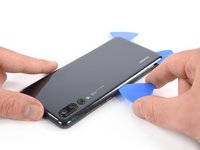
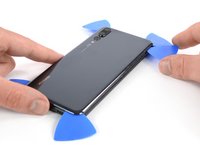
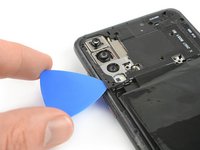
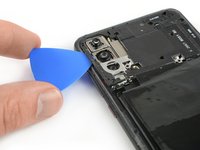
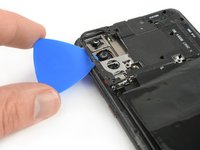
Insert an opening pick in the gap and slide it to the bottom right corner. Leave it there to prevent the adhesive from resealing.
-
-
-
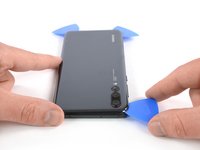
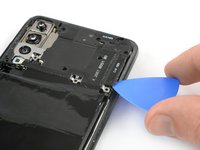
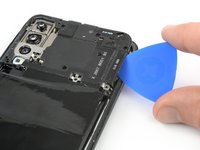
Insert a second opening pick and slide it to the bottom left corner. Leave it there to prevent the adhesive from resealing.
-
-
-
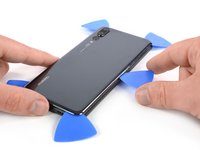
Insert a third opening pick at the bottom left corner.
-
Slide the tip of the opening pick along the left edge of the phone to cut the adhesive.
-
Leave the opening pick in the top left corner of the phone to prevent the adhesive from resealing.
-
-
-
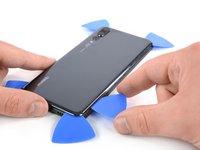
Insert a fourth opening pick at the top left corner of the phone.
-
Slide the opening pick along the upper edge of the phone to cut the adhesive beneath the rear glass and leave it in the top right corner.
-
-
-
Insert a fifth opening pick at the top right corner of the rear glass.
-
Slide the opening pick along the right edge of the phone to cut the remaining adhesive.
-
-
-
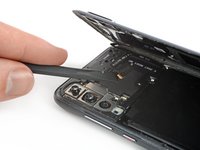
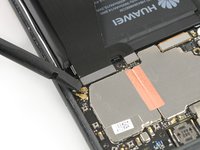
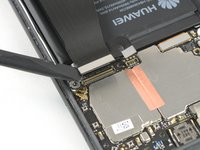
Carefully lift the rear glass until you can reach the connector of the proximity sensor flex cable next to the rear camera assembly.
-
-
-
-
Use the flat end of a spudger to pry up and disconnect the proximity sensor flex cable.
-
-
-
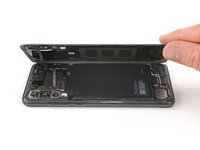
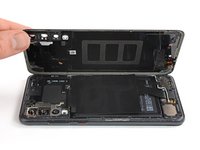
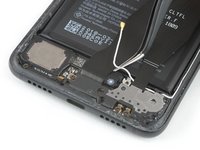
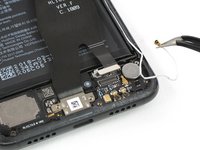
Insert an opening pick under the left side of the motherboard cover that includes the NFC.
-
Slide the opening pick towards the top left corner of the phone and twist it to pry the cover out of its plastic clamps.
-
-
-
Repeat the previous process on the right side and twist the opening pick to pry up the motherboard cover.
-
-
-
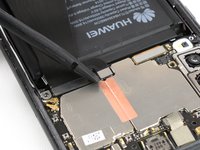
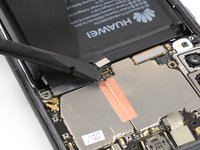
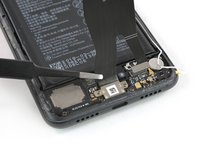
Use the flat end of a spudger to pry up and disconnect the battery flex cable.
-
-
-
Remove the five Phillips #00 screws (3.4 mm length).
-
-
Инструмент, используемый на этом этапе:Tweezers$4.99
-
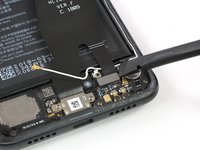
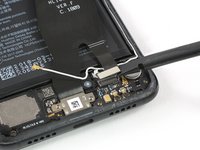
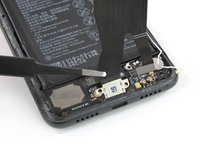
Use a pair of tweezers to disconnect the antenna cable.
-
Use a pair of tweezers to pull the antenna cable out of its routing.
-
-
-
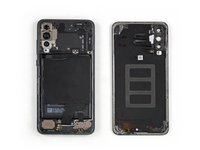
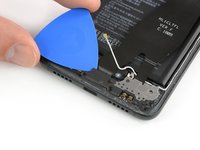
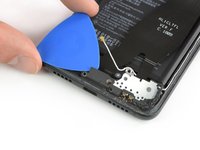
Slide an opening pick under the left side of the daughterboard cover and start to pry it up until you can get a good grip.
-
Remove the daughterboard cover.
-
-
-
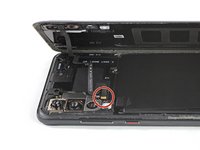
Remove the two Phillips #00 screws (3.4 mm length) on both sides of the USB C port.
-
-
-
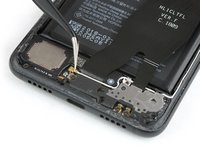
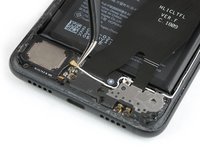
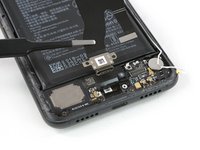
Use the flat end of a spudger to pry up and disconnect the upper end of the interconnect and charging port flex cable from the motherboard.
-
-
-
Use the flat end of a spudger to pry up and disconnect the bottom end of the interconnect and charging port flex cable from the daughterboard.
-
Use a pair of tweezers to move the antenna cable out of the way.
-
-
-
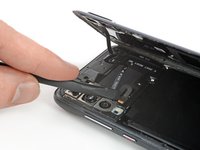
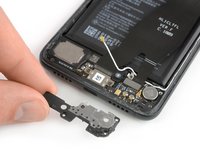
Use a pair of tweezers to pull the charging port out of its recess.
-
Remove the interconnect cable including the charging port.
-


To reassemble your device, follow these instructions in reverse order.
To reassemble your device, follow these instructions in reverse order.
Отменить: Я не выполнил это руководство.
14 человек успешно провели ремонт по этому руководству.


4 Комментариев
Hallo ich habe alles nach der Anleitung gemacht. Nun geht der Connector wieder, aber ich habe das Problem, das ich innerhalb von Gebäuden kein Netz mehr habe. Außerhalb von Gebäuden kein Problem. Was kann ich tun? Das Antennenkabel weißt auf den ersten Blick keine Beschädigungen auf…
hola, y.. ¿cuales tipos de pegamentos recomiendan para volver a pegar la tapa trasera? Use Poxiran( cemento de contacto) pero no se adhiere bien al plastico
Hi, you can use double sided adhesive tape like this one or even pre-cut adhesive for the rear case if you get one for your device on the internet. Poxi-ran could work too after removing old adhesive and if applied carefully only on those areas where there was adhesive.
dear friend hi. thanks for your perfect explanation but in my case, i wasn’t so able to fix my Huawei P20 charging socket and battery replacement that i had to do. The problem that i have is that the phone now is not charging. when i connect the cable to charge the phone the first 2 sec looks like is charging but after that is stopped. One more problem that i have is when the phone is into the charger and you turn it of is doing a restart by itself. The speaker is working and also the data transfer. Have you ever seen this kind o issue before?