Перейти к основному содержанию

Huawei P9 Plus Rear Case Replacement

Выберете то, что вам нужно

  1. Huawei P9 Plus Rear Case Replacement, Rear Case: шаг 1, изображение 1 из 2 Huawei P9 Plus Rear Case Replacement, Rear Case: шаг 1, изображение 2 из 2
    • First switch off your phone.

    • Remove the SD and SIM card tray.

  2. Huawei P9 Plus Rear Case Replacement: шаг 2, изображение 1 из 1
    • Remove the two P2 Pentalobe screws on either side of the USB C port.

  3. Huawei P9 Plus Rear Case Replacement: шаг 3, изображение 1 из 2 Huawei P9 Plus Rear Case Replacement: шаг 3, изображение 2 из 2
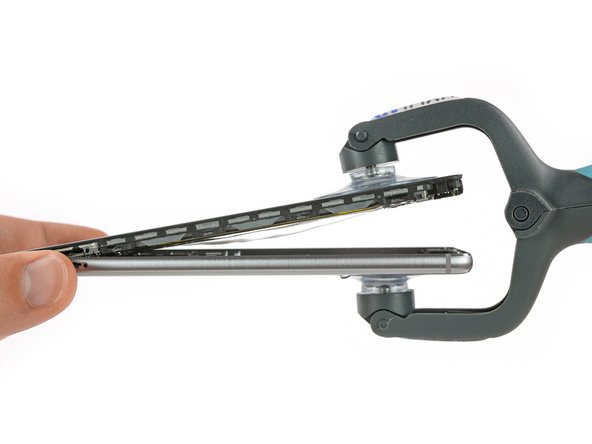
    • Use an iSclack or a suction handle to separate the display unit from the rear case.

    • Do not fully separate the pieces as they are still connected by the fingerprint sensor cable.

  4. Huawei P9 Plus Rear Case Replacement: шаг 4, изображение 1 из 3 Huawei P9 Plus Rear Case Replacement: шаг 4, изображение 2 из 3 Huawei P9 Plus Rear Case Replacement: шаг 4, изображение 3 из 3
    • After separating the rear case flip the other half open to get to the flex connectors.

    • With a spudger unplug the flex connector of the fingerprint sensor and the one of the side buttons.

    • Remove the rear case.

Заключение

To reassemble your device, follow these instructions in reverse order.

2 участников успешно повторили данное руководство.

Dominik Schnabelrauch

Участник с: 11/23/16

203 704 Репутация

Автор 682 руководств

Команда

iFixit Участник iFixit

Staff

135 членов

Автор 17 182 руководств

0 Комментариев

Добавить комментарий

Просмотр статистики:

За последние 24часов: 0

За последние 7 дней: 5

За последние 30 дней: 10

За всё время: 2,000