Эта версия возможно содержит некорректные исправления. Переключить на последнюю проверенную версию.
Выберете то, что вам нужно
-
Этот шаг не переведен. Помогите перевести
-
Use a wrench to remove the bolt on the top of the cover plate.
-
-
Этот шаг не переведен. Помогите перевести
-
Pull the pump handle all the way down and hold it in this position, exposing the pump rod.
-
Place the spacer around the pump rod and under the chain attachment point.
-
Lift the pump lever until there is no tension in the chain and hold it in this position.
-
-
Этот шаг не переведен. Помогите перевести
-
Remove the bolt connecting the chain to the pump handle.
-
Remove the chain from the handle.
-
-
Этот шаг не переведен. Помогите перевести
-
There are 4 bolts securing the head section to the water tank, located at the corners of head section base.
-
Remove the 4 bolts on the base of the water tank.
-
-
-
Этот шаг не переведен. Помогите перевести
-
Lift the pump head off of the water tank and place in a sanitary place, preferably above ground, to prevent contamination.
-
-
Этот шаг не переведен. Помогите перевести
-
Lift the plunger assembly and separator plate and place a rod clamp below the separator plate.
-
Tighten the rod clamp and gently set the separator plate on top of it.
-
Remove the spacer.
-
-
Этот шаг не переведен. Помогите перевести
-
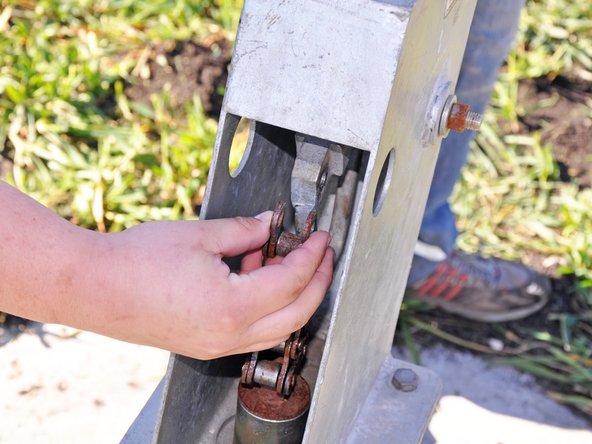
Hold the rod clamp steady while removing the chain from the pump rod. Check the chain for signs of damage.
-
Remove the lock nut by turning it counterclockwise.
-
Remove the separator plate.
-
-
Этот шаг не переведен. Помогите перевести
-
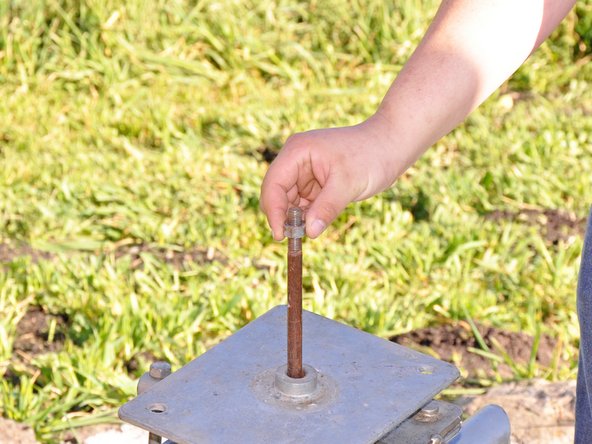
Reinstall the lock nut.
-
Install a T-handle, screwing it down against the lock nut.
-
-
Этот шаг не переведен. Помогите перевести
-
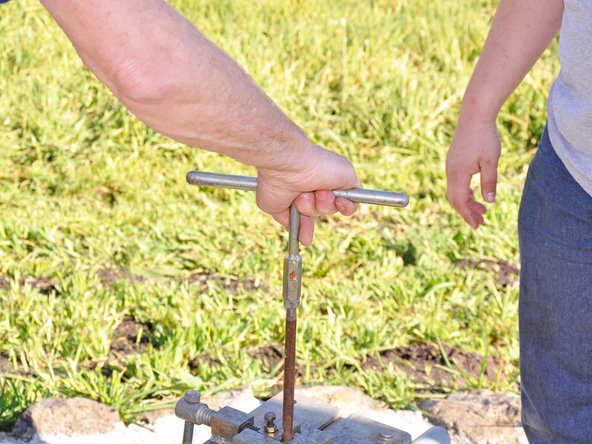
Lift up on the T-handle to take pressure off the rod clamp.
-
Remove the rod clamp and slowly lower the T-handle.
-
-
Этот шаг не переведен. Помогите перевести
-
There are 4 bolts securing the water tank to the pump base. They are located at the bottom corners of the water tank.
-
Remove the 4 bolts on the base of the water tank.
-
-
Этот шаг не переведен. Помогите перевести
-
Lift the water tank up approximately 1 foot.
-
Place a base clamp around the exposed pipe and tighten it against the riser main.
-
-
Этот шаг не переведен. Помогите перевести
-
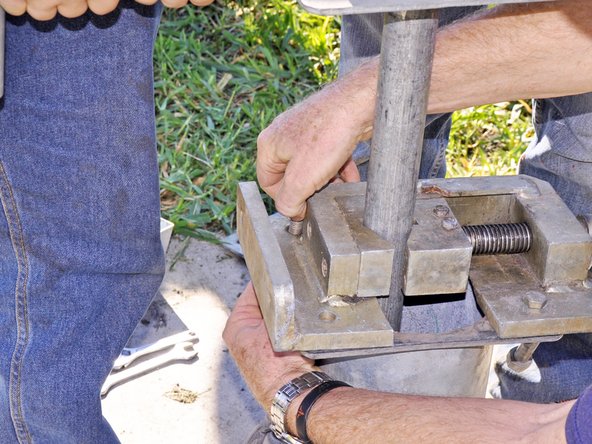
Secure the base clamp to the pump base with two bolt and nut sets installed on opposite sides of each other.
-
-
Этот шаг не переведен. Помогите перевести
-
Turn the water tank counterclockwise until it comes free from the pipe.
-
Lift the water tank up against the T-handle and secure the rod clamp to the pump rod.
-
-
Этот шаг не переведен. Помогите перевести
-
Remove the T-handle.
-
Remove the water tank and check for signs of blockage.
-
Store in a sanitary place to prevent contamination.
-