Перейти к основному содержанию

Insignia Flex 10.1 NS-P16AT10 Screen Replacement

Выберете то, что вам нужно

  1. Insignia Flex 10.1 NS-P16AT10 Screen Replacement, Screen: шаг 1, изображение 1 из 2 Insignia Flex 10.1 NS-P16AT10 Screen Replacement, Screen: шаг 1, изображение 2 из 2
    • Make sure your device is off and not connected to any power sources to avoid injury

    • Use a plastic opening tool to remove the rear panel from the front case.

    • Insert the plastic opening tool between the front case and rear panel. Use a prying motion to lift the front case from the rear panel.

    • Work the tool around the perimeter of the device until the front and rear panels become separate.

    • The volume rocker and power button will become free from the device when the front and rear panels are separated from each other. Do not worry. These pieces are easily put back into place when reassembling the tablet.

  2. Insignia Flex 10.1 NS-P16AT10 Screen Replacement: шаг 2, изображение 1 из 2 Insignia Flex 10.1 NS-P16AT10 Screen Replacement: шаг 2, изображение 2 из 2
    • Use a Phillips head #00 screw driver to remove the thirteen screws.

  3. Insignia Flex 10.1 NS-P16AT10 Screen Replacement: шаг 3, изображение 1 из 2 Insignia Flex 10.1 NS-P16AT10 Screen Replacement: шаг 3, изображение 2 из 2
    • Use tweezers to remove the gray pieces located around the speakers and four screws that were removed in the previous step.

    • There should be six grey pieces total.

  4. Insignia Flex 10.1 NS-P16AT10 Screen Replacement: шаг 4, изображение 1 из 2 Insignia Flex 10.1 NS-P16AT10 Screen Replacement: шаг 4, изображение 2 из 2
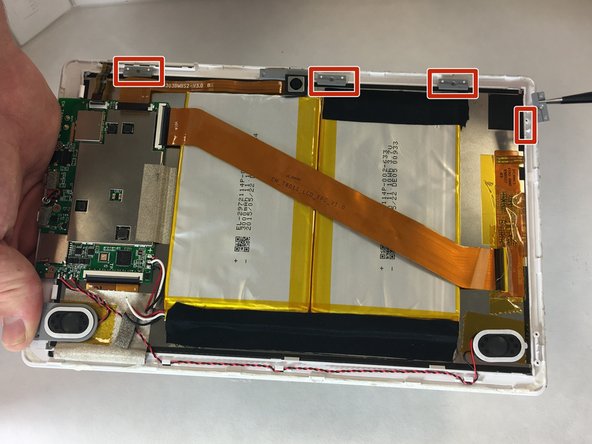
    • Use a plastic opening tool to flip up the ribbon cable connector that connects the camera to the motherboard.

  5. Insignia Flex 10.1 NS-P16AT10 Screen Replacement: шаг 5, изображение 1 из 1
    • Gently lift the camera lens up from the front case.

  6. Insignia Flex 10.1 NS-P16AT10 Screen Replacement: шаг 6, изображение 1 из 2 Insignia Flex 10.1 NS-P16AT10 Screen Replacement: шаг 6, изображение 2 из 2
    • Use a plastic opening tool to flip the ribbon connector up in order to free the ribbon cable from the motherboard.

  7. Insignia Flex 10.1 NS-P16AT10 Screen Replacement: шаг 7, изображение 1 из 2 Insignia Flex 10.1 NS-P16AT10 Screen Replacement: шаг 7, изображение 2 из 2
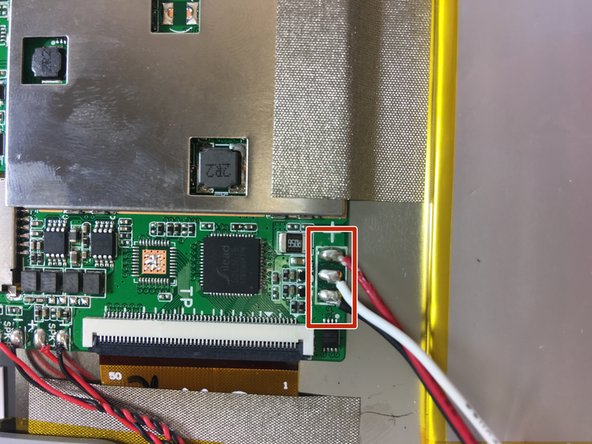
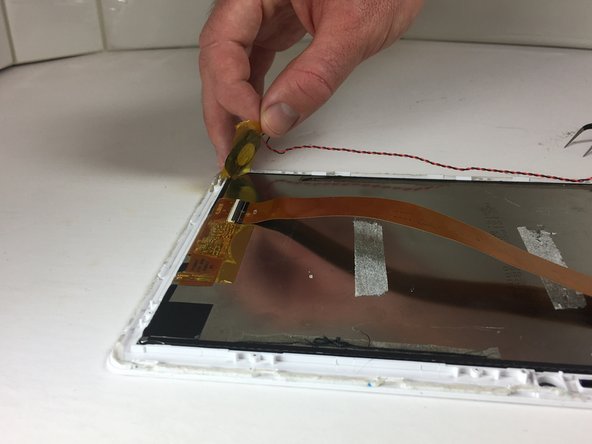
    • Free the battery from the motherboard by desoldering the red, white, and black connections one by one.

    • For soldering instructions, visit this guide.

    • Remove the soldering tip immediately once the wire has become free. Too much heat can damage the motherboard.

  8. Insignia Flex 10.1 NS-P16AT10 Screen Replacement: шаг 8, изображение 1 из 1
    • Peel the black tape up that is attached to the battery and front case.

  9. Insignia Flex 10.1 NS-P16AT10 Screen Replacement: шаг 9, изображение 1 из 3 Insignia Flex 10.1 NS-P16AT10 Screen Replacement: шаг 9, изображение 2 из 3 Insignia Flex 10.1 NS-P16AT10 Screen Replacement: шаг 9, изображение 3 из 3
    • Use a plastic opening tool or spudger to remove the battery from the front case.

    • Place the plastic opening tool between the battery and front case. Work the tool around the perimeter of the battery until the battery is free.

    • Do not bend or puncture the battery, or the battery will leak.

  10. Insignia Flex 10.1 NS-P16AT10 Screen Replacement: шаг 10, изображение 1 из 2 Insignia Flex 10.1 NS-P16AT10 Screen Replacement: шаг 10, изображение 2 из 2
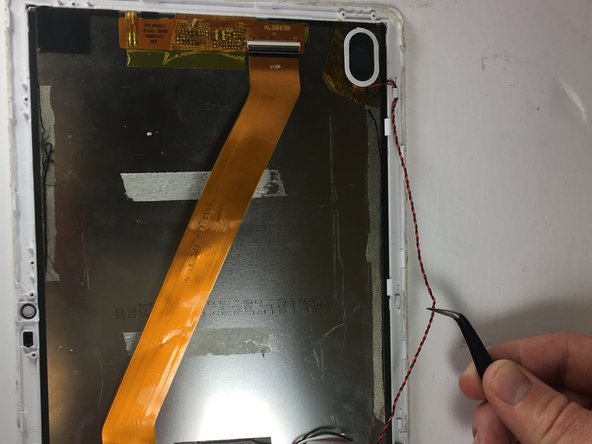
    • Use tweezers to free the twisted, red and black wire from the three clips on the front case.

  11. Insignia Flex 10.1 NS-P16AT10 Screen Replacement: шаг 11, изображение 1 из 3 Insignia Flex 10.1 NS-P16AT10 Screen Replacement: шаг 11, изображение 2 из 3 Insignia Flex 10.1 NS-P16AT10 Screen Replacement: шаг 11, изображение 3 из 3
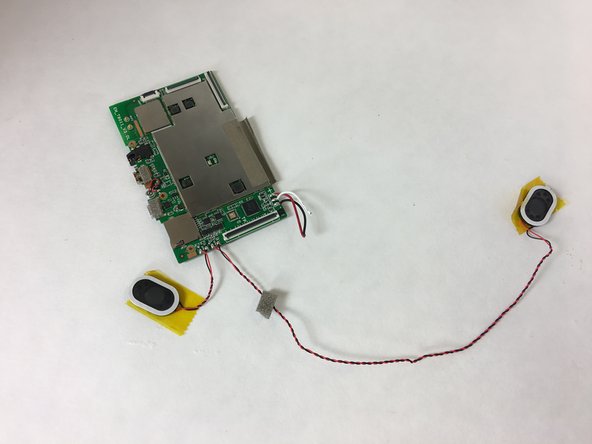
    • Remove the speakers from the tablet by gently pulling the yellow tape up from the front case.

  12. Insignia Flex 10.1 NS-P16AT10 Screen Replacement: шаг 12, изображение 1 из 2 Insignia Flex 10.1 NS-P16AT10 Screen Replacement: шаг 12, изображение 2 из 2
    • Use a plastic opening tool to flip up the ribbon cable connectors that connect the touch digitizer to the motherboard.

  13. Insignia Flex 10.1 NS-P16AT10 Screen Replacement: шаг 13, изображение 1 из 3 Insignia Flex 10.1 NS-P16AT10 Screen Replacement: шаг 13, изображение 2 из 3 Insignia Flex 10.1 NS-P16AT10 Screen Replacement: шаг 13, изображение 3 из 3
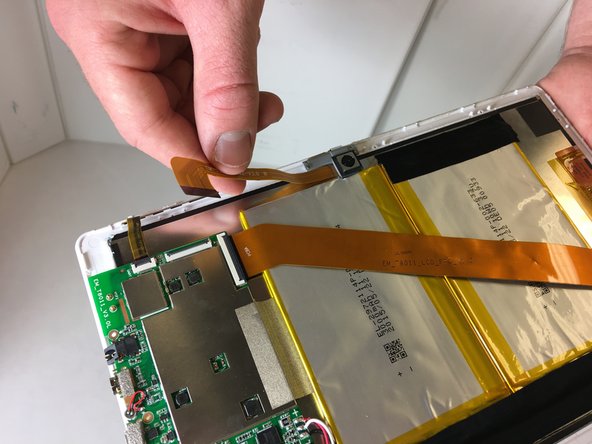
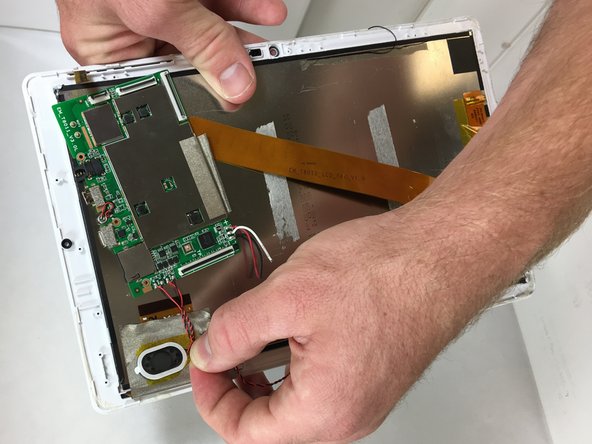
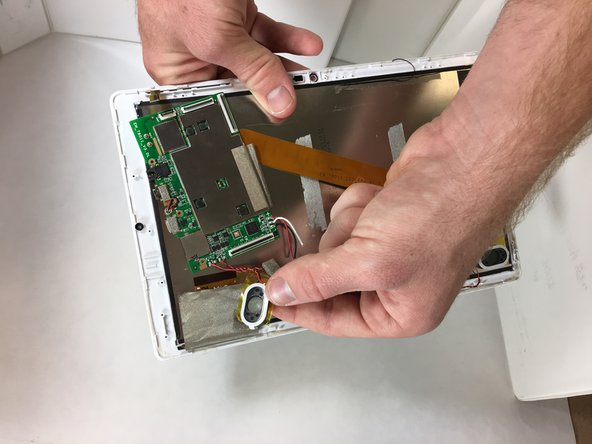
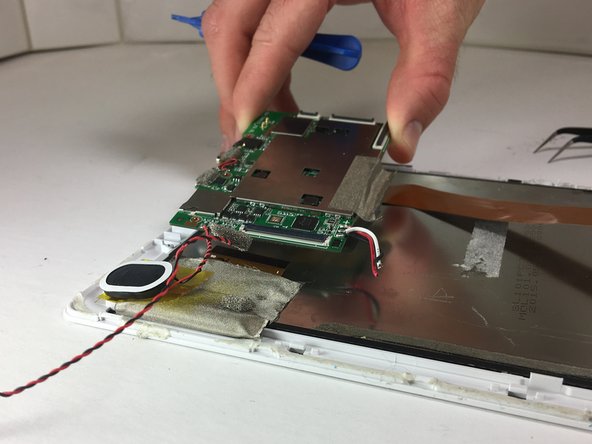
    • Gently lift the gray mesh tape up that holds the motherboard down to the front case.

    • Lift the motherboard up from the front case.

    • The speakers are directly connected to the motherboard and will come up with the motherboard.

  14. Insignia Flex 10.1 NS-P16AT10 Screen Replacement: шаг 14, изображение 1 из 1
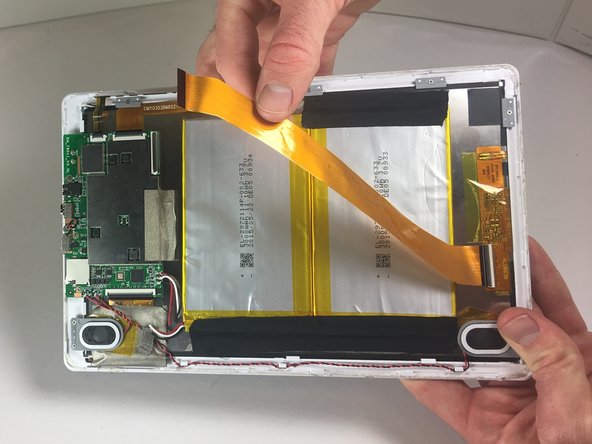
    • Peel away the grey mesh tape that holds down the touch digitizer's ribbon cable to the front case.

  15. Insignia Flex 10.1 NS-P16AT10 Screen Replacement: шаг 15, изображение 1 из 2 Insignia Flex 10.1 NS-P16AT10 Screen Replacement: шаг 15, изображение 2 из 2
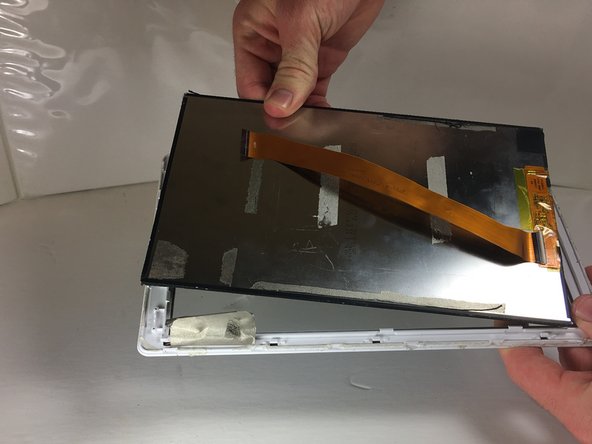
    • Use a plastic opening tool to separate the front case from the LCD screen.

    • Insert the plastic opening tool between the front case and rear LCD screen. Use a prying motion to lift the LCD screen from the front case.

  16. Insignia Flex 10.1 NS-P16AT10 Screen Replacement: шаг 16, изображение 1 из 2 Insignia Flex 10.1 NS-P16AT10 Screen Replacement: шаг 16, изображение 2 из 2
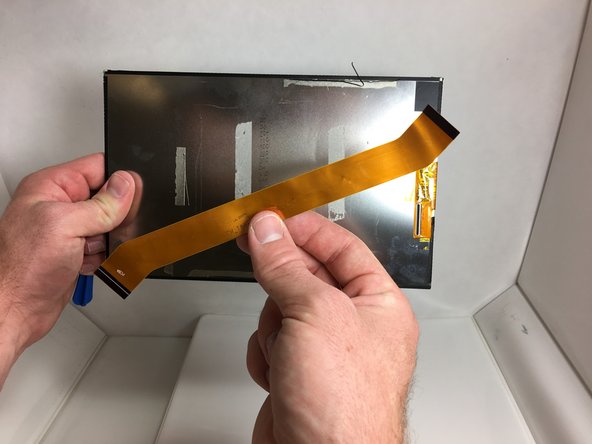
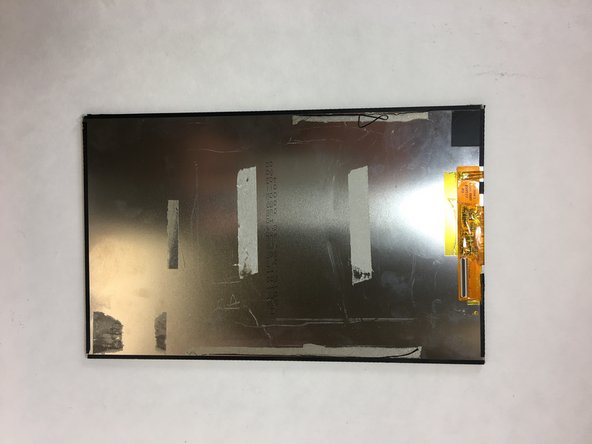
    • Use a plastic opening tool to flip up the last ribbon cable on the screen.

    • Free the ribbon cable from the LCD screen.

  17. Insignia Flex 10.1 NS-P16AT10 Screen Replacement: шаг 17, изображение 1 из 2 Insignia Flex 10.1 NS-P16AT10 Screen Replacement: шаг 17, изображение 2 из 2
    • The screen is now free and ready to be replaced.

Заключение

To reassemble your device, follow these instructions in reverse order.

Morgan Kidd

Участник с: 10/10/16

419 Репутация

Автор 3 руководств

Команда

Texas Tech, Team 12-3, Bennett Fall 2016 Участник Texas Tech, Team 12-3, Bennett Fall 2016

TTU-BENNETT-F16S12G3

3 членов

Автор 6 руководств

0 Комментариев

Добавить комментарий

Просмотр статистики:

За последние 24часов: 0

За последние 7 дней: 0

За последние 30 дней: 2

За всё время: 687