Введение
If your Kurio Xtreme is not charging or is not holding a charge, follow these steps to remove the faulty battery. Before proceeding, make sure that you have a soldering iron and know how to use it.
Выберете то, что вам нужно
-
-
Remove the rubber case by beginning to peel from one of the top corners and continue peeling until the cover is completely removed.
-
-
-
-
Insert the plastic opening tool in between the edges of the blue front casing and black back casing.
-
Slide the plastic opening tool around the perimeter of the device. This may require that you repeatedly run the opening tool up and down the edges of the device.
-
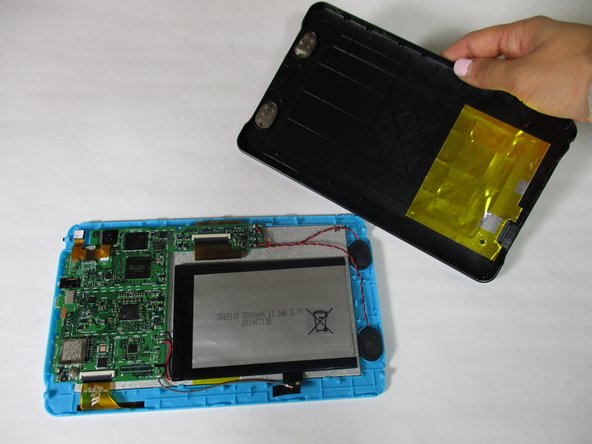
Carefully lift the back panel off of the rest of the device.
-
-
-
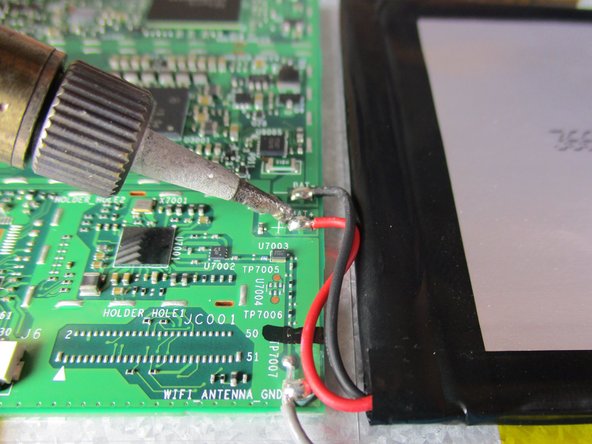
Disconnect the black and red wires from the motherboard by soldering the ends that are connected to the motherboard.
-
-
-
Slide iFixit's Plastic Card tool or a credit card under the battery to remove the glue that is holding it in place.
-
Carefully lift the battery out of the device.
-


To reassemble your device, follow these instructions in reverse order.
To reassemble your device, follow these instructions in reverse order.
Отменить: Я не выполнил это руководство.
2 участников успешно повторили данное руководство.
Команда

Baylor, Team 6-10, Williams Fall 2015 Участник Baylor, Team 6-10, Williams Fall 2015
BU-WILLIAMS-F15S6G10
3 членов
Автор 14 руководств
2 Комментариев
Does it have a certain battery or can a different battery fit?