Введение
If your LG Grace smartphone, model # LGL59BL, isn't charging, it's likely your charging port has gone bad. This is a common occurrence, so it's something to be on the look out for.
Consulting this guide will give you some guidance in diagnosing this issue, but ultimately it's an easy problem to pinpoint.
Please note that this guide requires the removal of the phone's battery, and while this is a trivial task with this particular model, if your battery is swollen and stuck then prying at is could potentially cause it to rupture and explode.
Please power off your device and take it to a repair professional or someone else trained in safely disposing of the malfunctioning battery. As a general rule of thumb, always turn off any device you are working on. All-in-all this is a relatively simple replacement but it does require a small amount of soldering knowledge. A replacement part is cheap here and if you have the time and tools it makes sense to replace this component.
Выберете то, что вам нужно
-
-
Find the indentation along the edge of the phone's back and pry open with your nail. A pry tool may help if you have short nails but shouldn't be necessary.
-
-
-
Pull the battery out of the back of the phone. A small indent is present to allow you to pry it out but you may also just flip the phone over and strike it gently against your palm.
-
-
-
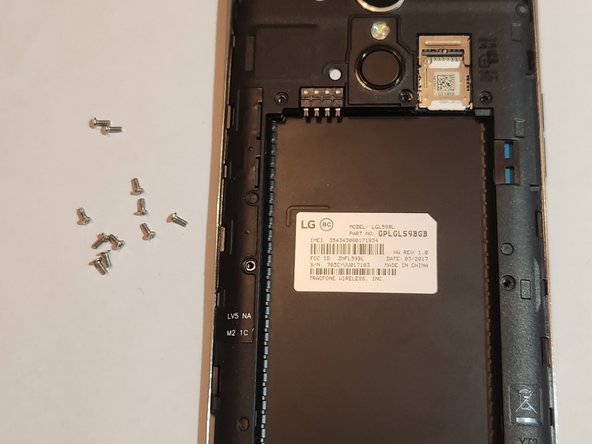
Unscrew all of the screws now visible on the back panel of the phone--11 in total. A #00 Phillips screwdriver works here.
-
The screws are M1.3 and 3 mm long.
-
-
-
-
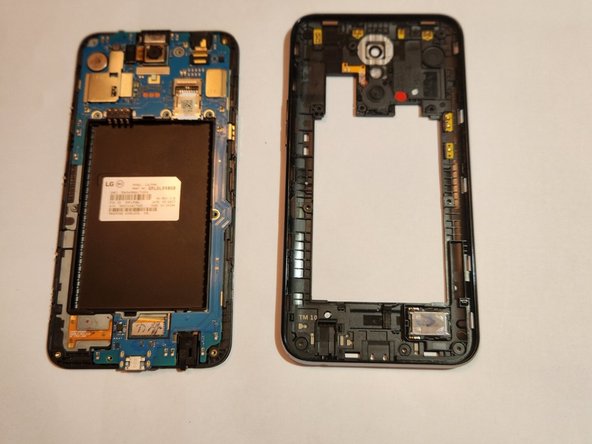
Insert the Jimmy into the small gap between the edge of the phone screen and body. Gently pry until it pops loose then remove jimmy and use your hands to slowly pry the body away from the screen
-
-
-
Locate the pin connection for the camera, noted by red box in the guide photo.
-
Gently lift the camera up while pulling away from connection; it should detach with minimal effort.
-
-
-
Next we remove the front speaker from the motherboard, with the goal of removing all connections that hold the board in place.
-
The location of the speaker is highlighted in the guide photo.
-
Just like with the camera, gently pull the ribbon wire away from the connector and it should release easily.
-
-
-
There is also a ribbon cable connected to the board by the charging port, as highlighted in the photo.
-
Pull it away in the same fashion as the others, and now the motherboard should be free.
-
-
-
From here, you should be able to gently pull the motherboard away from the screen assembly and remove it. I recommend grabbing the edge by the port and lifting with one hand while holding the phone down with the other.
-
-
-
With the Motherboard out, it's a quick fix to replace the charging port. Flip the board over to where the solder connection are available to work on.
-
The solder points that you should be working on are easy to identify as flat bits of solder on the back of the board, but they are highlighted in the photo.
-
Heat all the solder joints until the melt and then quickly pull the component off of the board. I recommend fully cleaning the solder joints and applying fresh solder when your replace the component.
-


To reassemble your device, follow these instructions in reverse order.
To reassemble your device, follow these instructions in reverse order.

Команда

University of New Orleans, Team 4-3, McDonald Fall 2023 Участник University of New Orleans, Team 4-3, McDonald Fall 2023
UNO-MCDONALD-F23S4G3
3 членов
Автор 6 руководств