Введение
This Short Guide will show you the steps to replace this Models Battery (BTY-M6J)
Выберете то, что вам нужно
-
-
Start by the removal of the screws on the base of the Laptop, this will require you to break the warranty seal. If your device still retains warranty in Dragon Centre or separately, MSI support should be addressed first. There is a total of 12 screws on the panel to remove.
 Спросите у FixBot
-
-
-
To Ensure the right part has been ordered make sure the battery reflects the exact sizing on top of the current battery, also checking the cable connector to see they are identical is a good step to make before any changes are made. The battery model should be BTY-M6J on the Label.
-
-
-
Инструмент, используемый на этом этапе:Tweezers$4.99
-
Ensure correct care is taken to remove the clip fastened to the board. To Remove this i would advise shimmying the cable left and right and applying gentle pressure with a small plastic tool (tweezers or a sturdy toothpick) to fully push it out. Take extra care to not score the board if you are to use these tools.
-
To Remove the battery, make use of a non sharp prying Metallic tool, or a guitar pick to move the battery out of place. The Main Adhesive connection is at the centre of the board and not the connector side. Do not use force on the battery or cause it to bend as the cells may be damaged and cause a hazard risk. The Battery will then easily remove.
-
-
-
The original battery has rubber stand offs on the front facing side of the cells for it to be seated properly. This is not necessary but re-applying them to the new battery to ensure it does not move is a good assurance it will seat well. Do not use heat on the old battery or force to remove these, instead gently shimmy them off the cells.
-
For placing in the new battery , it will sit in the slot where the old battery was removed. It does not require any screws or additional adhesive. You may choose to apply new adhesive backing to where there was originally in the centre of the board. Re-attach the wire connector gently to ensure no damage is made to the socket or cable connector.
-
-
-
If when powering on the system, the battery is recognised but will not charge, its likely the BIOS needs to recognise the part change made.
-
To do this you will need to remove the CMOS button battery located in the centre of the board around the processor. It should be connected by a cable and will have a Yellow film placed over the top of it, and is 1cm wide.
-
Additionally if the system boots and this has not created the desired effect, you should look to press the reset button on the board next to the charging port/ power indication light. Using a pin will press this button if the case is re-attached, if it is not it should look like the image shown.
-
Please note in the image shown, the CMOS and Reset button are not this close together on the Model this guide is for, but demonstrates the look of both components when the shell is removed.
-
-
-
To get the best performance and statistics toward the capacity of this battery on your system, you should make the use of the built in dragon center to ensure the battery is properly calibrated.
-
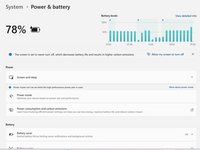
Furthermore, making sure the battery is recognised by windows be sure to check the power & battery section in windows settings.
-


To reassemble your device, follow these instructions in reverse order.
Отменить: Я не выполнил это руководство.
4 человек успешно провели ремонт по этому руководству.
3 Комментарии к руководству
thanks for the guide sir
Q. How long does the new battery need to have it's first charge?
I used this guide for a different MSI model and battery. I didn't have to do step 5 but everything else seemed relevant. Thanks!