Перейти к основному содержанию

Mac Mini Mid 2011 Hard Drive Replacement

Абсолютно необходимое руководство
Это руководство предназначено только для использования в качестве обязательного условия для других руководств. Оно не полностью само по себе.
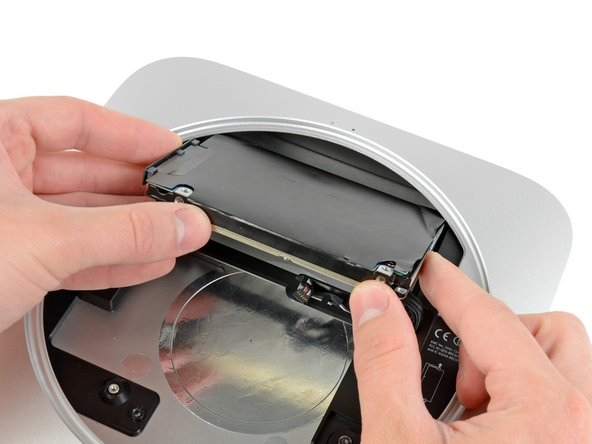
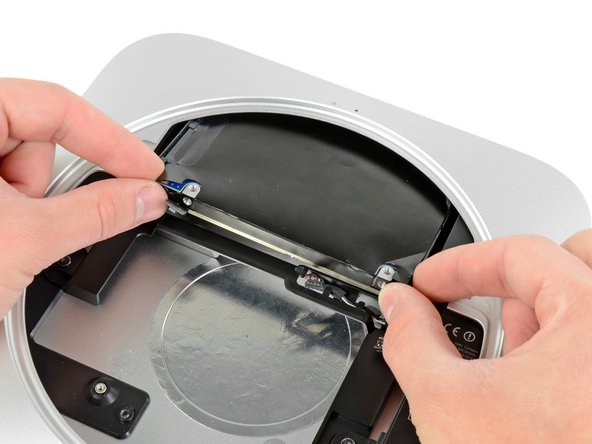
  1. Mac Mini Mid 2011 Hard Drive Replacement, Hard Drive: шаг 1, изображение 1 из 2 Mac Mini Mid 2011 Hard Drive Replacement, Hard Drive: шаг 1, изображение 2 из 2
    • Pull the hard drive away from the front edge of the mini and remove it from the outer case.

    • During reassembly, there are two pins on the inside edge of the hard drive that fit into the case. The holes have rubber grommets around them, so it may be difficult to tell when you have seated the hard drive correctly.

    • There are two pairs of holes in the case. Insert the pins into the holes closest to the bottom of the case.

Заключение

To reassemble your device, follow these instructions in reverse order.
0 Комментариев

Добавить комментарий

Просмотр статистики:

За последние 24часов: 0

За последние 7 дней: 0

За последние 30 дней: 0

За всё время: 1,024