Введение
Use this guide to replace the fan.
Don't forget to follow our thermal paste application guide before you reinstall your heat sink.
Выберете то, что вам нужно
-
Инструмент, используемый на этом этапе:Magnetic Project Mat$19.95
-
Remove the following ten screws securing the lower case to the upper case:
-
Two 2.3 mm P5 Pentalobe screws
-
Eight 3.0 mm P5 Pentalobe screws
-
-
-
Wedge your fingers between the upper case and the lower case.
-
Gently pull the lower case away from the upper case to remove it.
-
-
-
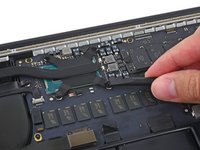
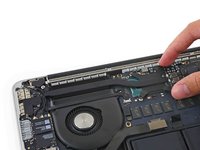
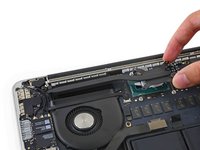
Use the flat end of a spudger to lift the battery connector straight up out of its socket on the logic board.
-
-
-
-
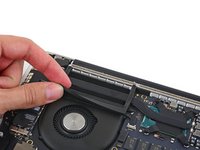
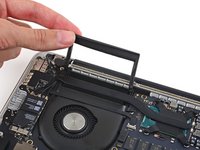
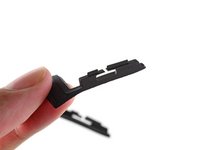
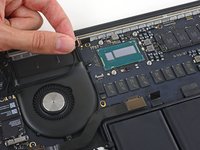
Carefully remove the rubber fan bumper from the edge of the heat sink.
-
-
-
Use the flat end of a spudger to peel the four foam stickers off of the heat sink screws.
-
-
-
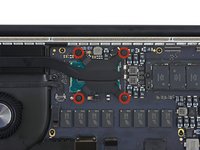
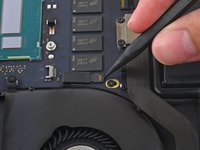
Remove the following screws securing the heat sink to the logic board:
-
Four 2.6 mm T5 screws
-
One 2.4 mm Phillips #000 screw
-
-
-
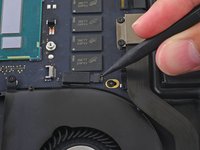
Use the tip of a spudger to push on either side of the the iSight camera cable connector to walk it out of its socket on the logic board.
-
-
-
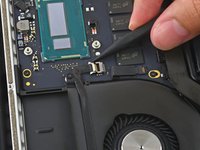
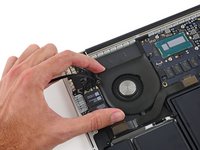
Use the tip of a spudger to flip the tab on the fan's ZIF connector.
-
Carefully pull the fan cable straight out of its socket.
-
-
-
Remove the following screws securing the fan to the upper case:
-
One 5.0 mm T5 Torx screw
-
Two 3.6 mm T5 Torx screws
-
-
-
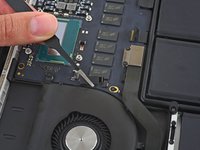
Lift the end of the fan closest to the display hinge and remove the fan from the upper case.
-


To reassemble your device, follow these instructions in reverse order.
To reassemble your device, follow these instructions in reverse order.
Отменить: Я не выполнил это руководство.
44 человек успешно провели ремонт по этому руководству.


4 Комментариев
in step#9, Phillips # 000 screwdriver did not fit in replacing fan?
When putting it all back together:
Step 15
Make sure to put the end furthest away from the hinge under the ribbon cable first.
Then place the hinge side. The screw furthest away from the hinge is partially obscured by the ribbon cable.
Step 14 (Part 1)
Start the screws enough to hold the fan in place but don’t tighten them until after step 13.
Step 13
Since the screws are not tight from step 14, putting the fan cable back into the ZIF connector is easier.
Step 14 (Part 2)
Tighten the screws after step 13
Step 12
Continue doing the steps backwards as normal.
Should the fan on this machine be on all the time, or only when needed?