Введение
Upgrade your hard drive for more storage space!
Выберете то, что вам нужно
-
-
Remove the following ten screws securing the lower case to the upper case:
-
Three 13.5 mm (14.1 mm) Phillips screws.
-
Seven 3 mm Phillips screws.
-
-
-
Using both hands, lift the lower case near the vent to pop it off two clips securing it to the upper case.
-
Remove the lower case and set it aside.
-
-
-
Remove the two 7.4 mm Tri-point screws securing the battery to the upper case.
-
Note: For certain repairs (e.g. hard drive), removing the battery is not necessary but it prevents any accidental shorting of electronics on the motherboard. If you do not remove the battery, please be careful as parts of the motherboard might be electrified.
-
-
-
Use the tip of your finger to carefully peel back the corner of the warning label to reveal a hidden Tri-point screw.
-
Remove the last 7.4 mm Tri-point screw securing the battery to the upper case.
-
-
-
-
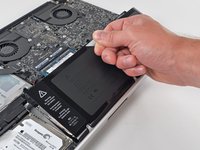
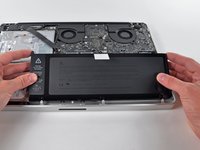
Lift the battery by its plastic pull tab and slide it away from the long edge of the upper case.
-
-
-
Tilt the battery away from the logic board enough to access the battery cable connector.
-
Pull the battery cable connector away from its socket on the logic board and remove the battery from the upper case.
-
Charge it to 100%, and then keep charging it for at least 2 more hours. Next, unplug and use it normally to drain the battery. When you see the low battery warning, save your work, and keep your laptop on until it goes to sleep due to low battery. Wait at least 5 hours, then charge your laptop uninterrupted to 100%.
-
If you notice any unusual behavior or problems after installing your new battery, you may need to reset your MacBook's SMC.
-
-
-
Remove two Phillips screws securing the hard drive bracket to the upper case.
-
-
-
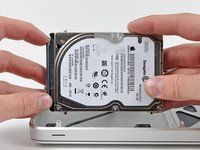
Lift the hard drive by its pull tab and pull it out of the chassis, minding the cable attaching it to the computer.
-
-
-
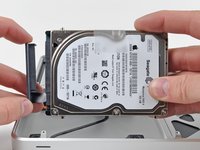
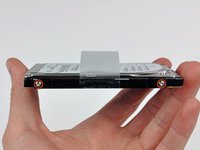
Remove the hard drive cable by pulling its connector straight away from the hard drive.
-
-
-
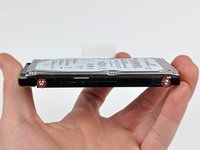
Remove two T6 Torx screws from each side of the hard drive (four screws total).
-
If desired, peel the pull tab off your old hard drive and transfer it to the side of your new drive.
-


To reassemble your device, follow these instructions in reverse order.
To reassemble your device, follow these instructions in reverse order.
Отменить: Я не выполнил это руководство.
382 человек успешно провели ремонт по этому руководству.

22 Комментариев
I went all over the place trying to find that stupid 7.4 mm Tri-Wing bit or driver to remove the battery per your instructions then I took a harder look and realized there was no need for all that SMFH!
We have you remove the battery because as long as it is connected, certain components on the logic board are electrified. If you accidentally drop something metallic on the board or touch the wrong part with a screwdriver, you could fry the board be out another $700+.
I bought the 1TB and the tool kit. Got it today. The step by step directions made it a piece of cake. Afterwards I booted up my MacBook Pro off of my system software cd. The new hard drive didn't show up so I called iFixit and talked to Scott. He told me how to format my drive and had me up and running in about 2 minutes. You guys are awesome! My computer works great and I went from a maxed out 500 GB hard drive to a full 1 TB Hybrid hard drive. Thanks for the new lease on life.
So, SSD´s can replace an the original HDD without any sort of fitting?