Введение
This guide will help you replace the battery.
Выберете то, что вам нужно
Видеообзор
-
-
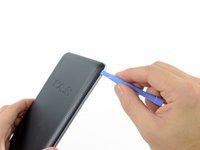
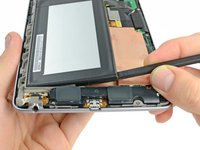
Gently insert a plastic opening tool near the top of the Nexus 7 between the rear panel and the front panel assembly.
-
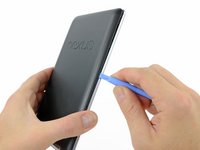
Carefully run the plastic opening tool along the top edge to pry the rear panel away from the front panel assembly of the Nexus 7.
-
-
-
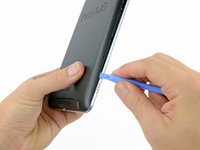
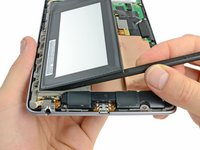
Insert the plastic opening tool between the rear panel and the front panel assembly near the power button and pry up at several points along the right edge of the Nexus 7.
-
-
-
-
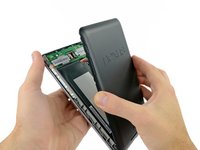
Pry up the rear panel along the left edge using the method described in previous steps.
-
-
-
Using the tip of a spudger, push first on one side then the other to "walk" the battery cable straight out of its socket on the motherboard.
-
-
-
Wedge the flat end of a spudger inbetween the battery and the front panel assembly.
-
Run the flat end of a spudger along the top edge of the battery to separate it from the adhesive securing it to the front panel assembly.
-
-
-
Wedge the flat end of a spudger between the bottom right corner of the battery and the front panel assembly.
-
Carefully run the spudger along the bottom edge of the battery while slowly lifting the battery to completely separate it from the adhesive securing it to the front panel assembly.
-
-
-
Grasp the lower right corner of the battery and rotate it upwards to remove it from the front panel assembly.
-


To reassemble your device, follow these instructions in reverse order.
Отменить: Я не выполнил это руководство.
187 человек успешно провели ремонт по этому руководству.

24 Комментарии к руководству
Will you guys be making the Nexus 7 battery available through your site?
My battery says me3 puj1. Will this kit work to replace that battery?
Thank you so much for this! I had dropped my nexus from about 2 feet onto a carpet and knocked the battery cable loose ( a know problem) but your set by step directions encouraged me to fix it myself instead of sending the whole thing back to Google.
is it possible to add qi charging by replacing the stock battery with a different one? if so, which battery?