Введение
If your blender seems to have no power, the power cord may be damaged. This guide will show you how to disassemble and show you two possible problems and how to solve them. For soldering help, follow the How to Solder and Desolder Connections guide.
Выберете то, что вам нужно
-
-
Remove the five screws (13mm long, 6mm head) attaching the Base Cover using a Phillips screwdriver (Ph2).
-
Remove the two screws (13 mm long, 6mm head) attaching the Base Cover using a T10 screwdriver.
-
-
-
Carefully remove the second layer from the base. You will not need a screwdriver for this step.
-
-
-
-
Remove the 2 screws (13mm, 6mm head) connected to the plastic piece holding down the power cord.
-
Then remove the additional 4 screws (13mm, 6mm head) and 2 screws (11mm, 5mm head) securing the base.
-
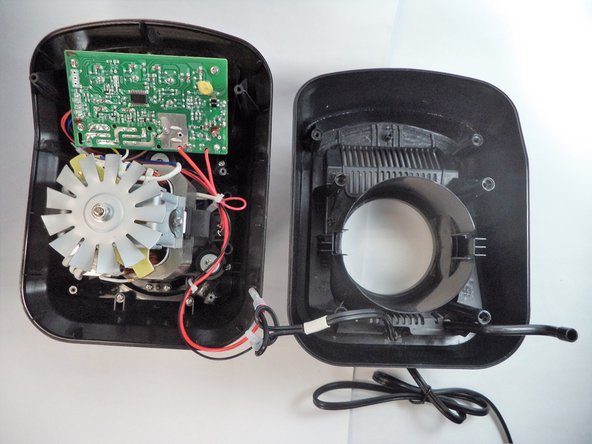
Carefully lift the base up from the rest of the blender.
-
-
-
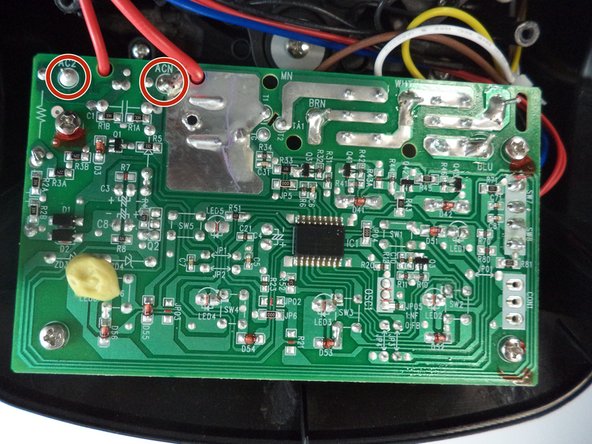
Check that the two red wires shown in the photos are properly soldered to the circuit board.
-
If they seem damaged, resolder the wires to the board.
-
If this doesn't solve the issue, proceed to step 6.
-
-
-
If the 2 wires in the previous step are connected, it's time to check the 2nd area.
-
Remove the plastic covers and check that the wires are soldered correctly.
-
To reassemble your device, follow these instructions in reverse order.
To reassemble your device, follow these instructions in reverse order.
Отменить: Я не выполнил это руководство.
Еще один человек закончил это руководство.


